January 9th, 2015
I’m just too damn excited not to post about this make today. I finished it today and seriously I can not believe I’ve done it, I really can’t! This is going to be long………
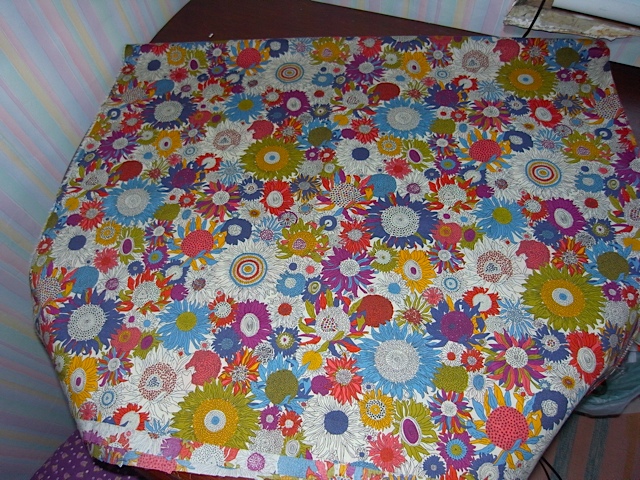
My friend Lucy gave me this for Christmas
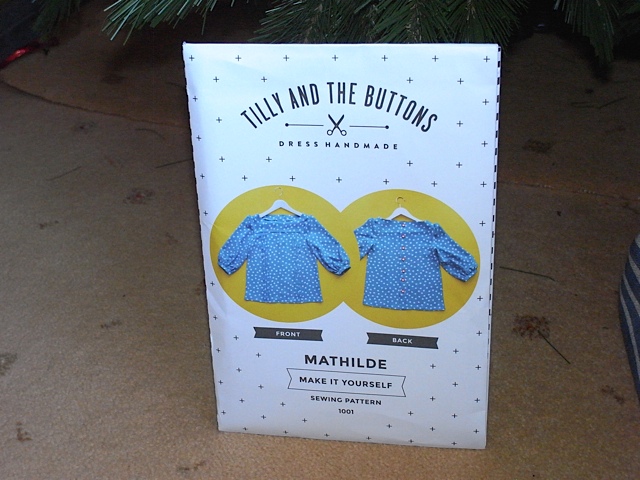
Yep, its a pattern. But I have an irrational fear of patterns don’t I? Why, yes I do! But something about this pattern was calling to me. I’ve loved this top ever since I saw Tilly make it, on “The Great British Sewing Bee”in 2013. It was my dream top. And I hadn’t even started sewing then. I got very excited when I saw you could actually buy the pattern from TillyandtheButtons web site, and then got disappointed when it was only a digital pattern, don’t have a printer. I then learnt how to sew, bought a pattern and didn’t like it. Didn’t understand it, couldn’t work it out, so I left it alone and stuck to drafting my own tops from two rectangle pieces of fabric( as you will be aware of by now, if you’ve been following this blog).
After making my OWN tops for over a year I started to get a little bored of the same shape. Although there were always slight variations on it and different fabrics meant a different outcome, but still I was feeling ready for a new challenge. I got very excited when I saw Tilly had started producing paper patterns, but when they first came out I still wasn’t ready. Back in November I went to London with Lucy and was going to buy the Mathilde pattern in Liberty, but they had sold out. So I was very happy that Lucy bought me one for Christmas.
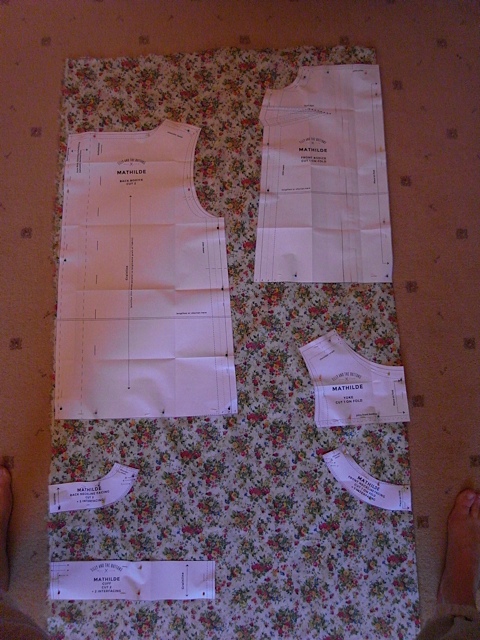
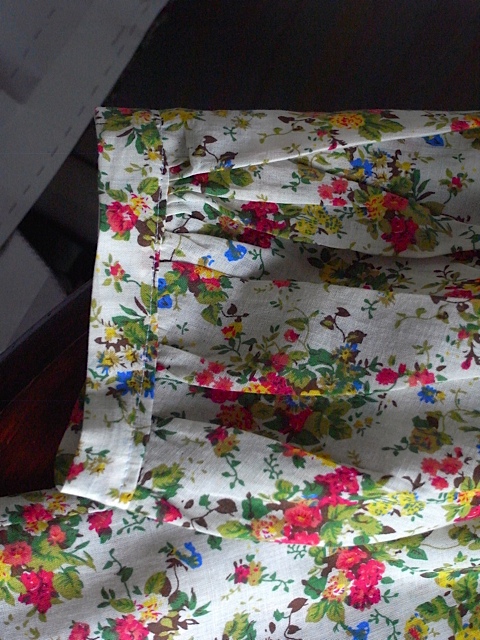
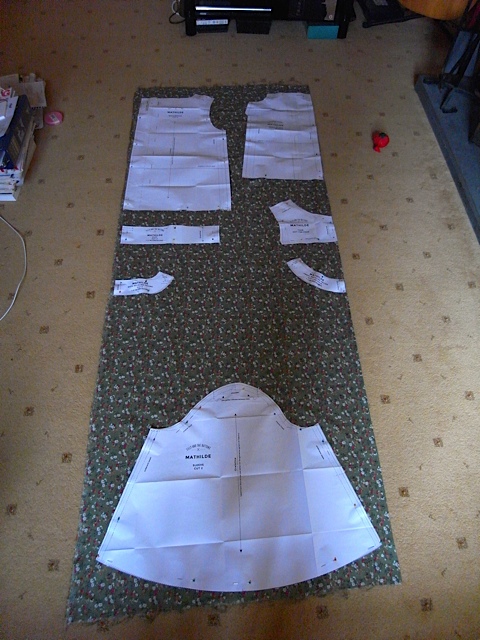
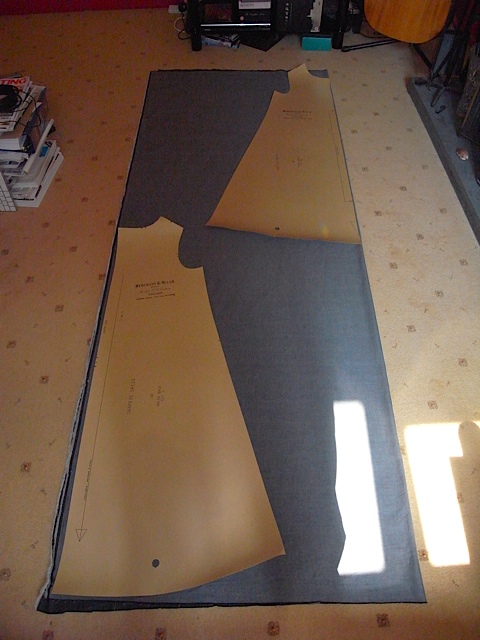
Then I looked at it! Read some of the instructions and got scared again. I decided the best way to tackle it was one step at a time, don’t look ahead, stay focused. I bought some fabric, (not the Liberty fabric I was going to order at £22 a metre) but some a little cheaper. Brought it home, put it straight into the washing machine. Next day I ironed it, then marked out the pattern for the size I wanted and cut it out, laid it out on the fabric and cut that out.
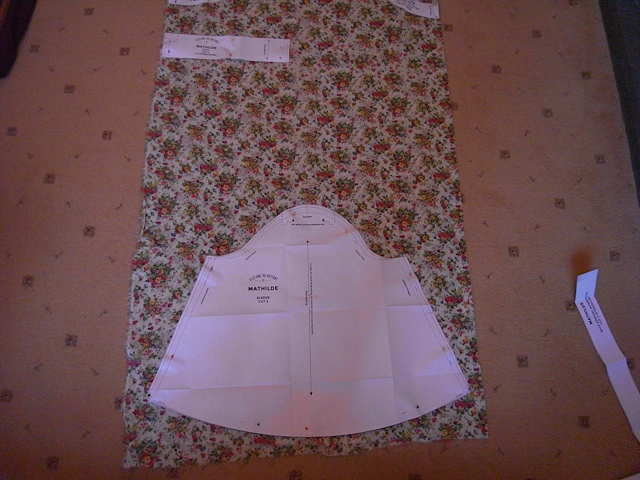
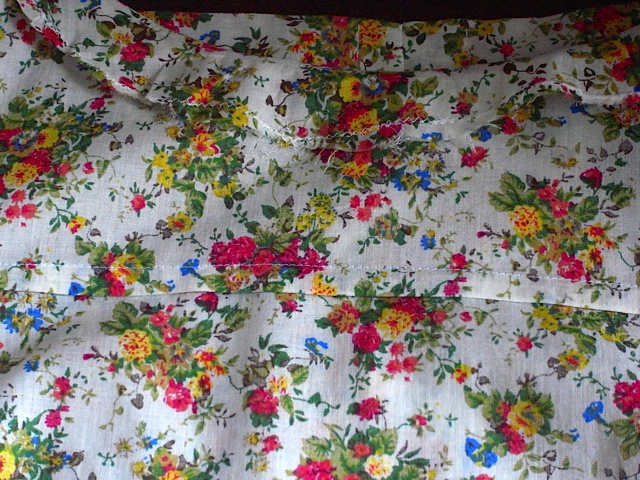
Can’t get over how much fabric the sleeves take up!
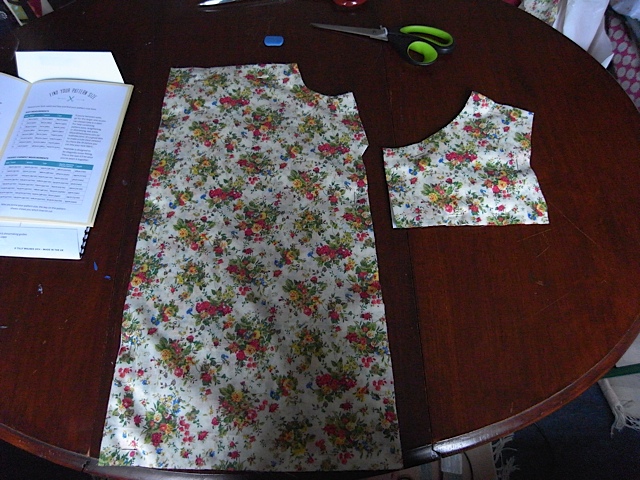
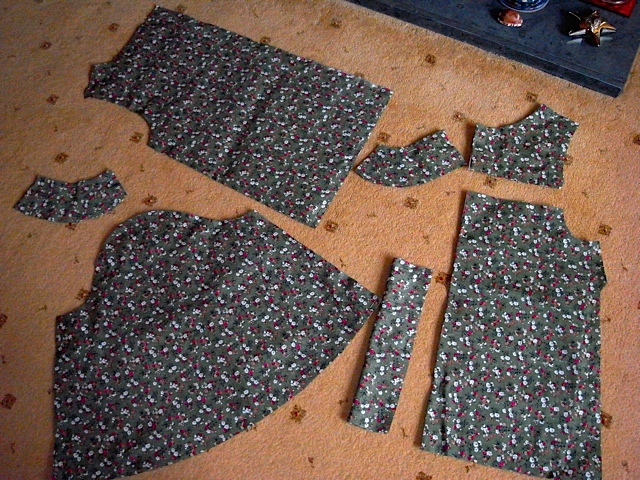
Some of the pieces
This took me about 3 hours to do, and by the time I finished my back was killing me so I took a break till the next day.
The next day was a first for me, I sewed darts and french seams.
French seam, attaching yoke to bodice.
Beautiful dart!
After sewing the bodice to the yoke and attaching the back to the front at the sides and shoulders I again called it a day. See I’m taking it slow ( I usually like to start and finish in one day), this had taken about 3 hours again.
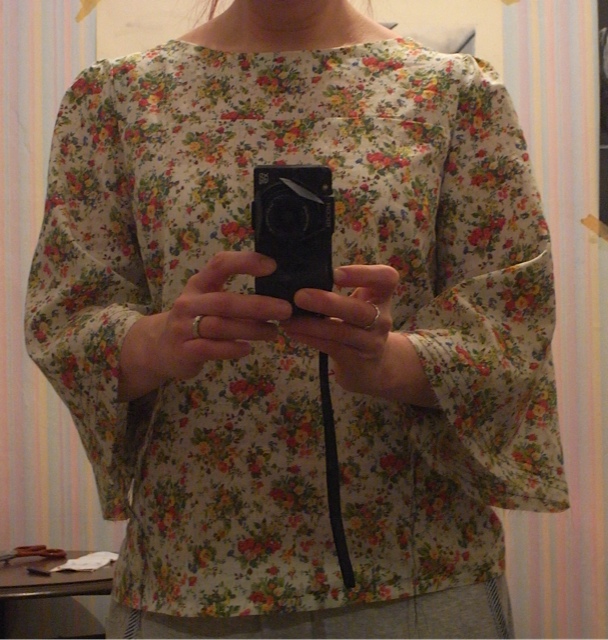
Here it is so far….. I’m very bloody happy with myself!
Next was about facings for the neck line and inserting sleeves! GULP!! I have done facings for a neck line before but it was a long time ago and I have since found a way round having to do this( although I’m learning its actually quite nice to do these things). I didn’t line the facings with interfacing, as I don’t have any and didn’t really think it necessary. My finishing of the facing isn’t perfect and would probably have been better with interfacing, but hey ho! It still worked, and I’m still really pleased with it.
This also shows the neck line facing!
I put a little stitch in at the front to help hold it down. Otherwise it wants to roll back out!
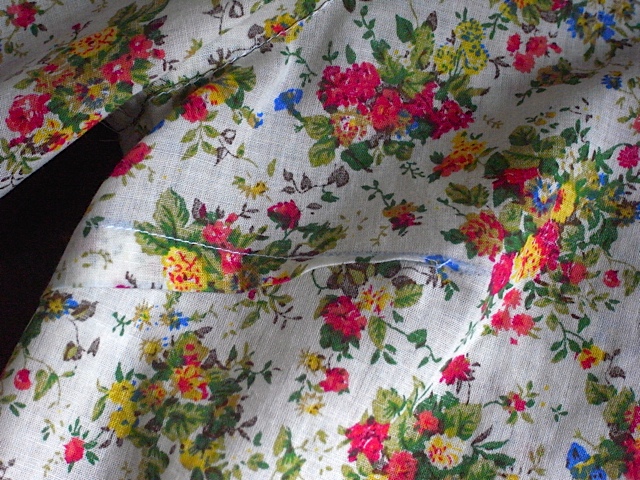
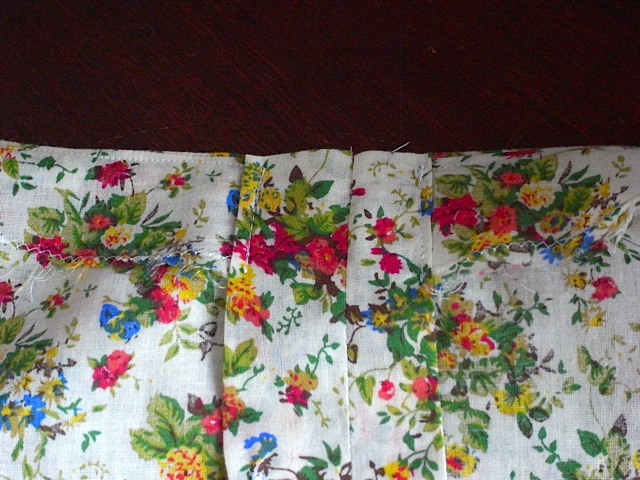
Now inserting sleeves was a bit of a head fuck! After sewing the 3 lines of gather stitches at shoulders and bottom of sleeves, you then have to insert the sleeve. This takes a bit of reading of the instructions and I found the web site more useful than the instruction booklet. Once I got my head round it and understood what I was meant to do, it wasn’t too difficult.
showing the shoulder seam and sleeve attachment, sort of!
Sleeves without the cuffs. You can just about see the 3 rows of gather stitching on the bottom of the sleeves. Wish i’d taken better pictures of these.
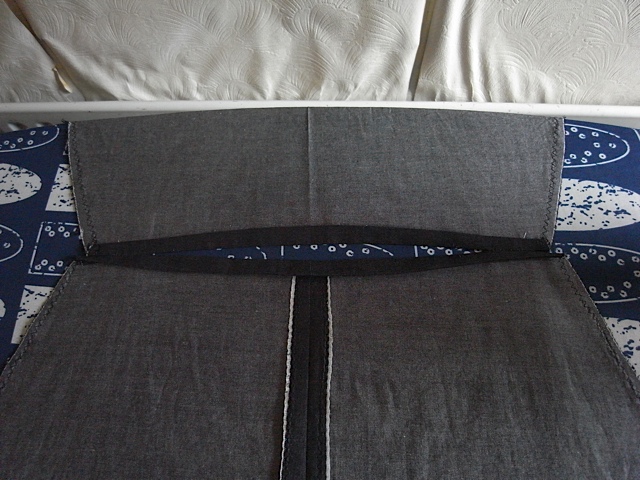
I forgot to mention that I left off the beautiful tucks that are on the front of the Mathilde blouse and also the button fastening for the back. I just sewed a centre seam down the middle of the back
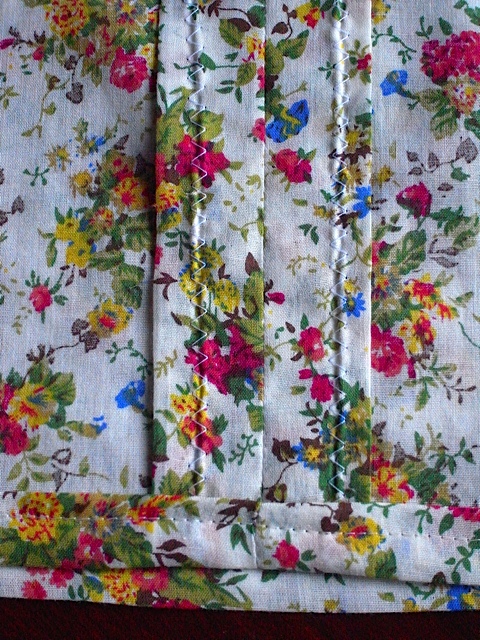
Bottom of back centre seam.
top of back centre seam.
I also hemmed it this day too. This all took me about 6 hours. So again I called it a day, although the temptation to just get it finished was strong, I resisted! And I’m flipping glad I did, as doing the cuffs was more complicated than I had anticipated.
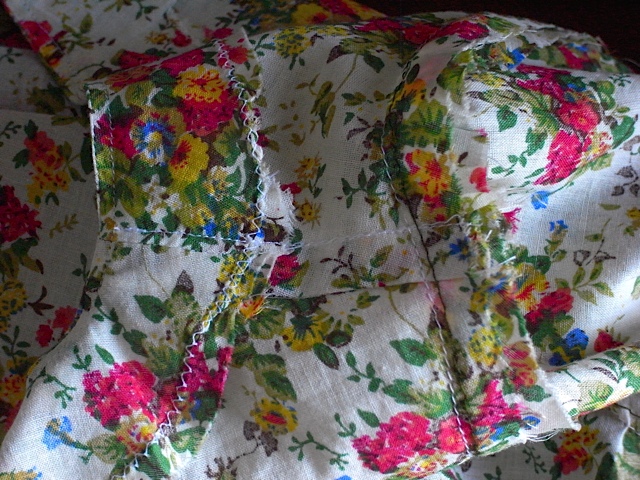
Yep doing the cuffs took me way longer than I thought it would and was quite fiddly, but happily I completed them. Took about 2 hours!
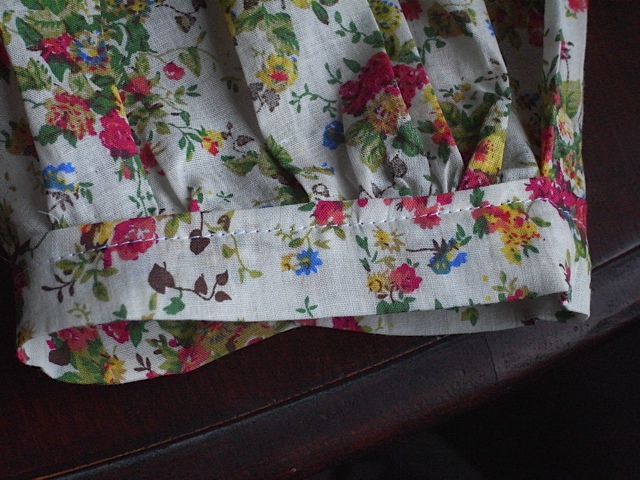
one cuff
other cuff.
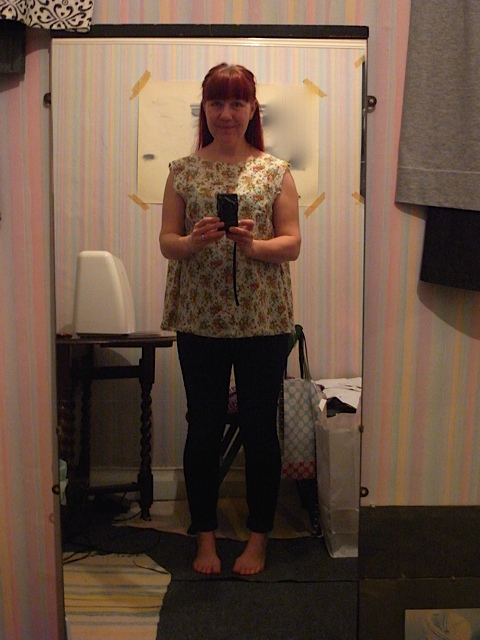
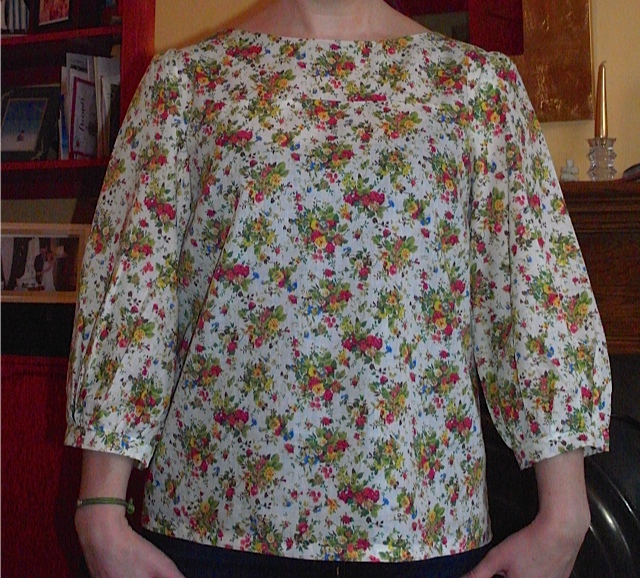
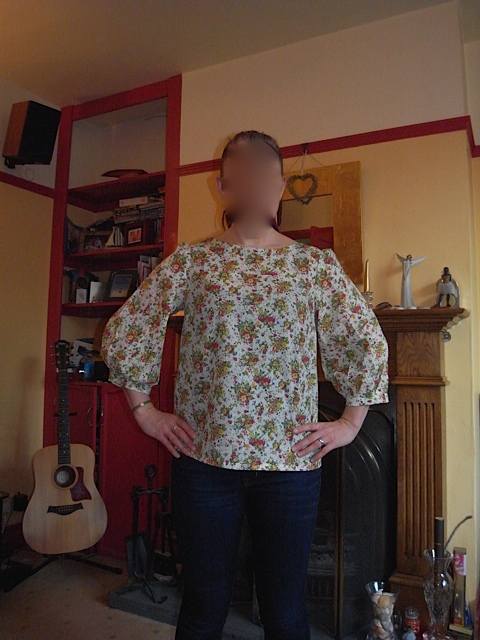
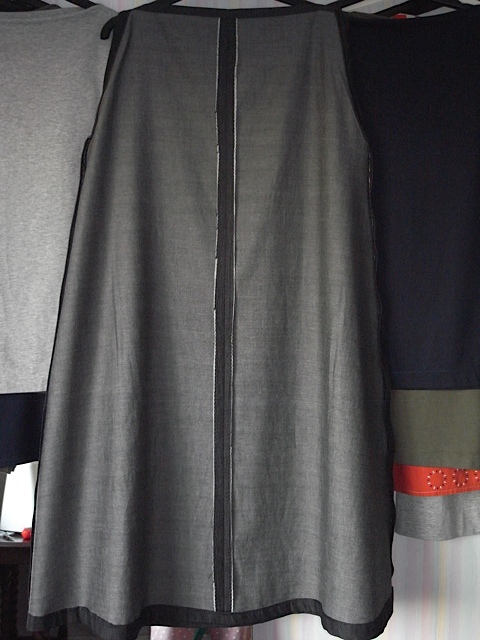
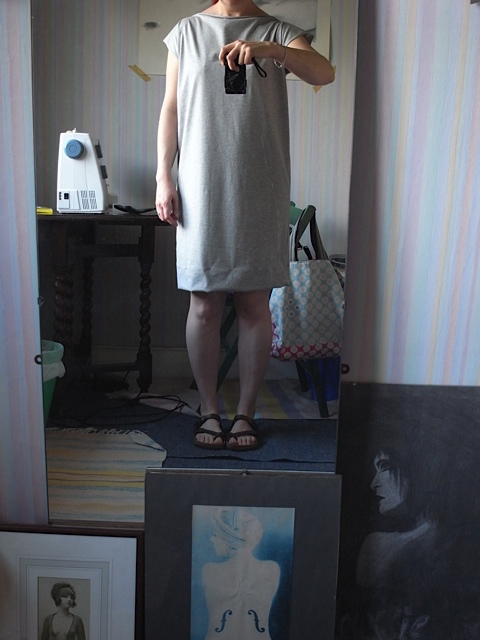
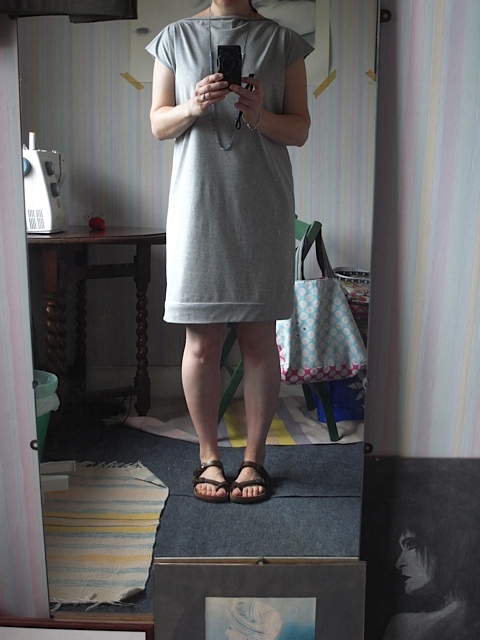
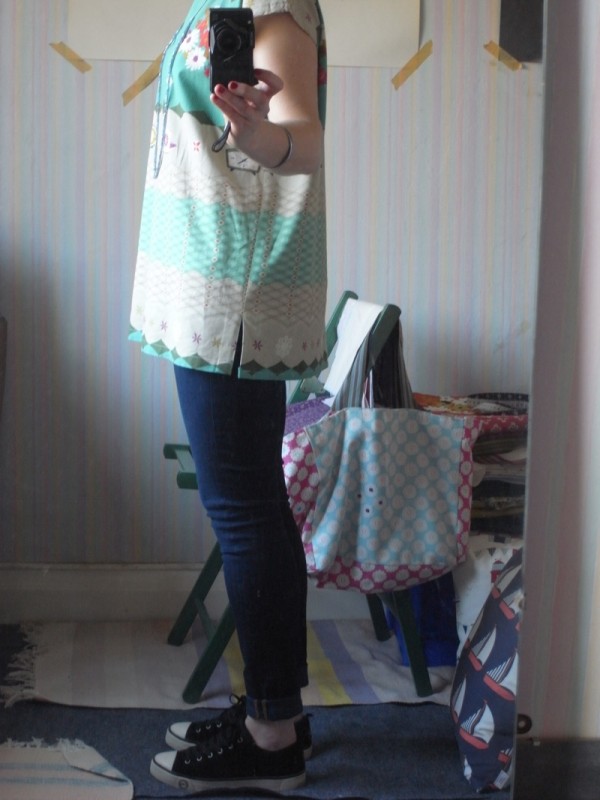
Finished!!! YAY!!!!
Cut head off as looked awful, and i am that vain!
How gorgeous is this? Top that is, not me!
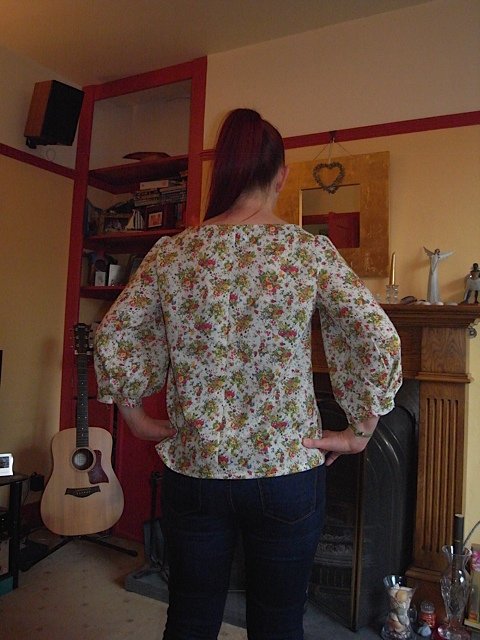
I can’t tell you how happy I am that I’ve finally tackled a pattern. And inserted sleeves. I never in a million years thought I’d have the courage to do this without attending a class. I didn’t think it was possible, but it is. I’ve obviously taught myself enough that working out what to do, wasn’t too much of a problem. I’m extremely happy with the results and its currently hanging up in my living room so I can look at it and admire it! I am slapping myself on the back big time people! Yes I am!
I have started on my next one already too……..
The beauty of this paper pattern is, the paper used is sturdy enough to use again and again! So here’s to many more Mathilde tops in many different fabrics……..
January 5th, 2015
I thought I’d done a post about this fabric, but it would appear that I didn’t. I shall make up for it now.
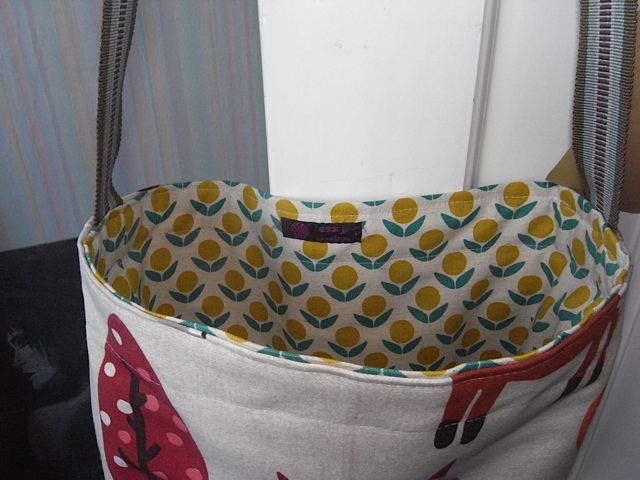
Back in February my very lovely friend Amanda bought me this fabric
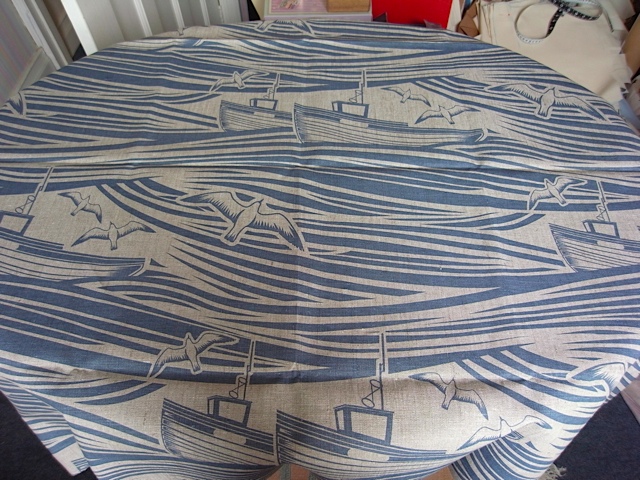
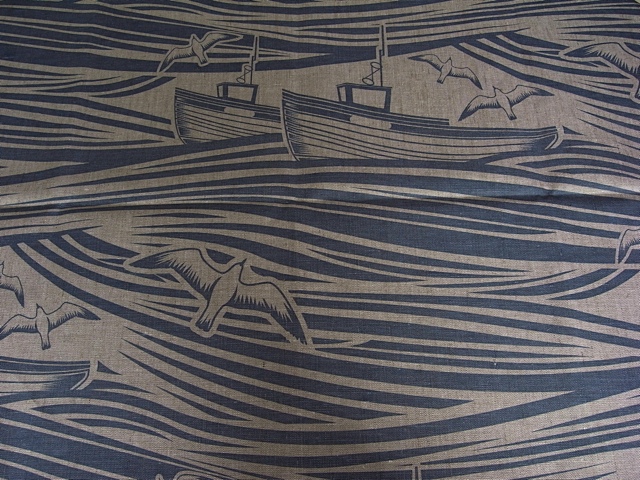
I just love the details.
I planned to make a bag with it, but didn’t want to rush into it. At £55 a metre it was probably the most expensive fabric I’d got. I wanted to think about it and try to make the most of the gorgeous pattern. 7 months later and i was finally ready to take my scissors to it. Always quite scary cutting into good quality, expensive fabric.
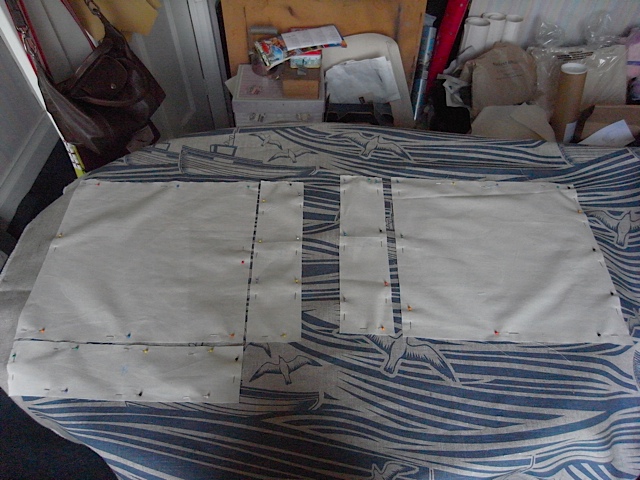
Working out where i want my pattern to be.
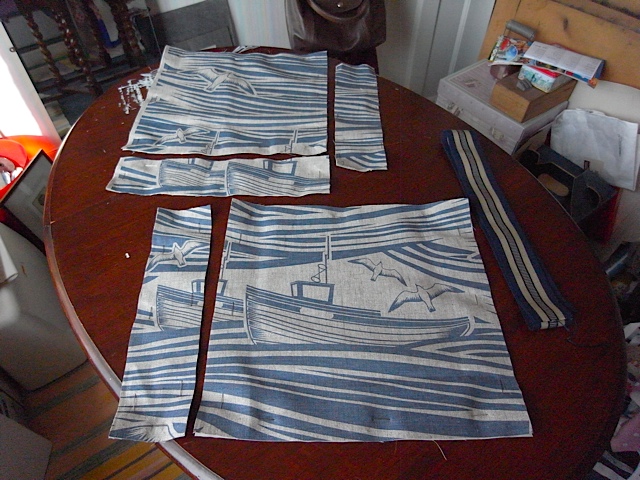
The pieces cut out. This was the way I’d intended the pieces to be. I wanted the pattern to line up the best it could…….
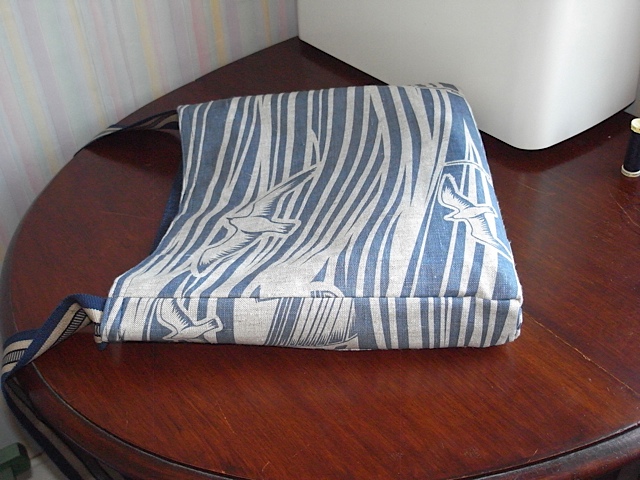
I used my usual messenger bag template but I altered the dimensions a bit. I made the height shorter and the length wider and also made it width deeper. Which meant a wider strap. I backed the fabric with calico, just to make it a bit sturdier, and I lined it in denim.
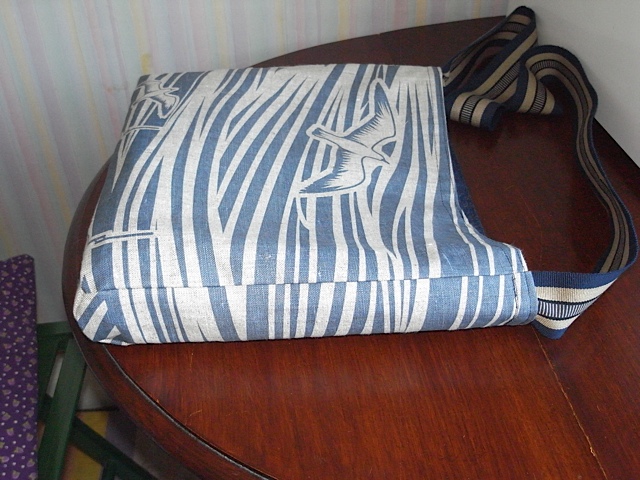
My pattern layout didn’t quite work out, got pieces the wrong way round, but still works I feel.
Bit more obvious here.
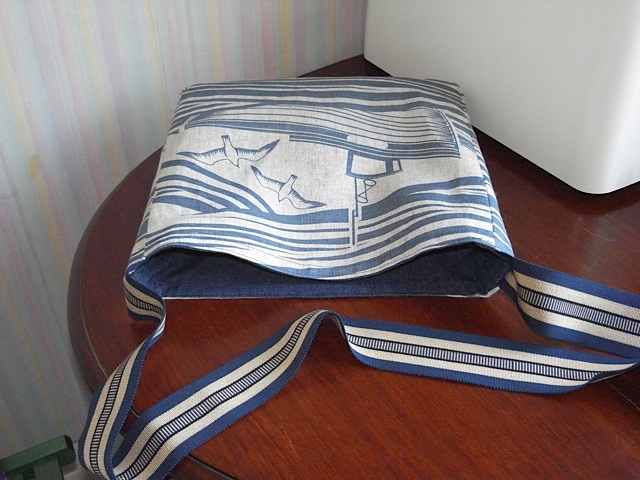
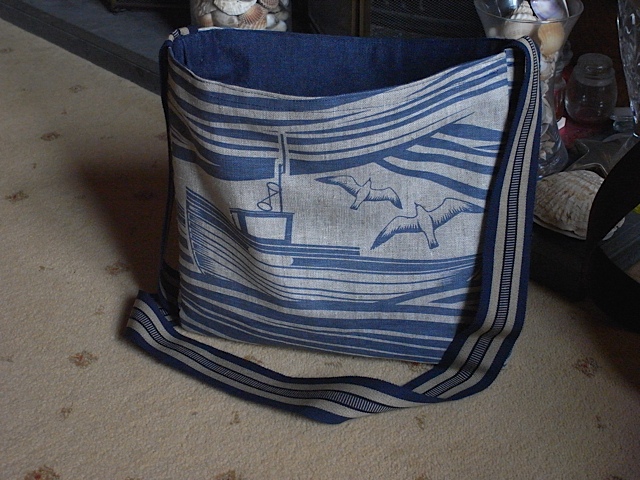
Lining inserted quite neatly.
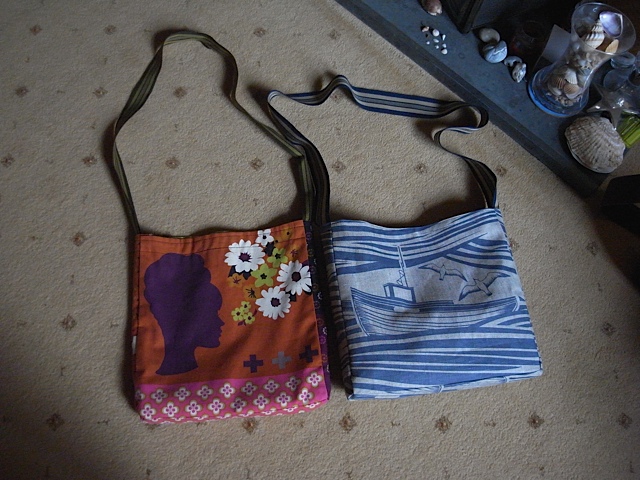
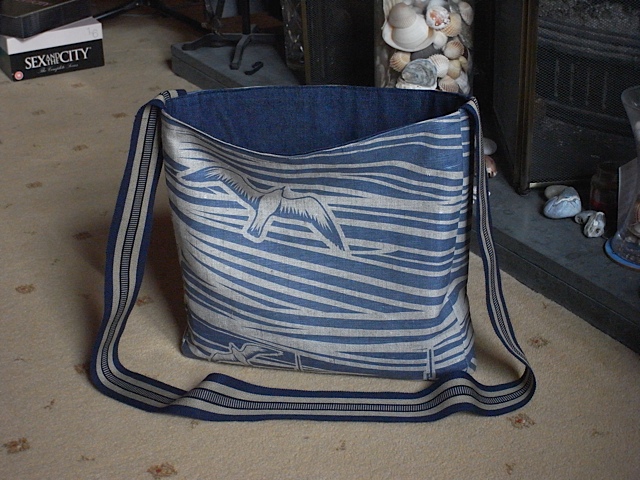
Size comparison, not too different but just enough.
I’m very happy with it and have had some lovely compliments on it. Mainly due to the quality of the fabric I feel. I just love this pattern though and find it very appropriate for living by the sea. I have enough fabric left over to make another bag, so although initially it was expensive fabric, if I can make two bags out of it, it won’t seem so bad.
January 4th, 2015
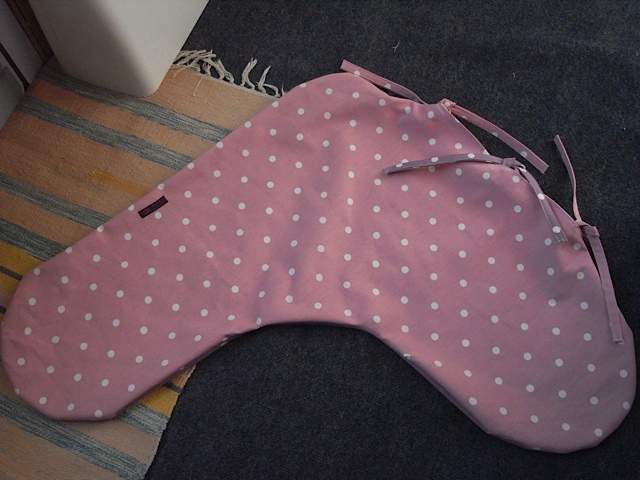
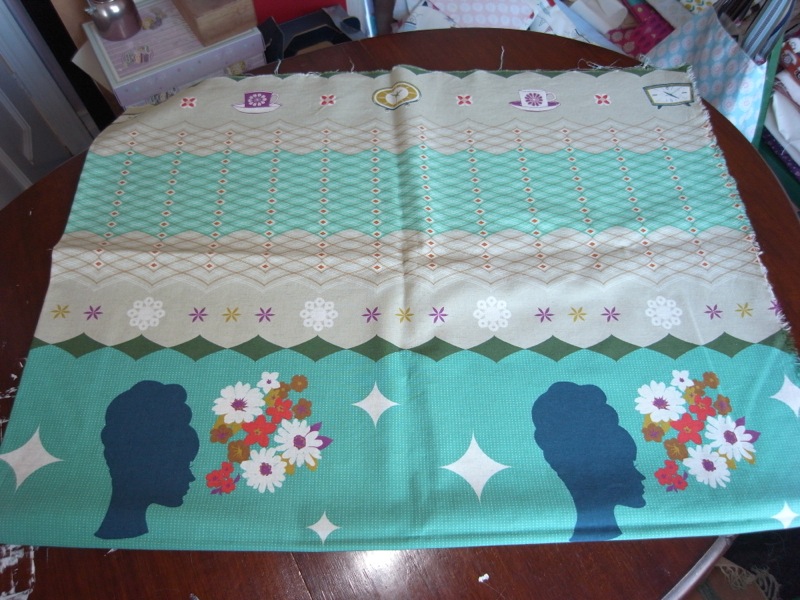
One of my work friends had recently had a baby, and she asked me if I could make a replacement cover for her V shape cushion. I of course said yes. And then started to panic, thinking, what the hell did you say yes for?! Aimee gave me the old cushion cover so I could take the measurements from that. I kept looking at it, sort of knowing what I wanted to do and how I wanted to do it, but not entirely sure if it would work. I know I’ve made cushion covers before but they were regular shaped and had straight edges, non of this curved malarky! Aimee let me decide what fabric to use, having given me an idea of what she liked. I chose a spotty fabric in two different colours in a fairly robust thick cotton.
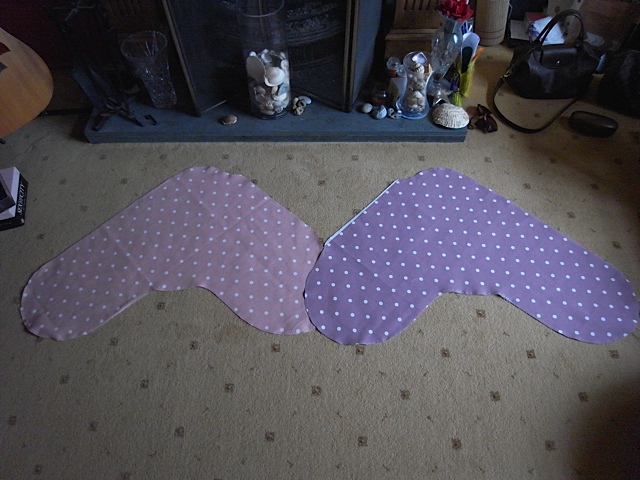
The cut out pieces.
I laid the old cushion cover inside out on top of the fabric and giving it 1cm SA I marked around the cover. Repeated this on the other colour fabric ( I hope this makes sense). Cut them out and pinned together .
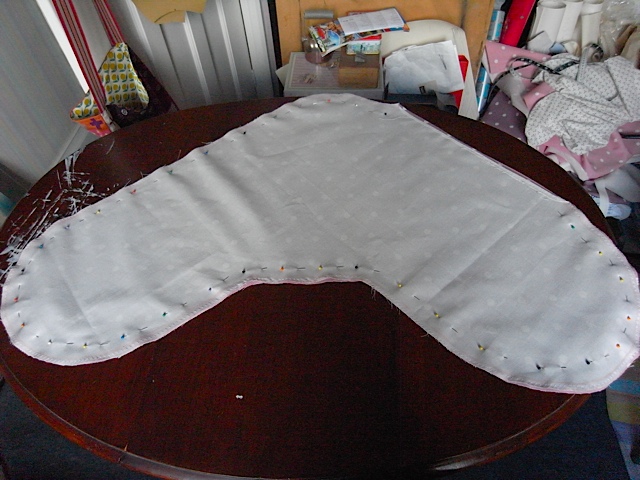
Pinned together….. I don’t know why but this pic makes me happy. I love how it looks with the pins in!
Not forgetting to leave an opening. I then sewed it together. I decided I was going to use ties to close the opening. So I made 3 pairs of ribbon ties and attached.
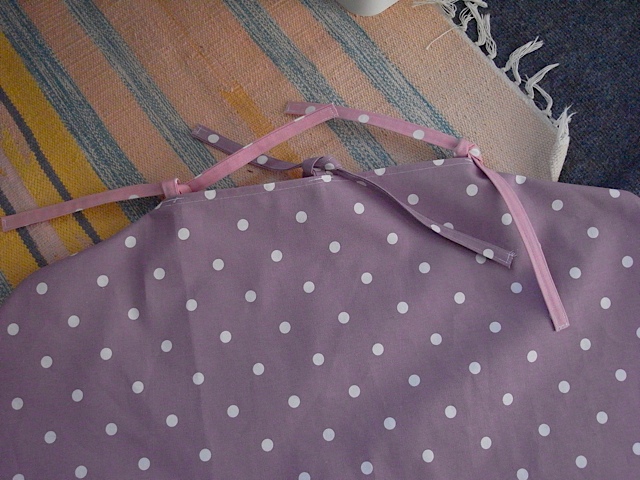
Like so……
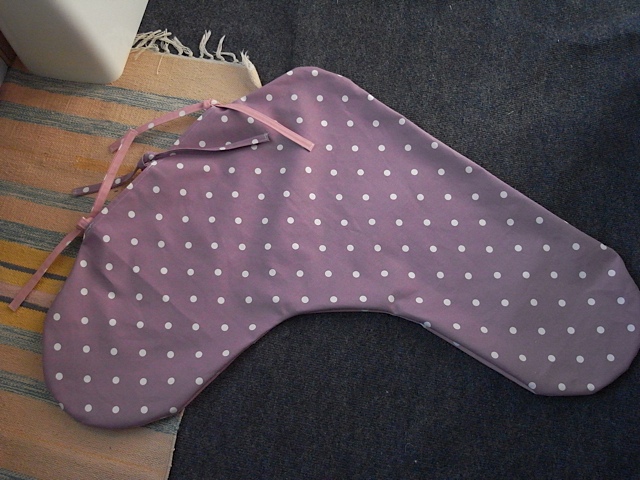
Lilac side.
Pink side.
I was really quite happy with this in the end, and it was fun to make. I delivered it to Aimee, I was a bit apprehensive when putting the cover onto the cushion that it might not fit, but it did, and looked pretty good too. I’m afraid i don’t have picture of it on the cushion, so you’ll just have to trust me. I have to say that baby Amelia looked pretty comfortable on it too :0) So I’d like to say thank you to Aimee for giving me a bit of a challenge. I’m always really happy when I complete something I didn’t think I’d be able to do.
January 4th, 2015
I wasn’t going to write about this having almost forgotten I’d done it! And that I’ve already made two woodland creatures bags, and that anyone ready this blog might not want to see another one, then I remembered this blog is mainly a diary for me of the things I’ve made. And this one is also slightly different from the other two in that it doesn’t have the multiple straps for different carrying options. I made this for my friend Kristina who no longer lives in the same country as me.
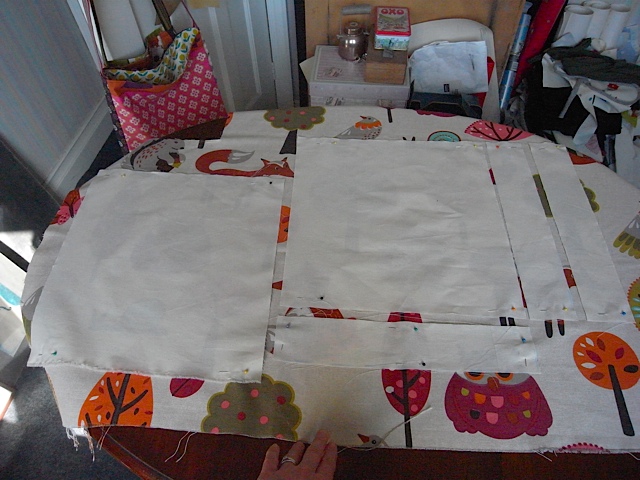
working out where I want the pattern to fall.
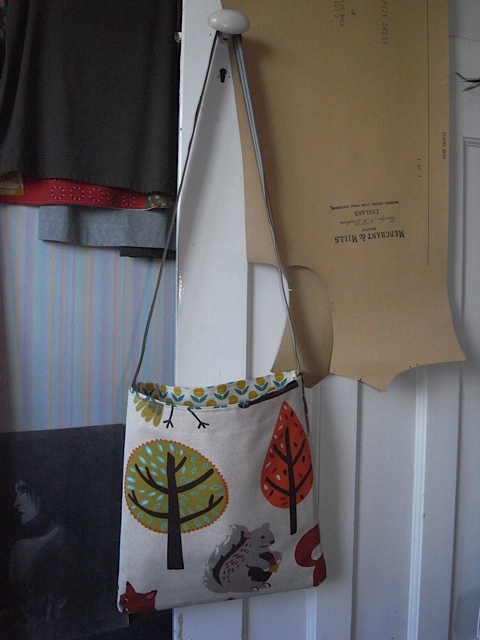
I love these trees……
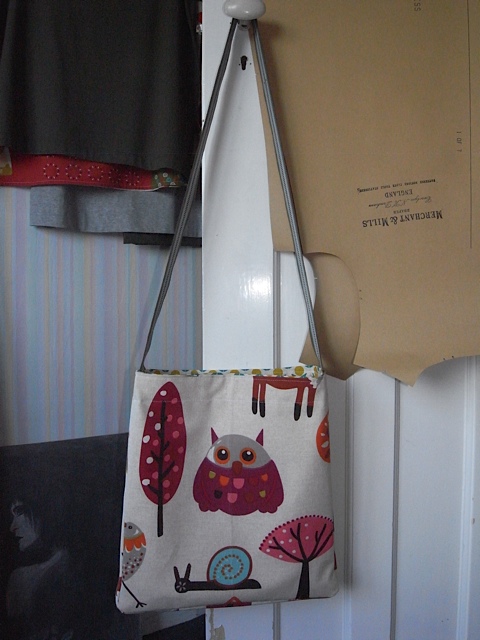
The other side.
One of my most perfectly executed insertions of the lining I’ve ever done! Sometimes its a little tricky and can get a bit messy…….
So there you have it. This bag was taken to Fuerteventura, but is now possibly in Australia!
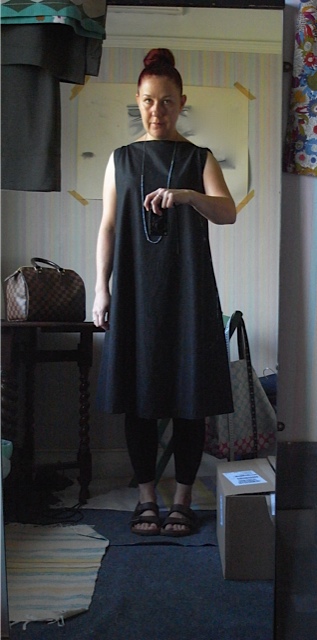
January 3rd, 2015
I made a top.
Here it is.
Wasn’t happy with it (can you see the look on my face?), felt it was too short, and simply not good value for money. At £22 a meter I thought it a bit expensive to be a short top. So whats a girl to do? Add some length,
length added.
thats what……..
I liked it better with the added length, but decided it was now too long, so I took a few inches off again……..
Now I’m very happy with it, although it might not look like it from my face! I finally settled on this length as being perfect for me after wearing a beach dress that was this length and being really happy and comfortable in it. So there you have it. Three stages to the perfect length dress for me!
December 29th, 2014
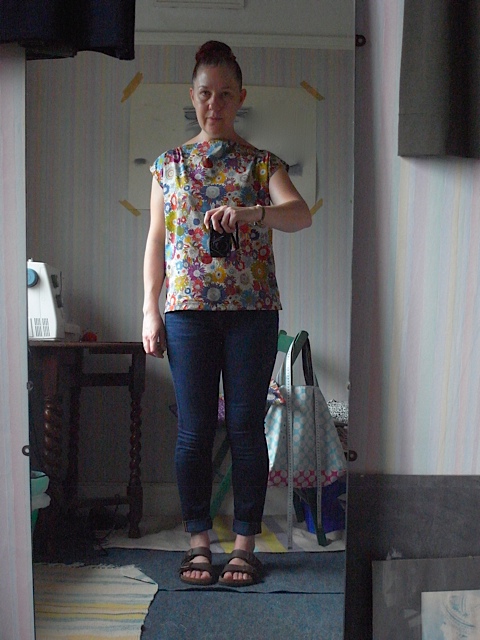
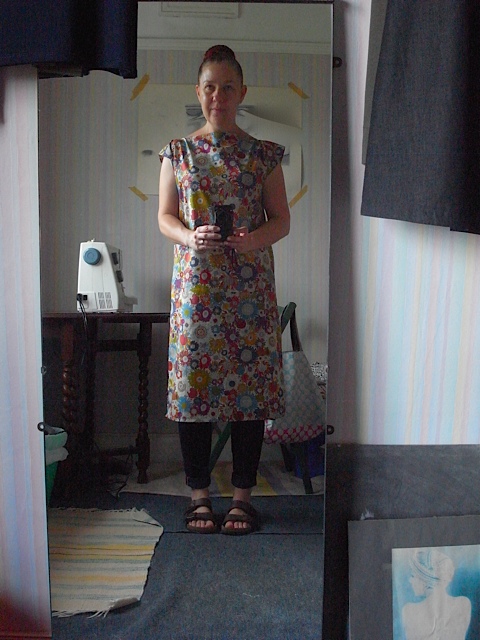
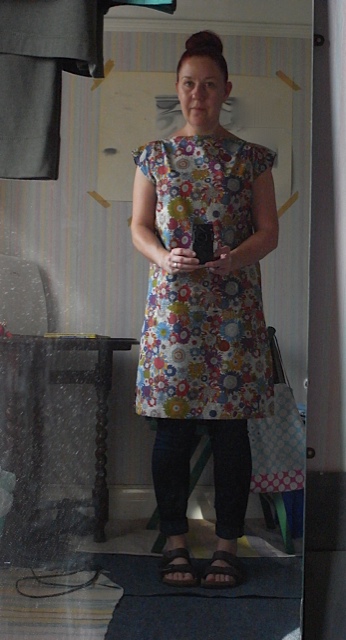
I bought the Merchant&Mills Trapeze dress pattern back when I first started sewing, thinking it looked plain and simple and that it would be easy to do. I was so very wrong. I sat and looked at the instructions and didn’t know where to begin (probably largely because I didn’t know what the hell I was doing), so I didn’t. I put it on its little hanger and hung it on the back of my sewing room door! And thats where it stayed for about a year.
In july of this year I bought some black dress weight denim from my favourite M&M. Very reasonably priced at £6.75 a meter, I bought 2 meters. And I once again looked at the Trapeze dress pattern, thinking this fabric could be perfect for it. I looked again at the instructions, understood them a little more this time. And decided I would have a go. I wasn’t particularly fond of the round neck shown in the pattern so I adapted it to fit my slash neck/boat neck style that I’m partial too (A: because its easy B: because its easy). So this is my version of the Trapeze dress.
One of the many things that put me off trying this pattern in the beginning, was for me the lack of space, my sewing room is basically the box room of a 3 bedroom semi, so not very big at all. I’m not complaining as I know how lucky I am to even have a sewing room all to myself. But it means my cutting table is the same one the sewing machine sits on and I have to move it to different places when I want to mark out and cut the fabric and then move it back again when I need to sew. So the table can’t be too big and bulky, and therefore its quite small and the amount of fabric needed for the Trapeze dress pattern is too much for my little table and indeed my little sewing room. I had to get creative. I ended up laying the fabric out on my living room floor and cutting out the pattern pieces there. This was not easy, but it worked.
Like so!
I don’t know if others find this, but one of my biggest problems is trying to get the fabric lined up evenly. I find more often than not, its not cut in a straight line when I buy it, which always makes lining up the edges interesting (headache inducing) not quite so much a problem with plain fabric, but when its patterned it can be a bloody nightmare!
I would like to take more pictures of the process when I make something, but I forget as I get so engrossed in thinking about what I’m doing and also I worry about it all going pear shape! So I take pictures when I think about it and I’m happy with something.
Once I’ve cut out the fabric I then marked out the seam allowances, zigzagged stitched the raw edges to help stop the fraying and then started to sew the pieces together. I really enjoyed making this dress. And was really really pleased with the out come.
Showing my adapted to suit my simple sewing neck line. Please excuse the wallpaper. Need to decorate……
This shows the hem and I was trying to do a contrast hem, sadly didn’t work. Think it would have looked amazing.
Inside out looking at the centre back seam. I was very pleased with this.
Here’s me wearing it. I love it and am so pleased I finally had a go. Look a bit like a psycho here. Sorry!
I was right about the fabric being perfect for this dress. It drapes beautifully and you get a lovely effect at the back when worn, I’m sorry I don’t have pictures of the back. Must try and enlist the Husband to take pics sometimes.
I had a wonderful complement while wearing this dress, a lady in a shop said she LOVED my dress and asked if I made it, and then proceeded to tell me I should make them to sell! I was very flattered and was on a high all day.
As a side note, I made this dress in the size 10, and I do believe I have enough fabric left over to make another one. The fabric was 2 meters in length and is 140cm wide.
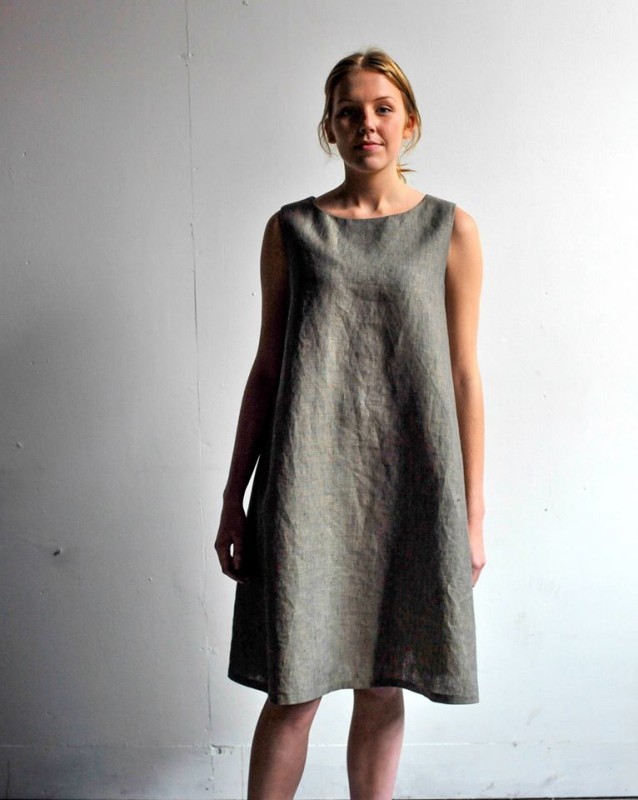
Just for reference, here’s how it looks when the pattern is followed properly. I also cheated with the armholes. Picture taken from the paper pattern packet.
May 28th, 2014
OK peeps, settle in, this is gonna be a long one!
I’ve already made quite a few tops like this one

In fact I’ve made four. two in the khaki green, one grey and one navy. I absolutely adore this style of tunic, for many reasons. Its comfortable to wear, and in the jersey fabric it drapes so beautifully and feels really good on. Also with my love of simple sewing (& limited ability), the jersey, coupled with the simple shape actually makes this style look quite stylish. I don’t have any decent pictures of the other tops so you’ll have to make do with just the one, but basically its quite safe to say the other three look almost identical.
I have a holiday coming up very soon, and need some dresses, just simple loose dresses. Nearly bought a few jerseyish (I’m aware its not a proper word) drop waist dresses from TopShop, but since I’ve started making some of my own clothes, I can’t justify £15 on an inferior quality item, when I have fabric at home that I paid £4 a metre for. Life would be easier if I could, as I would have bought four of the dresses and had a bank holiday weekend instead! So I decided I had to make them. And therefore spent the entire bank holiday in my sewing room, and lets not pretend that I didn’t love every minute of it.
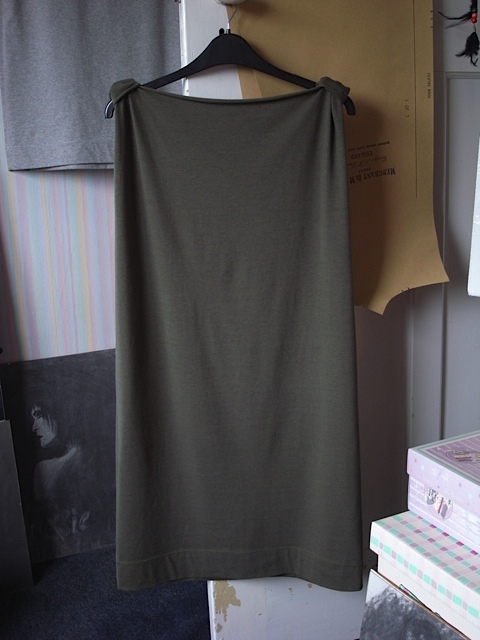
Right, first draft of the dress looked like this. Please don’t laugh! I’m well aware it makes me look like an inmate from a lunatic asylum……..
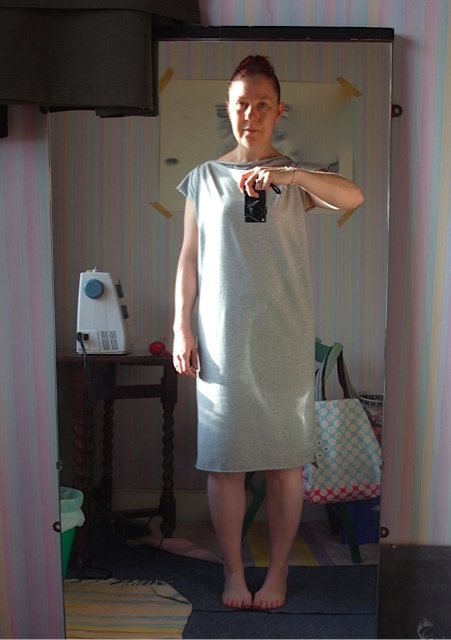
Its really difficult to work out exactly what length I want the dress to be. And when you are trying to do it on yourself you end up pulling poses like this……..
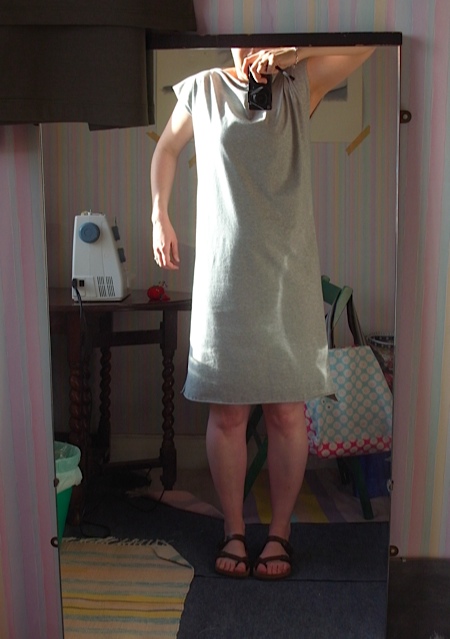
I’ve raised my shoulders in the hope it’ll help me decide. It didn’t really! I suppose it gives me a rough idea.
I then decide to pin the hem at the length I think will be best (actually more luck than judgement).
And BINGO! We have a winner.
I then sew the hem in place, using my trusted twin needle. Which depending on the mood of the sewing machine, can go smoothly, or end up in a twisted mess of threads, unpicking and re-sewing, sometimes several times!
Hem is now sewn in place, you may or may not be able to see that I’ve made it a nice deep hem, about 5cm deep in fact. I do like a deep hem. Haven’t ironed it yet either so its not sitting quite right, but I’m pretty happy with it.
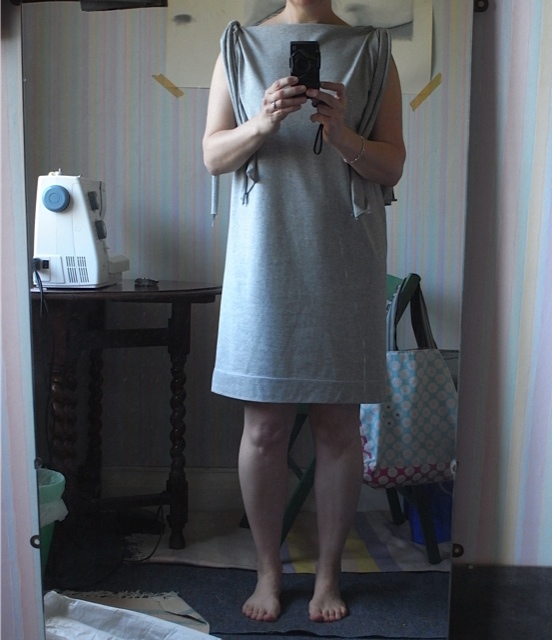
There’s something I’ve decided I’m not quite happy with. I love the way the shoulders look when its a tunic, but for some reason as a dress I don’t feel it works. Looks kind of unfinished. So I have a little play around, and tie some fabric round the shoulders, I like this. Gives it a sort of draping affect at the shoulders. However don’t particularly like the loose bits of fabric hanging down………
(I do apologise about the pale and pasty legs!)
I ponder on the shoulders for a while. Make another dress, in khaki green, while I’m thinking. Go to bed thinking about it, and come up with an idea. Can’t wait to get up next day and try it out. Thought about leaving the green dress like this
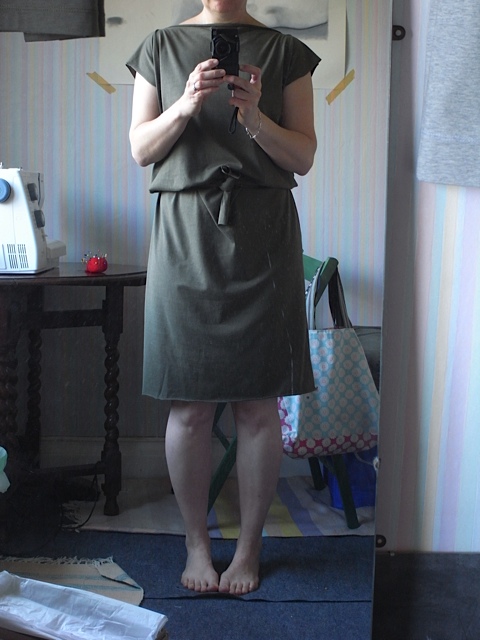
But don’t really like things round my waist.
So back to the problem in hand, what to do about the shoulders? So the idea I came up with (& I’m not pretending I’m the first to think of it but )was this
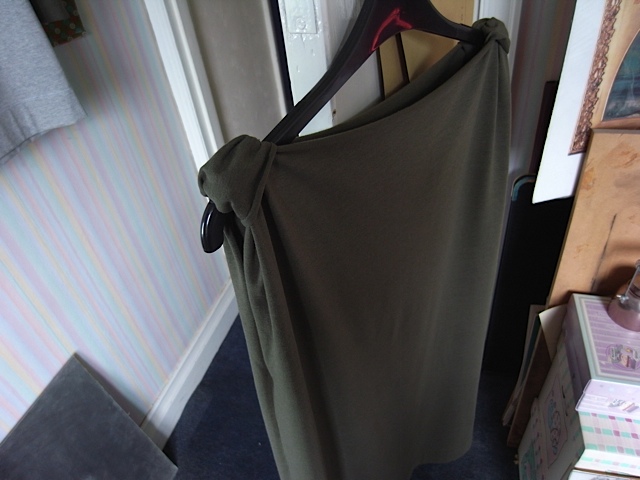
I sewed some fabric around the shoulders. Creates a gathering effect, gives the dress just a little more detail, and i think looks pretty cool. I’m loving it. Plus if I get bored of it I can just unpick the bits of fabric and have the sleeves back.
I think it even looks good on the hanger!
So what do you think?
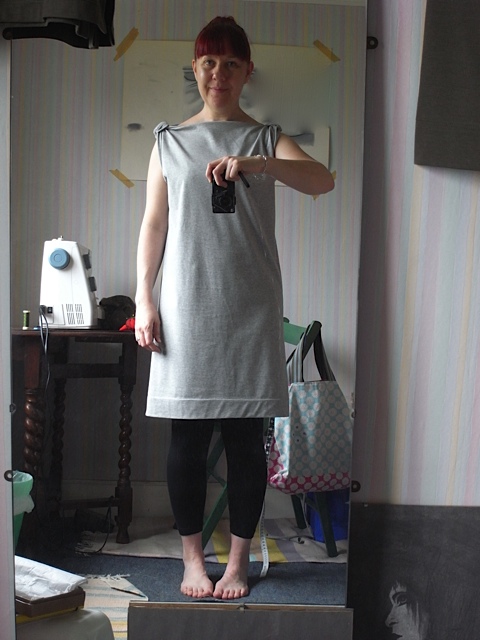
Gone from, inmate of a lunatic asylum, to a perfectly presentable dress I can wear in Florence!
I’m really really happy with this, I mean really HAPPY! This time last year I hadn’t made my first cushion cover yet. And now my holiday wardrobe will be at least 50% homemade! Slap on the back for me.
May 26th, 2014
I’m too excited not to share immediately! This bank holiday weekend I’ve done nothing but SEW! I’ve made 1 top and 3 dresses. First up is the top, as the post bout the dresses will be quite long.
I made this with some lovely jersey fabric I got in Merchant & Mills, I mentioned in an earlier post. I just love jersey, it doesn’t fray, so it means you don’t have to finish the edges, nor do you have to be so meticulous with the seams. Which all goes to mean a faster making process. YAY!
OK you lucky people, I’m putting my face in. Pretty sure the only people reading/looking at my blog are my friends anyway, and you all know what I look like.
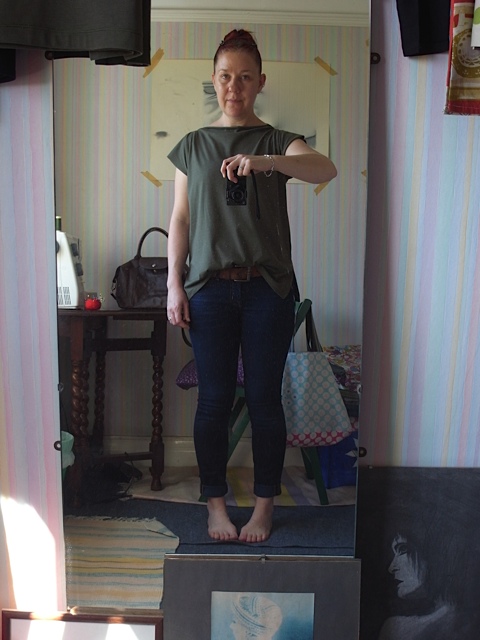
I’m really rather pleased with this top, might have to make another in navy. I am, I’m afraid one of those people who, when finds something I like, I buy it in multiples for fear that it will wear out and I’ll never find it again. So now, I can, and do, make things in multiples, for fear the fabric will become unavailable and I’ll never find it again.
May 20th, 2014
Went to London yesterday with my friend Kristina, had some lunch, did some shopping. One of the shops we went to was Liberty of London. And of course had to go up to the fabric floor. Last visited the fabric department, June last year. I hadn’t been sewing long, had only made some cushion covers, so I felt a little overwhelmed by it all. I never thought I was going to be brave enough to make clothes so didn’t dare buy any fabric, although I thought it was all quite beautiful. So yesterday it felt quite different. I had a good long look at all the beautiful prints but I just couldn’t decide, they really were all so pretty. Again I was overwhelmed and decide not to buy anything. Kristina asked me why? And I told her they were all so lovely I just could not make a decision, so rather than make the wrong choice I wouldn’t make any choice. Kristina wasn’t happy with this, and said she would pick one out for me. She knows what I like and the style of tops I make and wear. I thought why not, lets see what she picks. Kristina walked up and down looking at the fabrics, picked out three different ones and showed me. I rejected the first, the second I liked but I wasn’t keen on the third. However after holding up the fabric against myself we came to the conclusion that the third choice was actually the best one for me. I duly purchased a metre and off I went. Happy! :0)
This is a really gorgeous fabric, feels so soft and silky. And the pattern is just wonderful, so much going on if you look closely. Lots of cute little details. There will now follow lots of pictures.
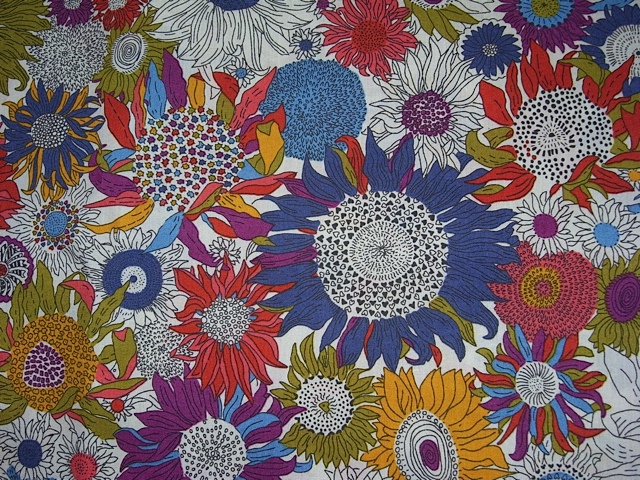
I love the little details, like the hearts in the middle of the flowers.
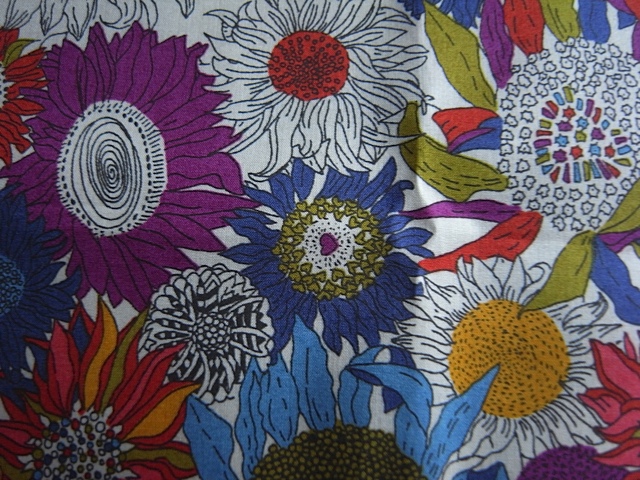
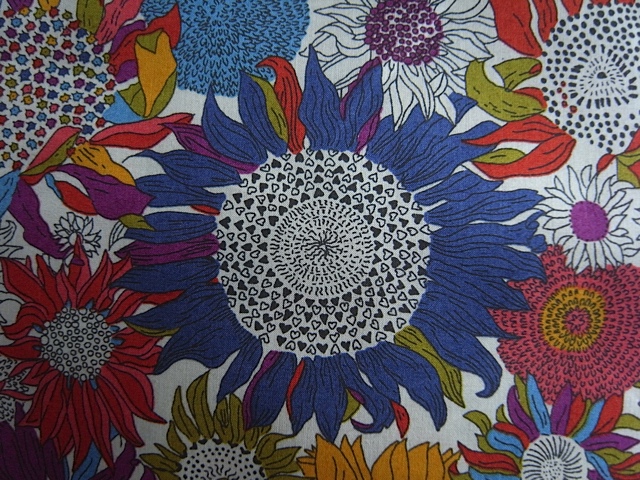
I can’t wait to make this into a top. At £22 a metre its not the most expensive fabric I’ve bought but it still feels a bit special and I’m a little nervous. I really want to be able to do the fabric justice.
Watch this space!
May 6th, 2014
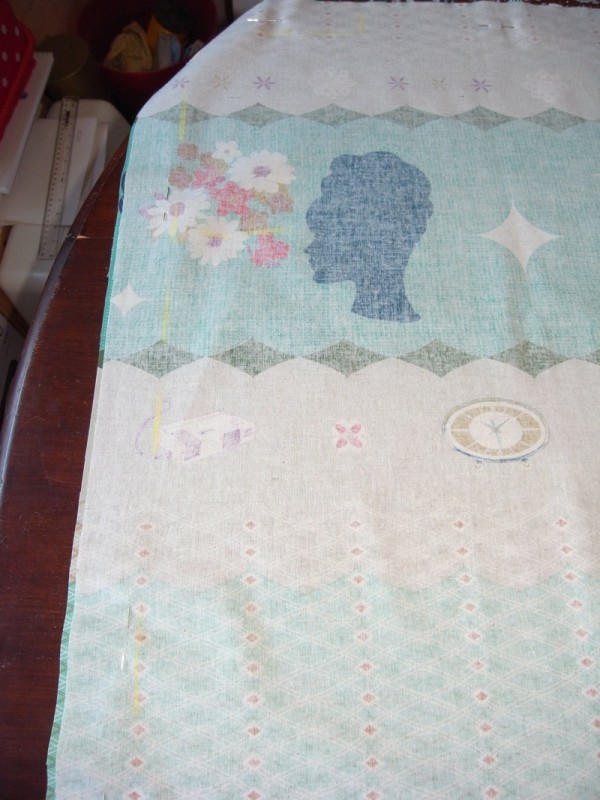
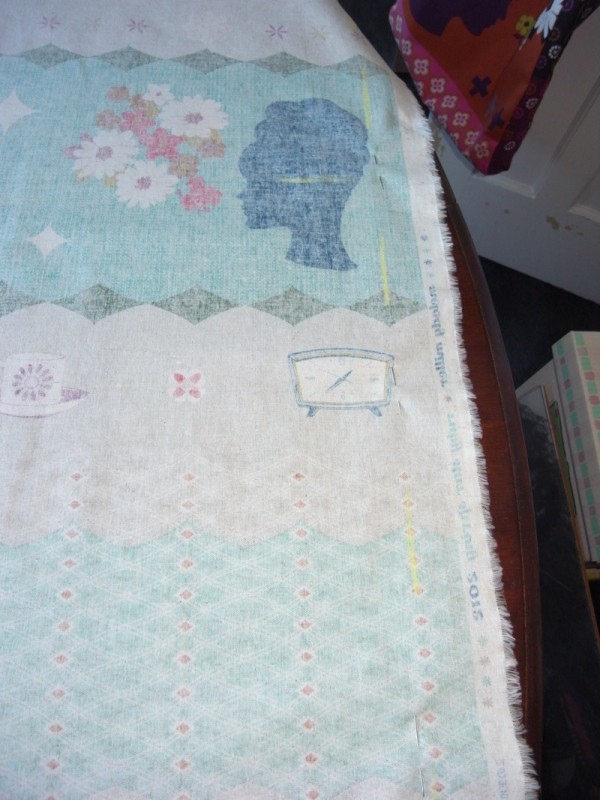
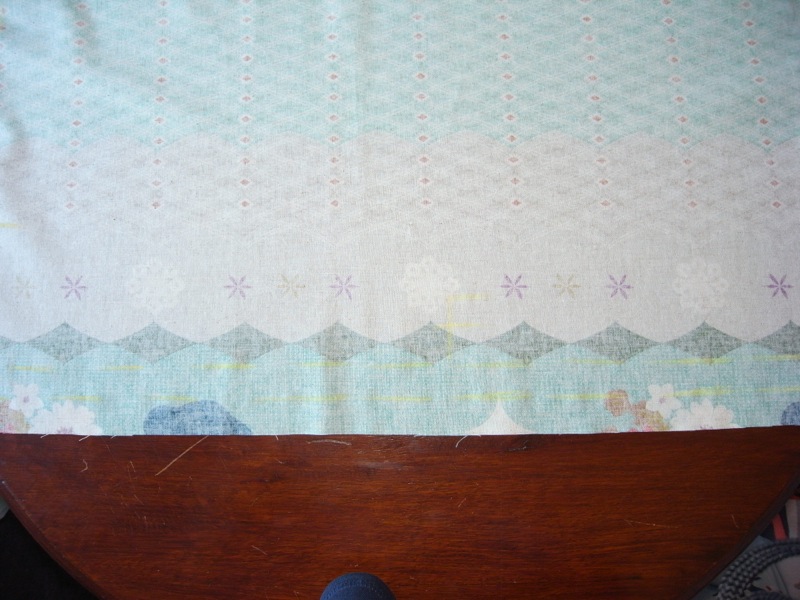
So I have a lunch date with some girl friends the day after my birthday and I want a new top. And it gives me great pleasure to be able to make it myself. I had fun with this gorgeous Melody Miller for Kokka fabric. I got the fabric from the lovely Fabric-yard. At £19 a metre it isn’t cheap, but the fabric is a lovely cotton/linen mix.
It took me ages to decide where exactly I wanted the pattern to fall. Pattern placement can really alter how a finished item looks and can make or break it. I’m really happy with how this turned out. I surprise myself every time I make something, as I learn something new each time, and feel I improve on my finishing and therefore the overall quality of the item of clothing or bag.
The fabric
After deciding where I want the pattern design to appear on the top, I mark out my pieces. And due to the simple nature of my tops there are only 2 pieces. Nice and easy. I then mark out the neckline, the shoulders, hem and seam allowance. Now I’ve been pretty generous with the seam allowance on this top, I’ve used a 4cm SA. It makes it nice and easy to fold the seams over on themselves to give a much better finish.
Neckline after joining the two pieces together. Inside out.
Not sure how clear this is, but I’ve marked out the 4cm SA & armholes. The pieces of fabric are pinned together so i mark everything out the same on both sides.
same the other side.
markings for the hem.
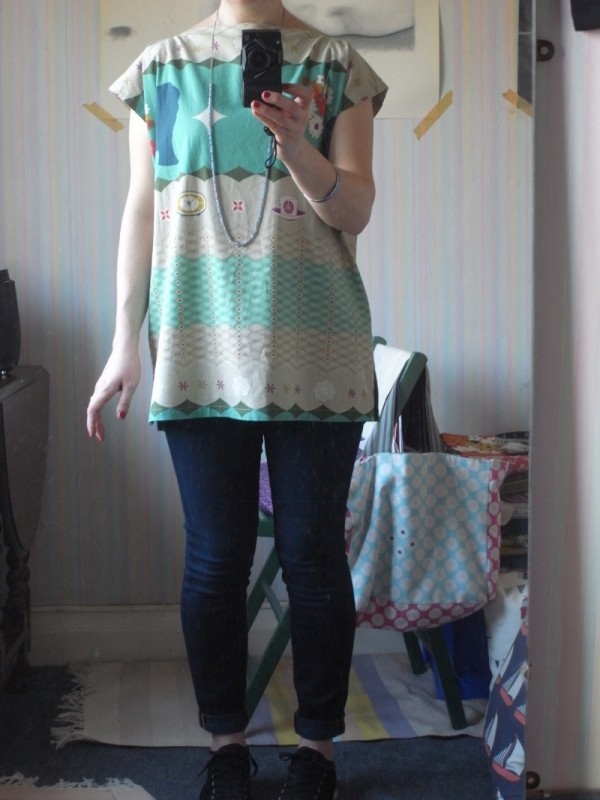
Finished. Been worn so its a little wrinkled!
Pattern placement worked pretty well. Not 100% perfect but matches up quite well at the seams.
I love this top and am so happy with it. This is the sort of thing i like and find so difficult to find in the shops, so to be able to make something like this for myself gives me a really happy feeling.