For christmas my lovely hubby gave me a voucher for Merchant & Mills, and I’d been looking at the Jack Tar bag pattern for quite a while, but hadn’t gotten round to getting it. then they started doing a kit, which includes everything you need to make the bag. So armed with my voucher I trotted off to Merchant & Mills and bought it.
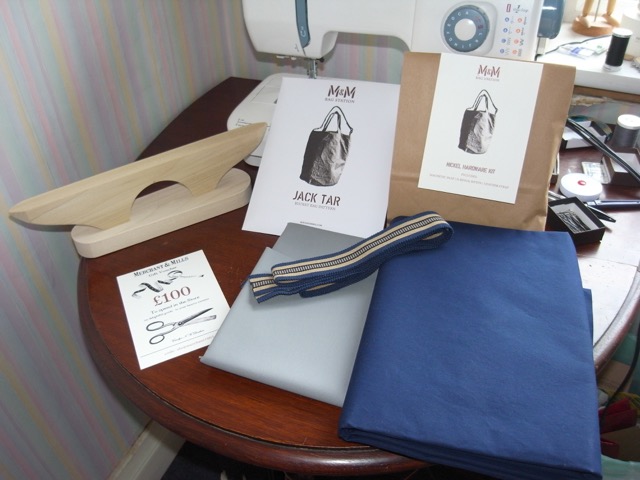
Its taken me a couple of months to get round to making this, but I’ve finally done it. I have to say it was a rather pleasant experience. I did things I’ve not done before, like snap closure, and used D rings. Also a facing on a bag, which I’ve not done before. And turning a bag right side out through a hole in the lining. That was an experience I can tell you.
This was also quite a painful make too! The outer fabric I believe is a dry oilskin and the lining is a sturdy canvas, both fabrics were quite tough to get my pins through at times, and I managed to stab myself on many occasions.
I also want to say, that whilst the pattern is supposed to be beginner level, Merchant & Mills can be quite frugal with their instructions, and If I hadn’t already known how to attach a base to the main body of a bag I would have been a bit stumped at that point.
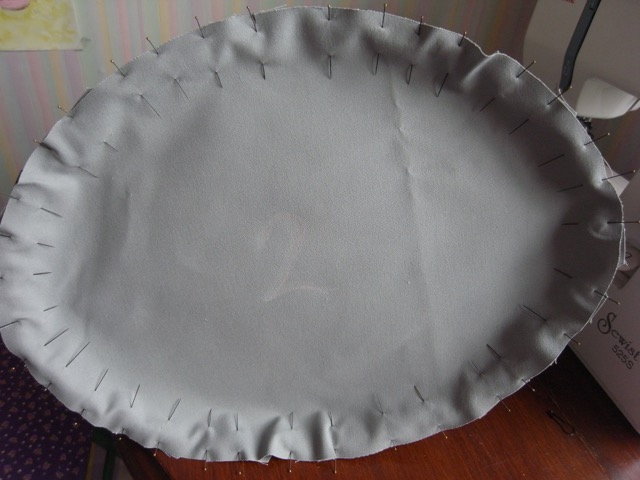
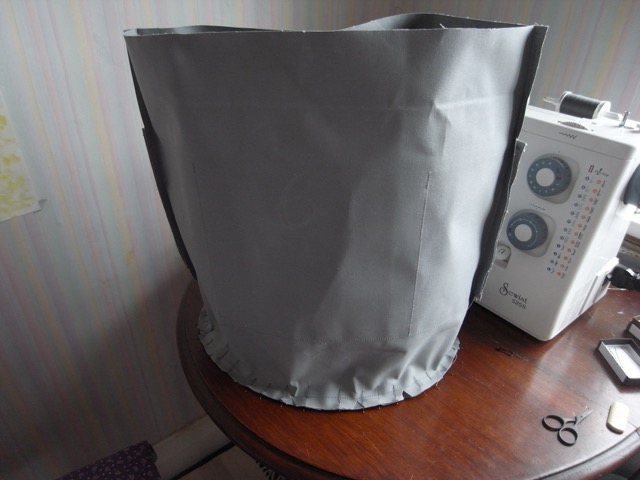
Base of the bag pinned to the top. Above ^ and below
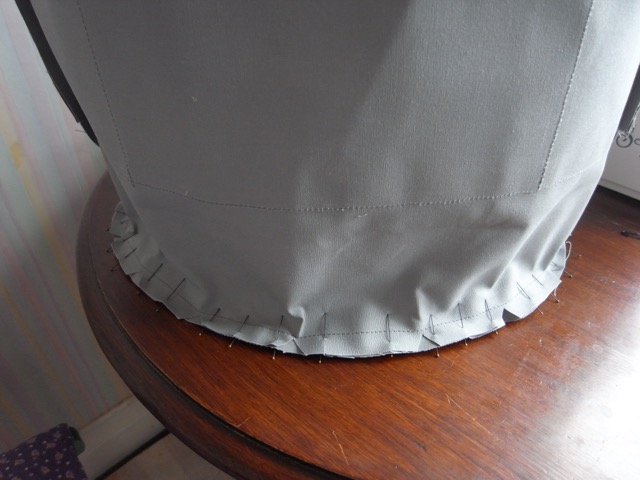
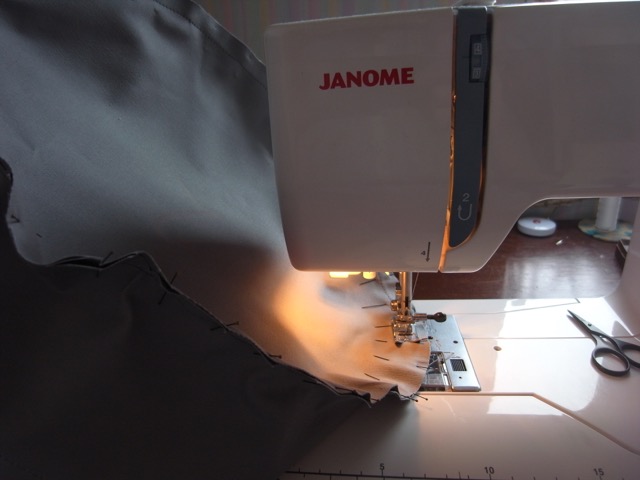
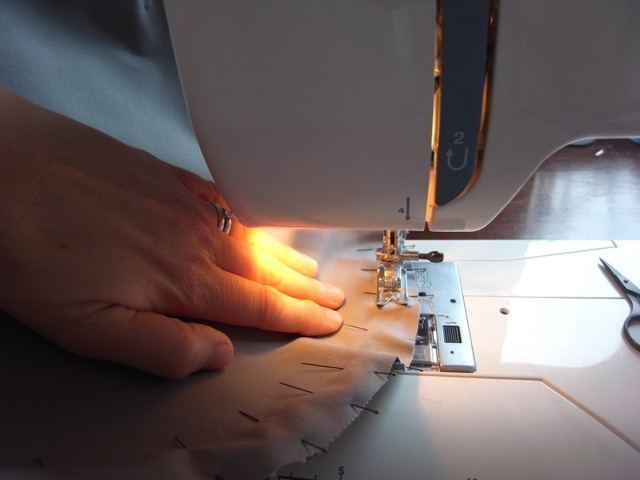
It was quite tricky getting it through the sewing machine, as the fabric was quite stiff. And this was one of the areas where I would get stabbed by my pins!
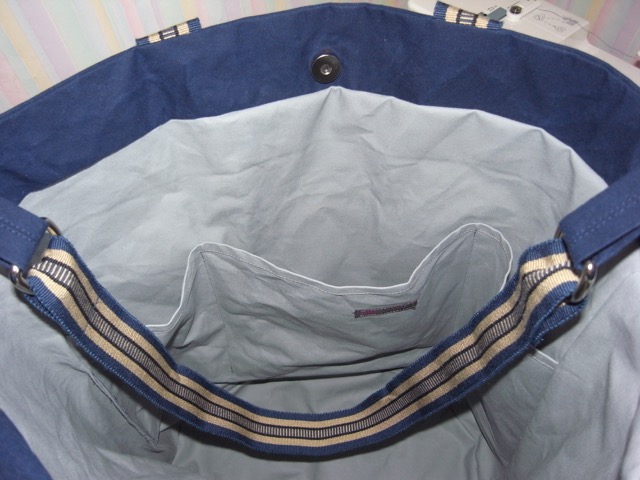
Picture of the lining, before I’d sewn the base.
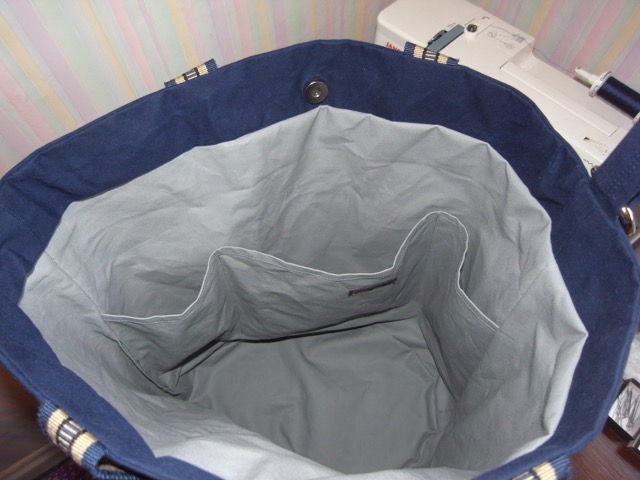
All finished. Inside view of the pockets.
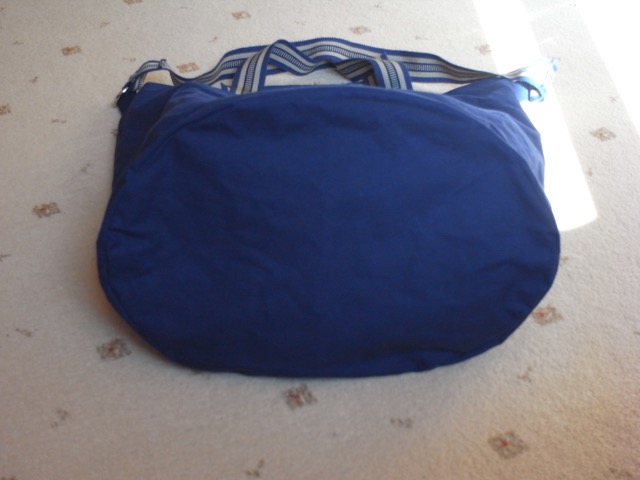
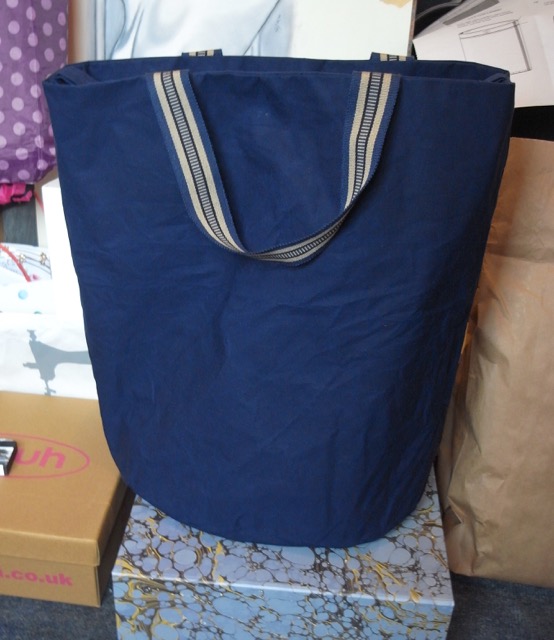
Another inside view, with the shoulder strap. The bag kit comes with a leather strap, but I decided not to use that, and opted for a webbing strap instead, same as I used for the handles. There is an option to make the handles yourself out of the same fabric as the bag. I like the contrast the webbing straps give though.
This is a pretty big bag, I think it will be really useful as weekend bag or carry on bag for flights, as well as being a great everyday bag for town and shopping. The 3 inside pockets are the perfect size for your purse, keys, sunglasses and phone. Plus any other small items you don’t want to lose inside the main compartment. the pockets are also ideally placed for good access whilst carrying the bag crossbody, but I reckon would be tricky for someone to try and pinch your purse.
Carrying options, are as follows.

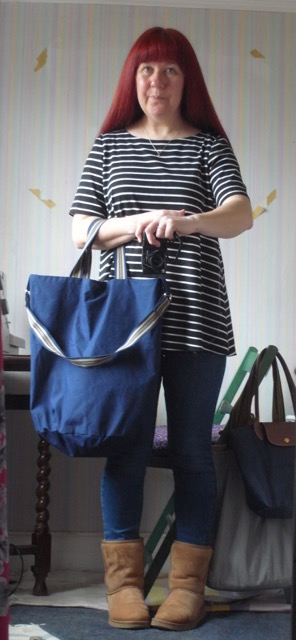

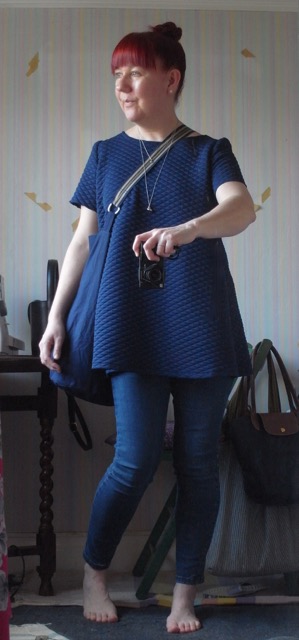
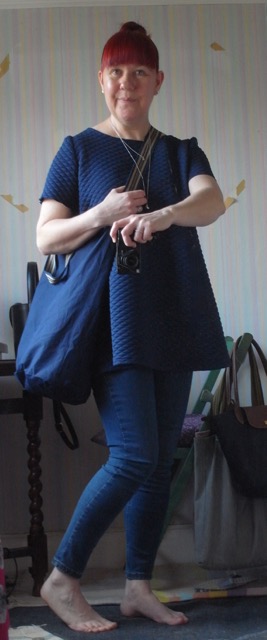
My favourite is crossbody, so comfortable. So there we have it. What do you think?
I really like the style of this bag and it’s so practical too. The round base looks tricky! I like using sewing clips when I can – definitely reduces my injury rate!
The whole bag had its tricky moments, mainly because of the thickness of the fabrics. But yes the round base was a little troublesome. Ooh sewing clips, I’ve not heard of these. Sound intriguing.
I like the way you modelled the carrying options – very helpful! I may purchase a kit for myself soon. The hardware sounds like fun.
Thank you, I would whole heartedly recommend the kit. It is a fun and satisfying make.
I’m a sewing beginner/improver and have been wondering if this bag kit was within my skill level. Yours turned out beautifully. Thank you so much for this post, it’s really helpful! I have a mid-range Janome machine – did you find your machine was struggling with the thickness of the material? Any advice much appreciated! 🙂
Hello there, thank you so much for your comment :0) Have you made bags before? If so you’ll know how to attach a base to the sides of a bag, if not then you might struggle a bit the Merchant and Mills instructions as they can be a little confusing! Or that might just be me!
However on the whole I found it a lovely pattern to put together, the hardest part is getting the pins through the fabrics. I have a pretty basic Janome its the 525s, and it coped pretty well the fabric thickness, if I remember rightly. Just make sure you use the right needle for the fabrics. If you want anymore advice/help then please let me know and I’ll do my best to help. xx
Thank you, Sarah! I’ve made a lined tote bag (with quilting fabric, not canvas), some zippered purses, baby bibs, some knitting accessories to hold double pointed needles (for that I used canvas on the outside, Kona cotton for the lining), and various other bits and bobs.
I’ve just ordered the Jack Tar kit, and this will be the most technically challenging and the expensive item I have tried to make, so I don’t want to mess it up. 😉 Many thanks for the very kind offer of assistance, I may take you up on it! xx
I’m so excited for you! Just take your time, take each step one by one. I often find when using a new pattern (and you might notice if you’ve read my blog, that I tend to re-mkae the same pattern over and over. Get a little obsessed!! So I still find it daunting to make a new pattern) that its beneficial to me, not to read ahead and look at the next step before I’ve done the one I’m on, if that makes sense. That way I don’t find it as scary!
The canvas is very very nice to work with, and doesn’t need the edges to be finished as it doesn’t fray. Which colour did you go for? Good luck and let me know how you get on. xxx
Thank you! 😀 I got the yellow bag. After work today I dashed into the fabric shop and got some thread that matches the mustard yellow outer fabric and the grey lining. This is my first time using a proper sewing pattern, and I’m more than a little intimidated! I’ve been watching YouTube videos on how to cut out and pin, etc., and have ordered some tracing paper so I won’t have to cut the original pattern sheet. I’ve also been reading the Merchant and Mills ‘Elementary Sewing Skills’ book to get my head around some of the terms the pattern uses. It’s a useful little book. Once the tracing paper arrives, I’ll dive in. (Eeeeek) 🙂
One piece of advice, don’t pin, use weights to weigh the pattern down. I just use tins from my cupboards. I find pinning can distort the fabric and pattern. But if you do that try and make sure you mark the fabric with which piece of the pattern they are. Although it shouldn’t be too much of a problem with that pattern. Also I don’t think you need to trace the pattern, as its one size only. I think tracing is really only an issue if there are multiple sizing options.
Should look good in the yellow! I look forward to hearing how you progress. XX
Thanks – I was thinking about that distortion issue. Usually I use Wonder Clips to hold fabric, but in this case they might not work. I will have cans at the ready. 🙂 Did you press the fabric with an iron at any point? Someone on Instagram warned that pressing oilcloth can be a messy experience for your iron, so I’d like to avoid it if I can… Many thanks for all the photos you’ve provided above – they definitely help me visualise the process! I’ll let you know how I go and will link you to the finished object! 🙂
i think I had a go at pressing the fabric, but didn’t really bother after the first attempt. It doesn’t really need it if I’m honest. The fabric I used was a dry oilcloth, so I really wouldn’t recommend ironing oilcloth. Can’t wait to see how you get on! xx
Thanks, Sarah! I was hoping you’d say you didn’t try and press it – I had visions of ironing disasters…! Trying to summon the courage to dive in now!
Hi again! I’m stumped at the first hurdle! I’m trying to work out how to cut the fabric. You know the kit gives you two pieces of fabric, the lining and the outer? And then the ‘cutting layout’ gives you six pictures showing rectangles of various dimensions…. I don’t understand that part.
Surely we aren’t supposed to cut these two big pieces of inner and outer fabric into six smaller rectangles – or are we?! Sorry to bother you again, but any advice here would be great as I’ve never cut from a pattern before and am trying to grasp what it is I’m supposed to do! x
Sent you an email. xx
I’m having trouble similar to that last question above ♀️. Also the pattern lines – do you cut the fabric on the pattern line and then go in with your seam allowance? Or do you cut 1.5cm outside the pattern line? Confused.com !
Hello, yes the pattern includes the seam allowance. Cut it out and then sew with a 1.5 seam allowance. Its been a while since I made it, but I think there’s a part where its a 1cm seam allowance. Just make sure you read the pattern carefully. I’m happy to answer anymore questions you might have.
Thanks so much for this, I got it for Christmas and will use all your tips and advice x
Ooh I hope you enjoy making it. Its a great bag. XX
I got this pattern as a Christmas gift, along with waxed canvas. I finally got all my pieces cut (woo hoo!), but now that I’m about to make my pockets (I say pockets, because I’m adding an additional pocket on the outside, since I had enough leftover waxed canvas). It says to press down the top edge, from the WS to the RS, twice and stitch down. That should be fine for my canvas, but I chose a lining fabric that will show the WS at the top of the pocket! My gut says to fold the top down like I normally do, with WS together (or RS to WS, as they call it) and stitch down. But I also like to follow new patterns (and recipes) the exact way the first time I ever make something. What did you for your pockets? It looks like you did it “my” way, WS together.
Hello there Ericka, I made the inside pocket the way the pattern said, WS to Rs. I shouldn’t worry about doing it Rs to Ws for your inside pocket if the fabric is going to show a difference. You can do the outside pocket according to the pattern, thats just as good. I’m sure it will look fab.
Hi again! I “binged” sewed this weekend and managed to finish the bag.. . except for the rivets! I had to get a rivet setting tool, which I was able to get at my local crafting supply store. A few thoughts: Yes, I got poked many times by my pins while sewing the base! Turning the straps inside out was probably the hardest part. And yes, turning the bag inside out through the opening was quite the experience! The waxed canvas leaves quite the interesting residue after wrestling with it haha. Referring to my previous question about turning the lining from WS to RS, I got around that and just added an extra pocket panel since my lining was 100% cotton and not canvas, like yours. I can’t wait till I get the rivets on there correctly!
I’d love to see pics when you’ve finished. I cheated quite a lot with mine. I used webbing for the straps so didn’t have to turn them out, or do the rivet thing. I’m afraid I have no problem with not following the pattern/recipe as per instruction. I like to make things easy for myself.
I’m happy you’re mostly completed though, its a fab bag! I’d like to make another but nor sure if I can handle being poked by pins again!! :0)
Trackback this post | Subscribe to the comments via RSS Feed