Its been too long! I have been sewing, just haven’t got round to blogging them yet, sorry. I will soon, promise. XX
May 18th, 2017
April 20th, 2017
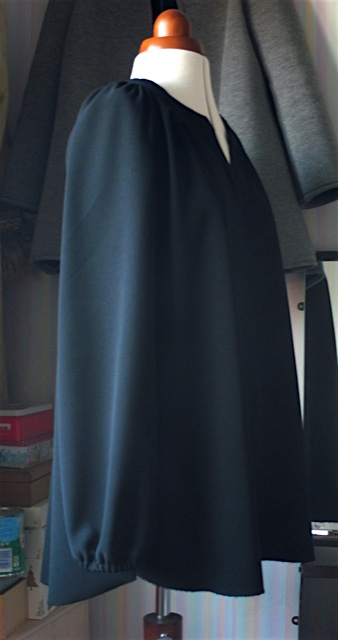
Not too sure how else to describe this! I had been thinking about trying another jacket made from the Trapeze pattern like this one that I made last year, but making it from the tunic length pattern I’d made, and using the boiled wool fabric from Merchant & Mills that I used to my make Strand coat from.
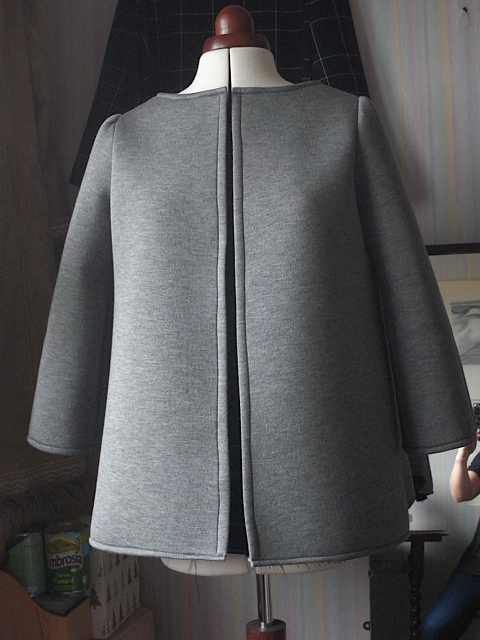
This is the kind of thing I mull over in bed at night, I come up with an idea and then think about fabrics and so forth. As it happens I’d ordered some fabric from Fabric Godmother and had been sent the wrong fabric as part of my order. After getting in touch with them they were very apologetic and refunded me the difference as the fabric I received was cheaper than the one I ordered and had been charged for, so no problems there, and they would have refunded me if that was what I wanted to do, but I was actually quite happy with the wrong fabric. I earmarked it straight away for the Trapeze cardi/coat thing!
Its a lovely jersey Ponte Roma fabric. I bunged it in the wash and planned to get cracking the next day.
I do so love that I only need 3 pattern pieces when using the jersey fabric. I thought this was going to be a very quick make, as I wouldn’t have to finish the seams but as the way this fabric is woven/knitted I felt it would be vulnerable to fraying and therefore decided to zig zag the seams.
This little project also took a bit more thinking about and planning than I had anticipated. I wasn’t too sure it would actually work…
Quite pleased with how the side seams matched up. Not planned at all.
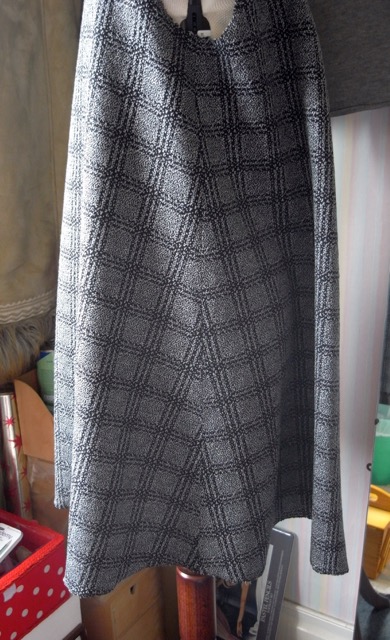
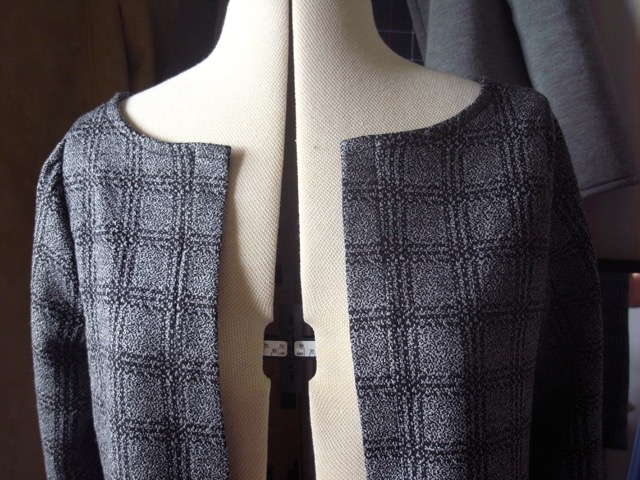
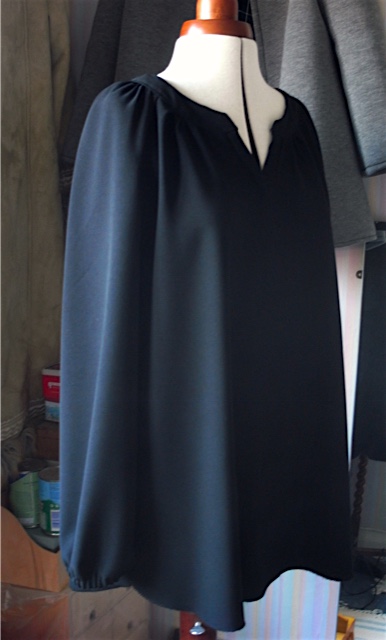
Once I’d put it together, I liked it but couldn’t help but feel something was not quite right!
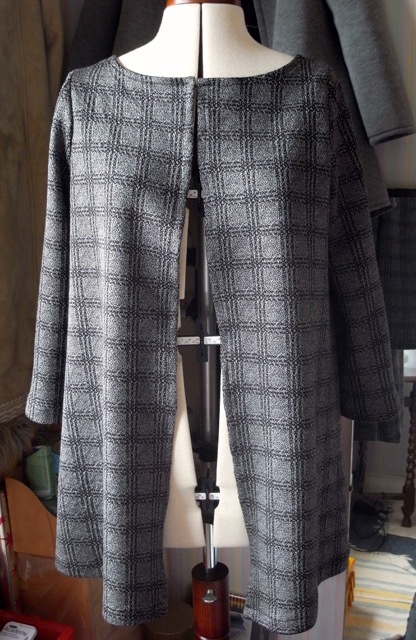
I couldn’t get away from the feeling that the opening edges were wobbly and flimsy looking. I had a go at folding the edges under another 3cm and pinned in place. Once I was I was happy with it like that I sewed into place and felt much better about it. Above is the before and below is the after.
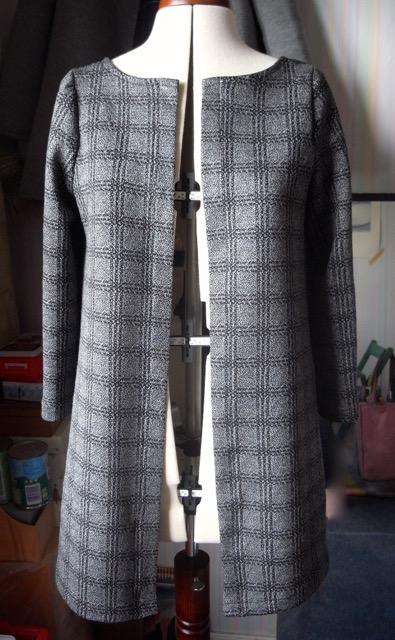
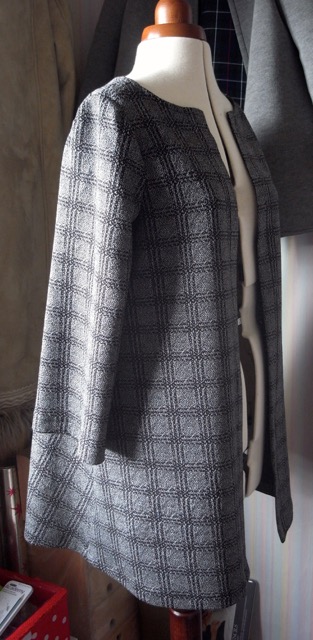
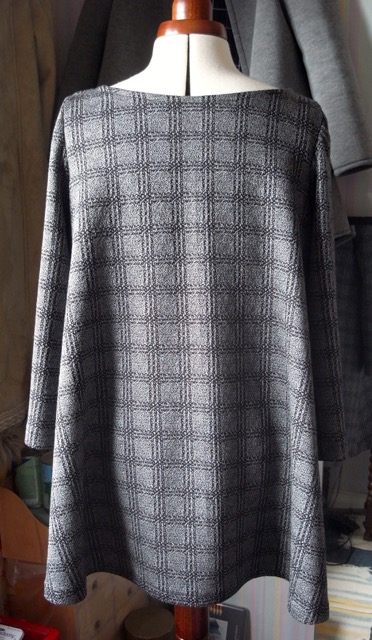
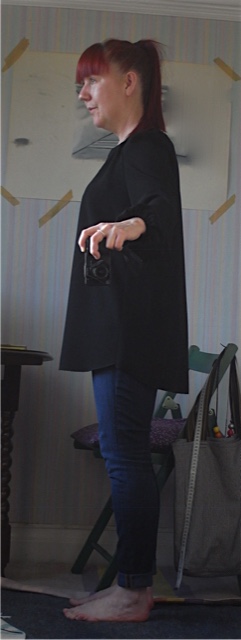
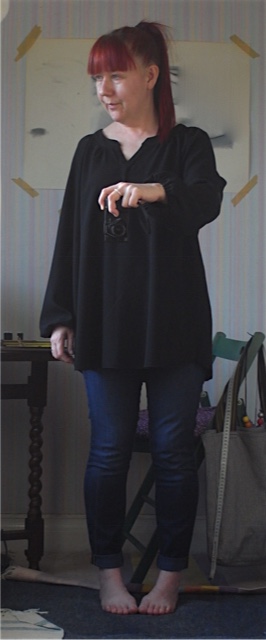
Its got a bit of a swing coat vibe to it!
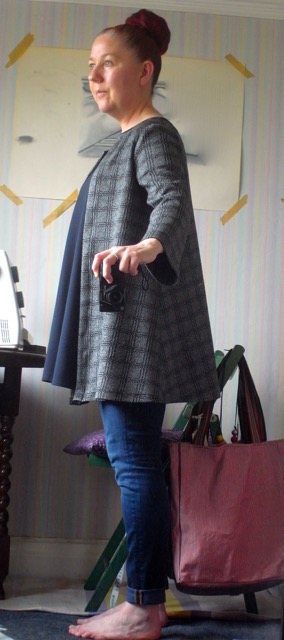
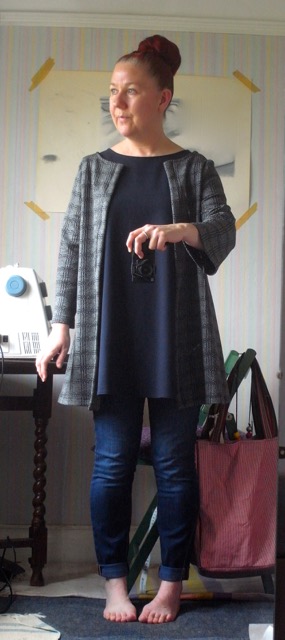
Husband says its very me! I’m really happy with it and I love that I am able to make things that are very me.
April 13th, 2017
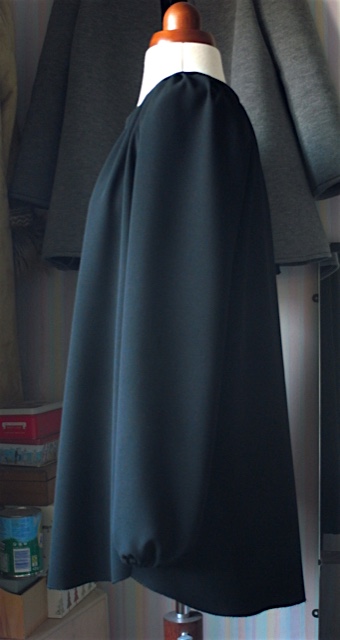
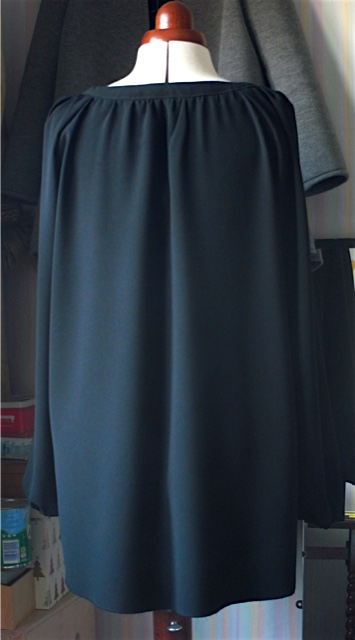
I wanted to make another practice run for the dress I want to make for my Nieces wedding, but as it turned out I didn’t have enough fabric for a dress, so decided to make a top instead. I was wanting to check out how easy or tricky the neckline might be in this fabric. So I decided I had nothing to lose.
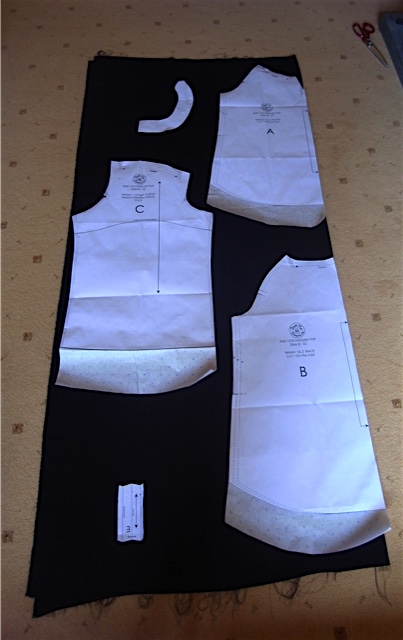
The thing about crepe viscose fabric is that it frays like a bastard! So I decided to zigzag all the edges before putting it together to take the worry of that away and it really did help. I shall definitely be doing that again.
As to be expected the collar and plackets were quite tricky but taking my time and using a million pins turned out okay. Hemming it turned out to be trickier than I expected it to, so I ended up leaving it un-hemmed And it looks fine.
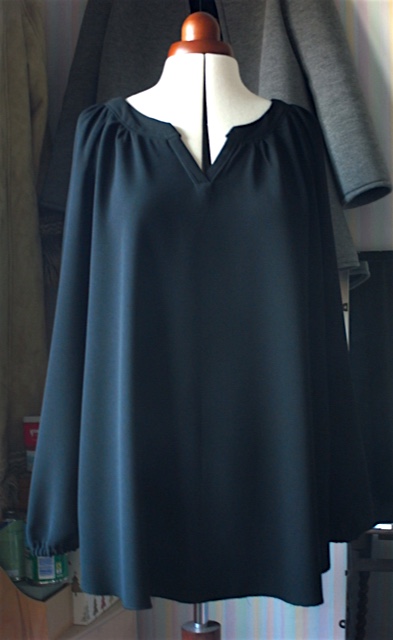
I feel fairly confident about making the dress version now. So watch this space…
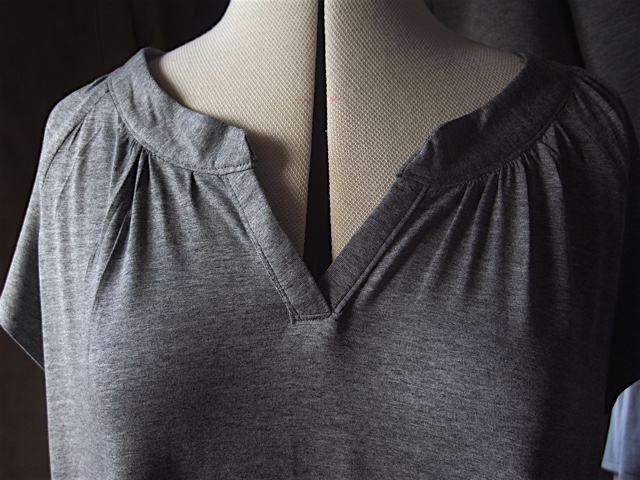
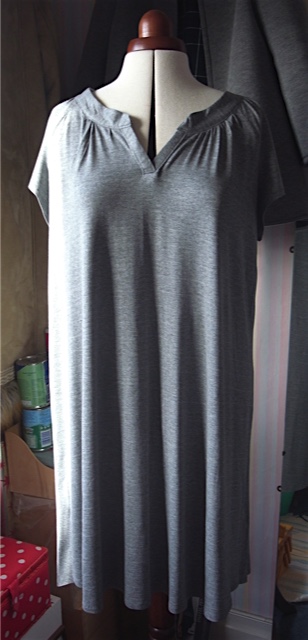
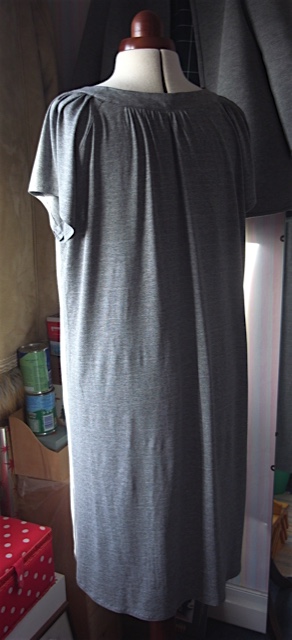
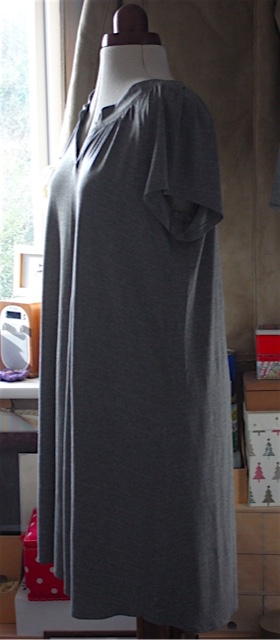
March 20th, 2017
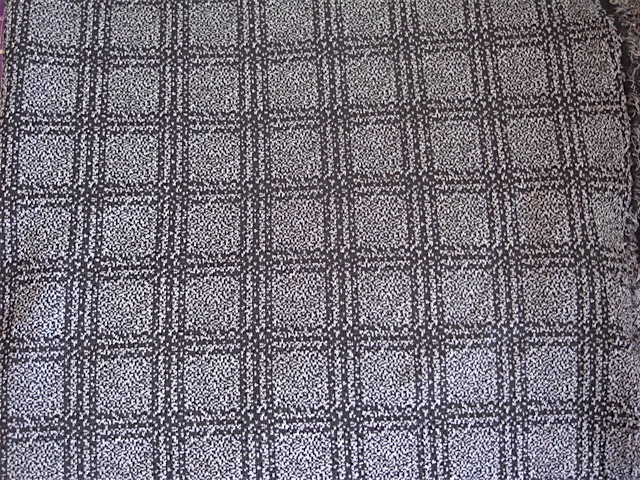
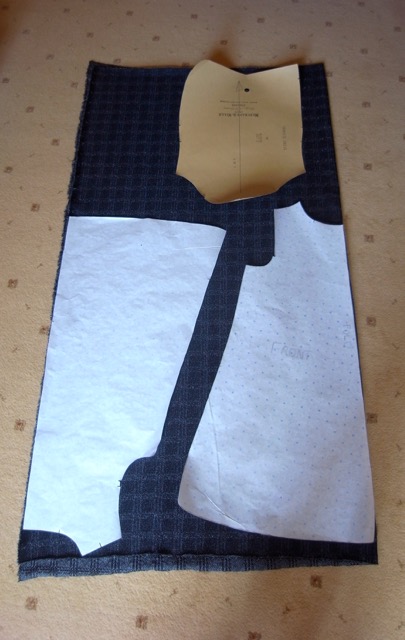
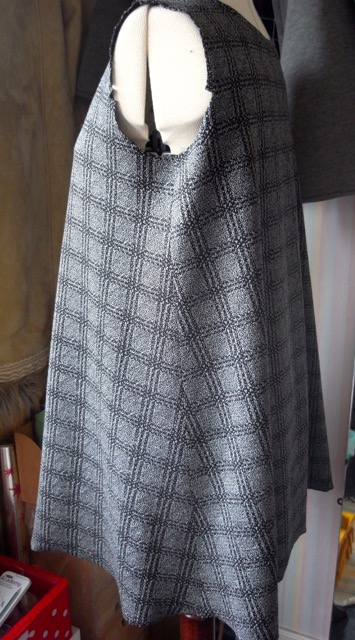
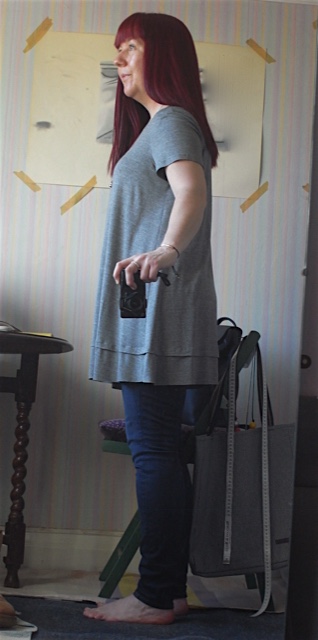
A grey jersey Trapeze with hem detail.

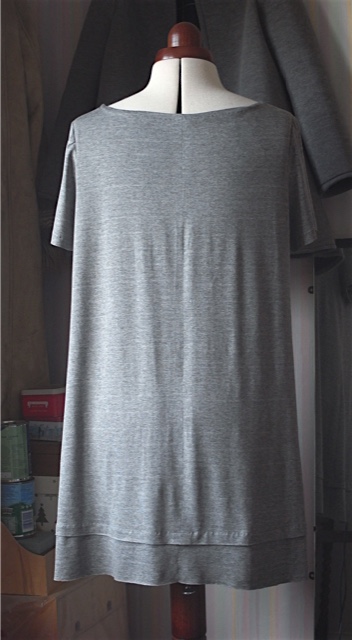
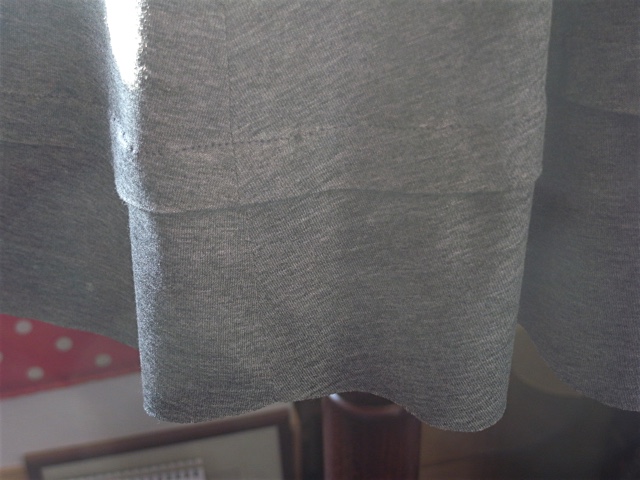
I was going to be turning up the hem by about 5 inches, but after I’d stitched the hem in place and before I’d cut off the excess fabric I looked at it and rather liked the effect, so I kept it.

March 12th, 2017
jersey dress.
So I’m thinking about making an Imogen dress for my Nieces wedding in June from some gorgeous Crepe fabric I got for my Birthday from my Husband. I decided I ought to make a trial run, so chose this lovely jersey fabric I had in my stash from last year.
This was a very fine jersey fabric and as such was quite tricky to work with. It kept wanting to slide off the table and I had to use millions ( I do not exaggerate) of pins to get it to stay in place, I thought this would be good practice as the crepe fabric I want to use will be quite tricky too.
It went quite well all in all, except for one side of the collar that doesn’t lie quite flat enough. I can live with it though.
The fabric drapes beautifully. However I wasn’t too sure I liked this pattern as a dress and very nearly turned it into a top this weekend, but I tried it on again with my trusty Birkenstocks and decided it would be perfect for those summer days when its too hot to wear too much! And if I do make a dress for the wedding it will be a tad shorter. I haven’t quite decided yet if I want to make the fabric into a dress or if I want to get a couple of tops out of it instead.
March 5th, 2017
Made a big baby bag for a work colleague to give to her friend.
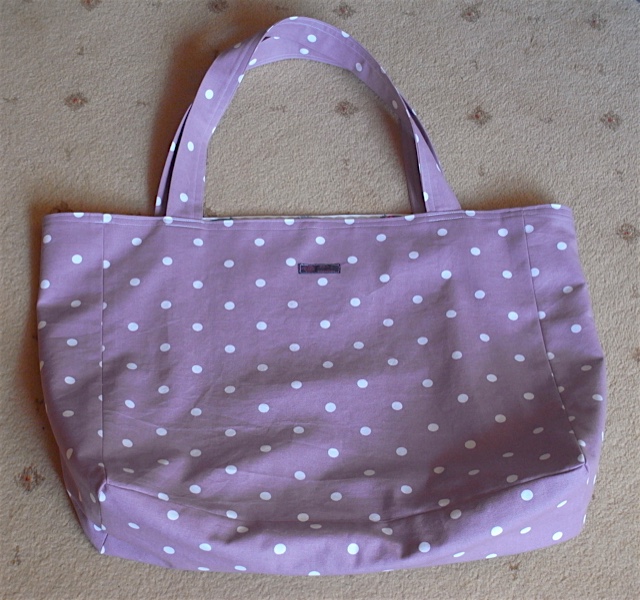
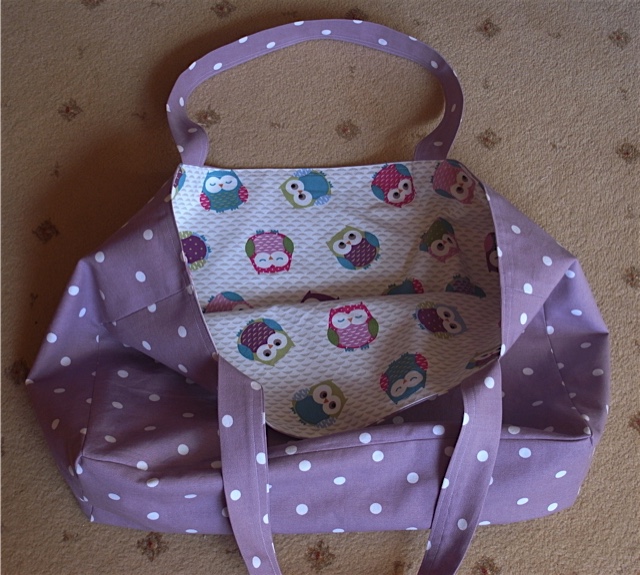
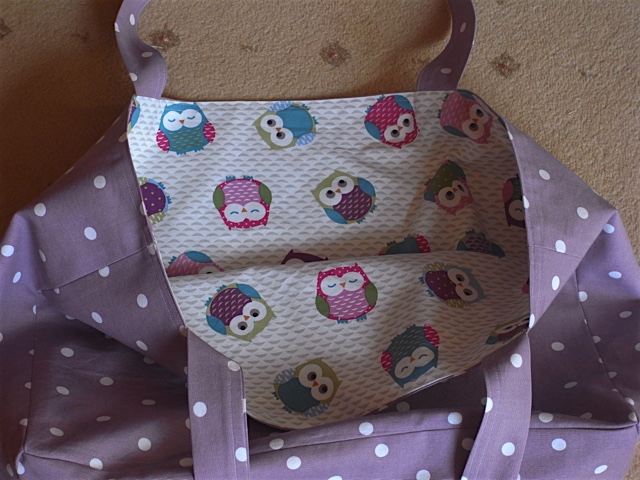
I think the inside contrasts nicely with the outside. Had feed back and the recipient loved it!
February 3rd, 2017
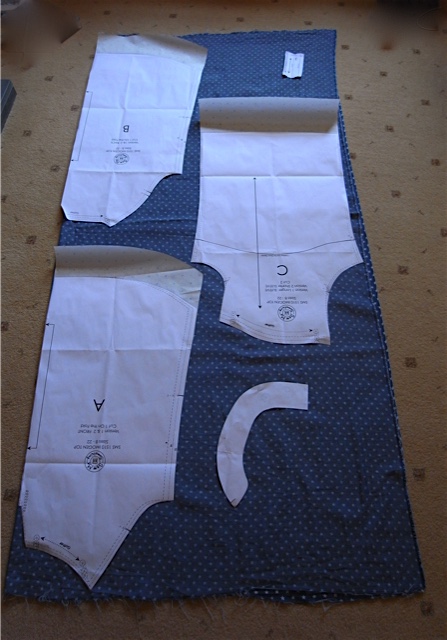
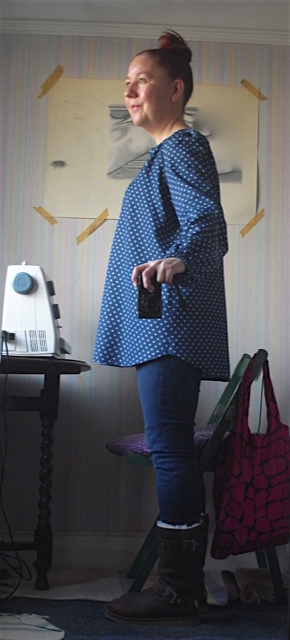
Last September I bought some gorgeous Japanese double gauze cotton from Merchant and Mills. It was quite expensive and I wasn’t really supposed to be buying fabric for me at that time, but it was just too divine to pass up. I bought 1.5metres, I can’t remember exactly how much it was a metre but it was around £22, so it cost me over £30, I haven’t bought fabric that pricey for a while and remembered why when trying to decide what to use it for. Needless to say it sat in my stash for a good few months. And then Imogen came along and I knew what I must do…
Not too sure how wide the fabric was but it obviously wasn’t as wide as the star fabric I’d previously made Imogen out of and it was really really tight getting the pattern pieces to fit. I had to compromise and use the original shorter sleeve pattern piece otherwise it just wasn’t going to work. As it was I literally had mm to spare between pattern pieces, had to be really economical with my cutting out.
At the moment I tend to make this pattern over 3 days, as I find it quite demanding in places. I usually cut out the fabric and attach the interlining to the relevant pieces, and then if I’ve started early enough in the day I might do the zigzagging of the neck edges and bottom edges of both bodice pieces and sleeves followed by the gather stitches. I will then start again afresh the next day.
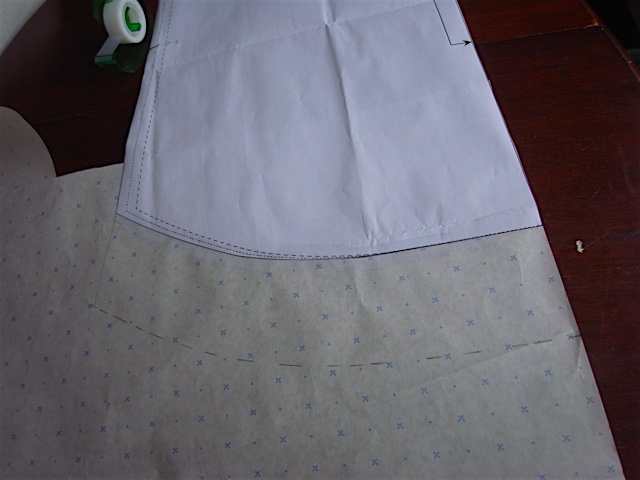
There will now follow some pictures that I hope will help with the inserting of the placket.
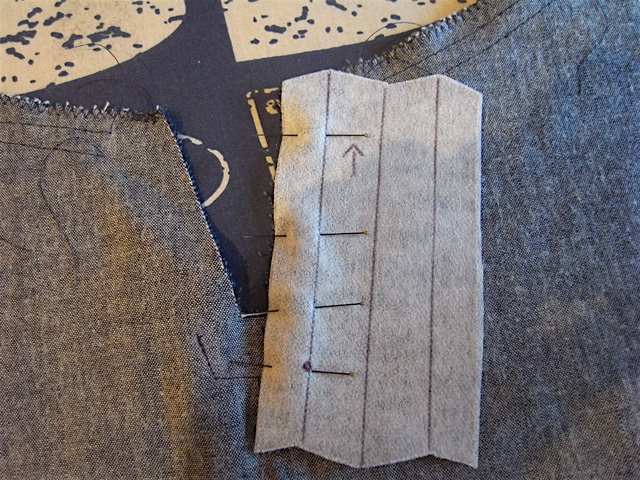
Make sure your pieces overlap before sewing.
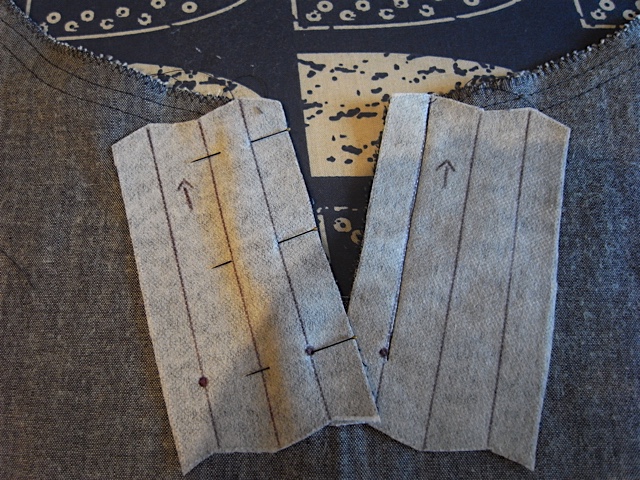
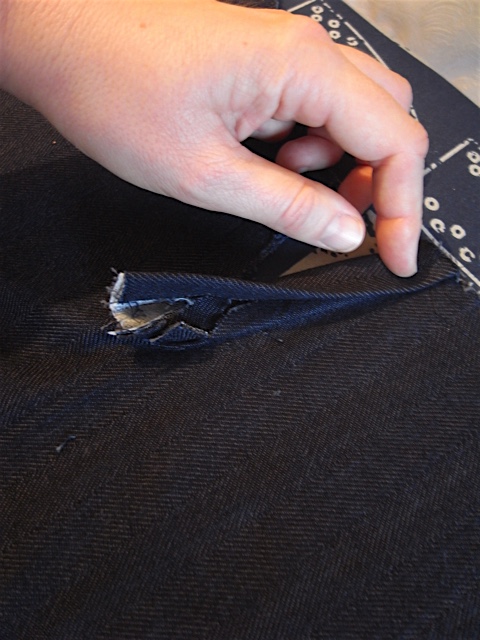
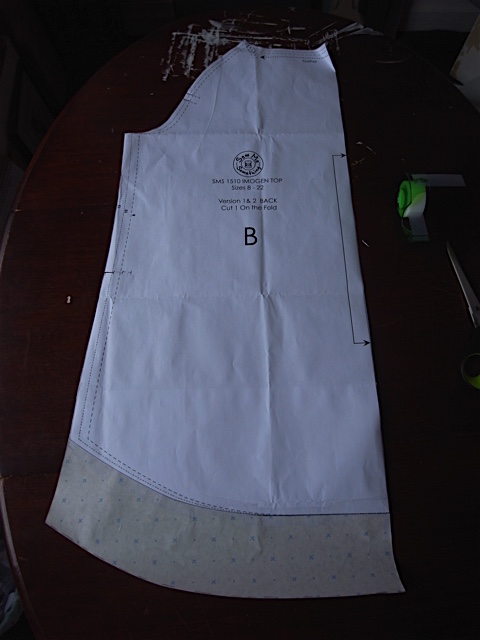
The pictures below are where it gets tricky. And I have to say it was particularly tricky with this fabric as it got pretty thick in places and I really wasn’t sure if I was going to get it through the sewing machine!

I honestly thought at this point that it wasn’t to work and that I’d made a major waste of this beautiful fabric! However it would seem I don’t like to give up too easily, especially when I love the fabric. So I persevered…
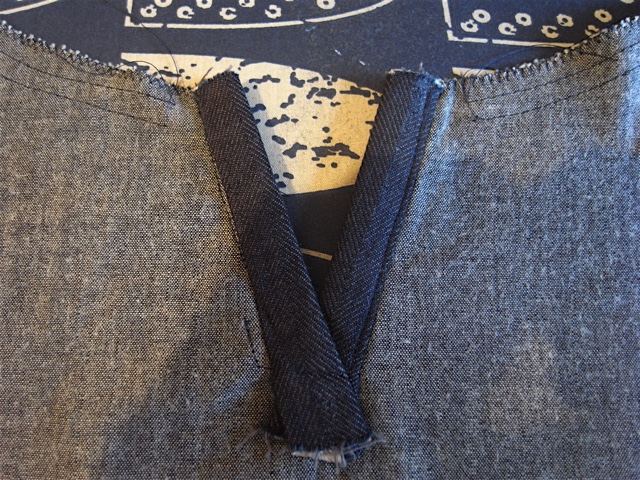
Look at that beautiful placket. I am so proud of this bit and I can’t believe it actually worked out!
After the plackets done, you then hem the back and the front pieces.
After that you attach the front and back at the side seams. And then comes the sleeves. This was also a little tricky as the fabric was so thick after turning up the sleeve hem twice that it was quite hard pushing the elastic through and took me way longer than previously. I left it after that and picked it up again the next day. Have to say if I didn’t have housework and washing and cooking to do I’d probably be able to make it in a day.
After making the sleeves comes the attaching of the sleeves. I’m always a little anxious when I put in the sleeves, have had many a sleeve insertion go awry. Happily this went smoothly.
Next up attaching the collar, I quite enjoy this bit as I love the gathering and getting the body to fit the collar. Again though it would prove quite difficult with this fabric due to its thickness. The gather stitches didn’t want to run smoothly through the fabric and I had to pull quite hard. I used lots and lots of pins. And I can’t recommend the entomology pins from Merchant and Mills highly enough. I leave them in the fabric as I sew and sew over them, they are fine enough to get it away with it. Have had the machine needle hit one a few times, usually makes me jump but haven’t had any major problems yet. Obviously I’m not recommending it as such but just saying it works for me.
Below is the outer collar piece
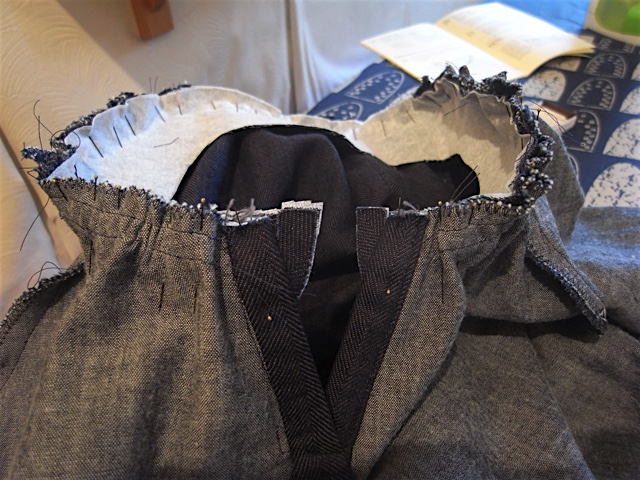
And below here is the inner collar piece being attached to the outer piece.
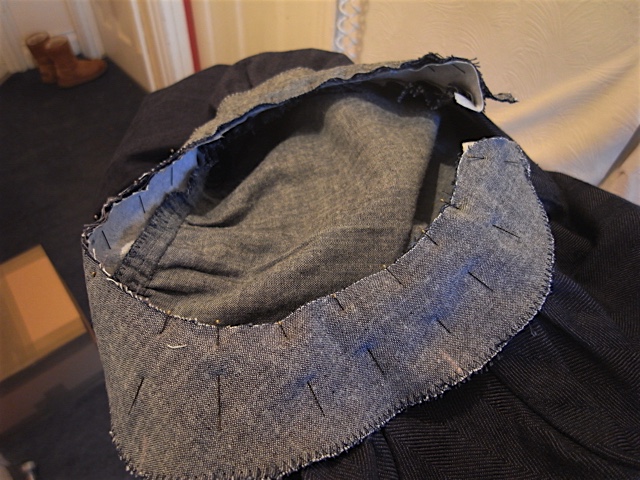
After both collar pieces have been attached comes the top stitching at the base of the collar. Now I did have trouble with the opening parts of the collar, I simple could not get it through the machine. I even tried hitting them with a hammer to see if that would help. It flattened them out a bit but not enough, so I just had to leave them unstitched at those two points. Doesn’t seem to be a problem though. Phew!
You can just about see in the picture above where I’ve had to leave it unstitched. Oh and the top stitch did go a little wonky in places, but I can live with it.
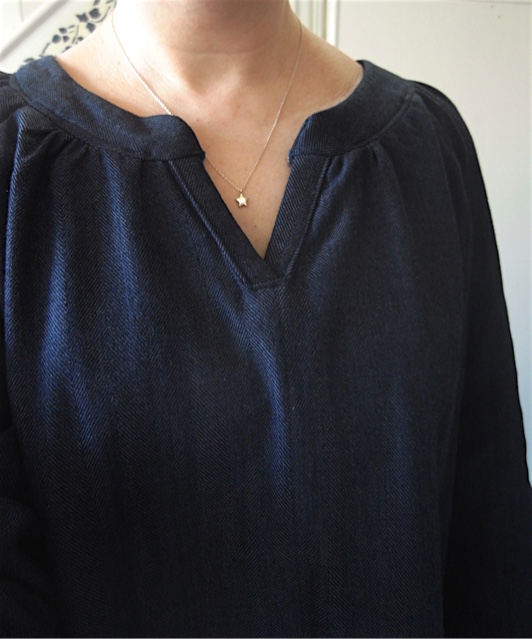
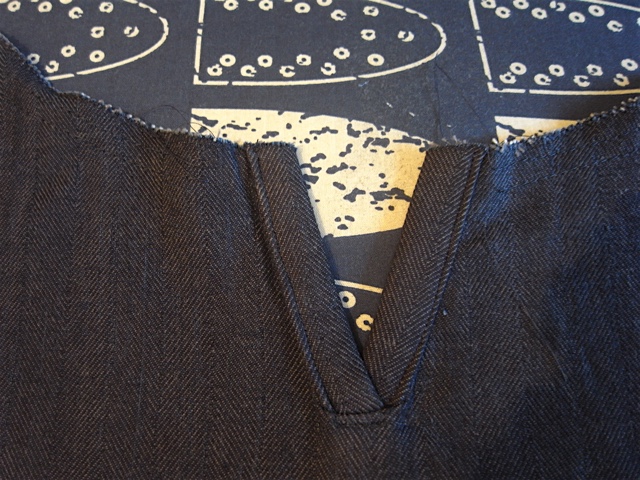
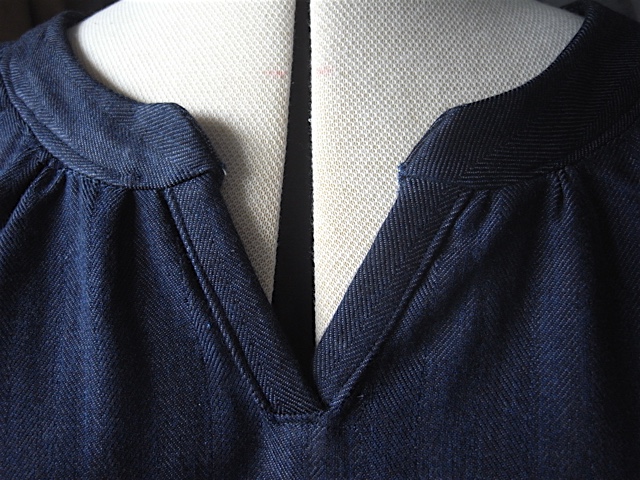
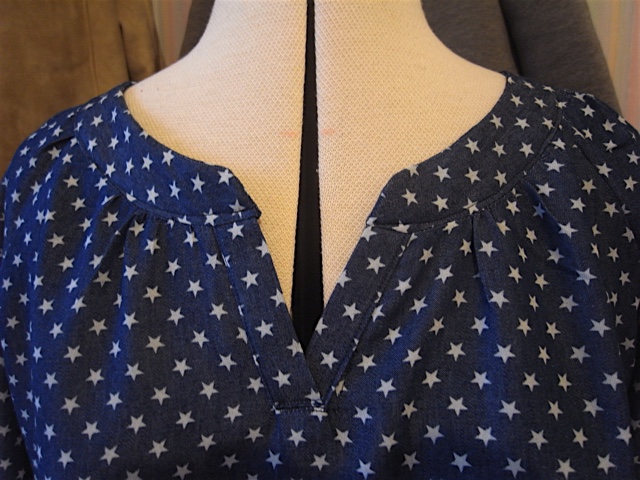
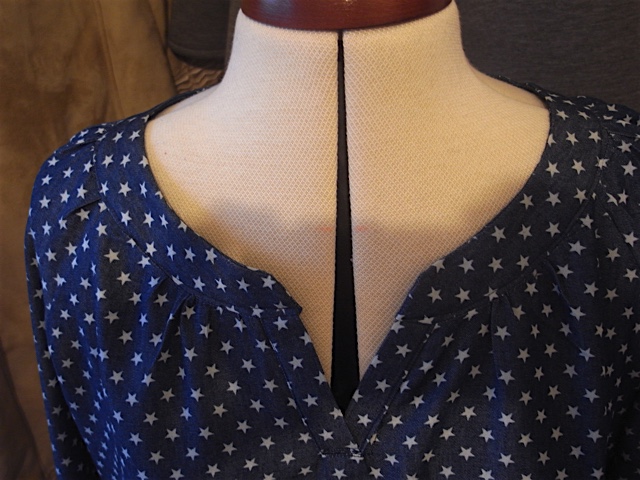
I really do love the neckline on this top.
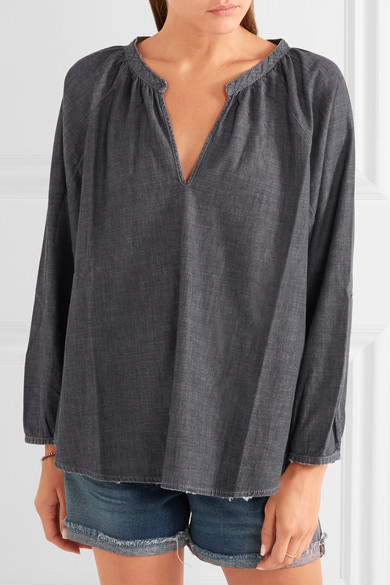
It reminds me of this top, which is designer and quite expensive, so I am so happy to be able to make it for myself. And I think it looks just as good if not better if I may say so myself! I like the fact that the Imogen doesn’t have such a low cut neckline.


With the thickness of this fabric its a little more structured than the previous 3, but I like it. I think it worked quite well. Its pretty warm too.
So all in all I am extremely happy that I’ve finally used the fabric and happy that I ended up making the right choice. Although I reckon it would have made an equally lovely Trapeze top.
And I would like to say that when I posted this on Twitter shortly after finishing it, Jules Fallon of “sew me something” said and I quote “@essjcreative Yes, I thought that when I zoomed in. But it was worth it, this has to be one of my most favourite Imogens of all time!” How flipping happy am I! :0)
January 27th, 2017
I’ve been given some gorgeous fabric from a colleague/friend who recently came back from her trip home to Tanzania. I am incredibly touched that she thought of me whilst so far away.
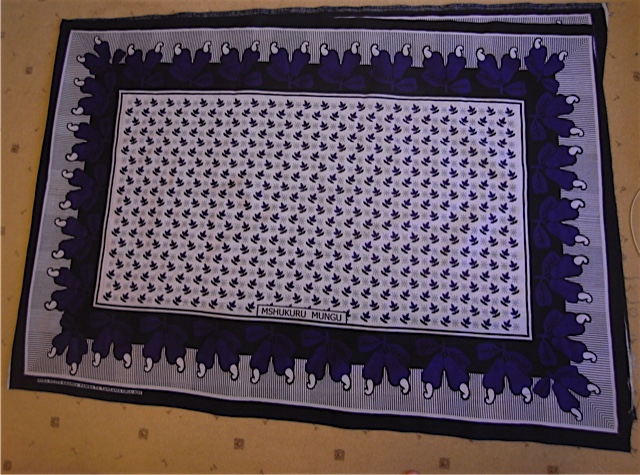
The fabric is printed in panels and usually sold as two panels. The two panels together measure nearly 3 metres and they are 1metre wide. You can find lots of examples on google. Whilst usually used for traditional dress in Africa I will be using mine for probably an Imogen top! I reckon I can make quite an interesting one using the border print for certain pieces of the pattern.
I believe the words in the middle of the panel mean “Thank God” in Swahili.
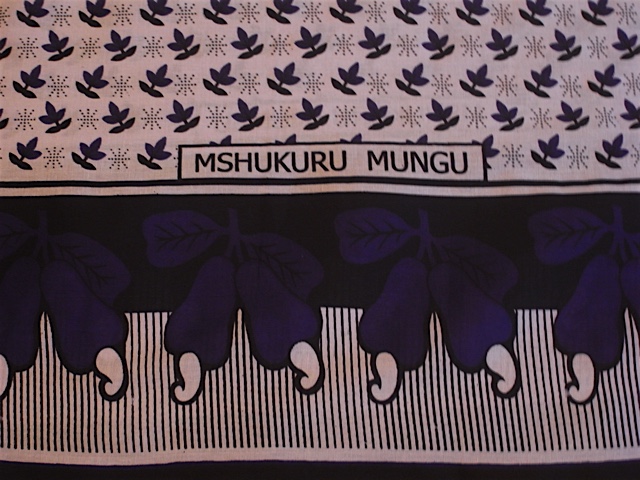
I can’t wait to get cracking on making this into something lovely. Thank you Mia, rafiki yangu. Xx
January 20th, 2017
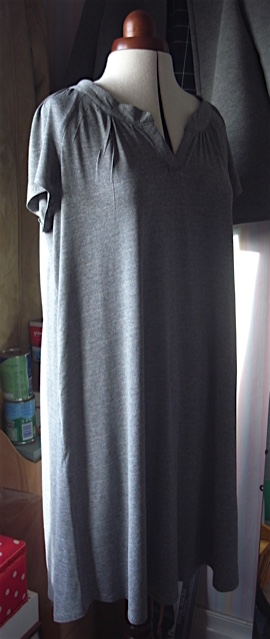
Here comes the third Imogen. I think we can safely say this will be the year of the Imogen!
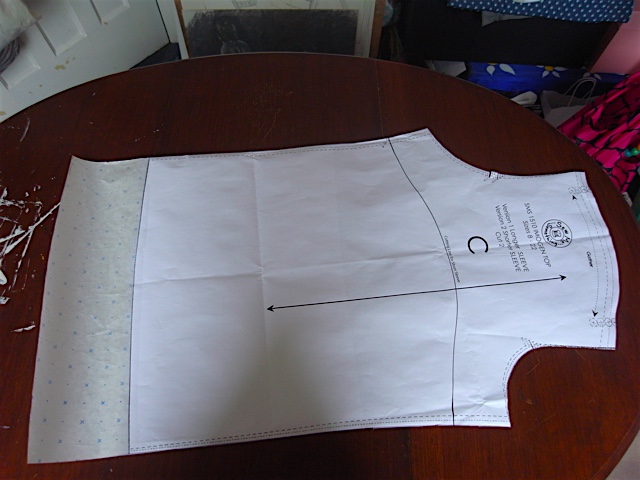
Using my newly adapted longer pattern pieces.
I’ve used the same fabric because I like it very much. And it would seem third ones a charm. Finally got the hang of the placket and this one looks really good.
The collar edges are getting better too.
Another shot of the neckline, just cos I’m so pleased with it.
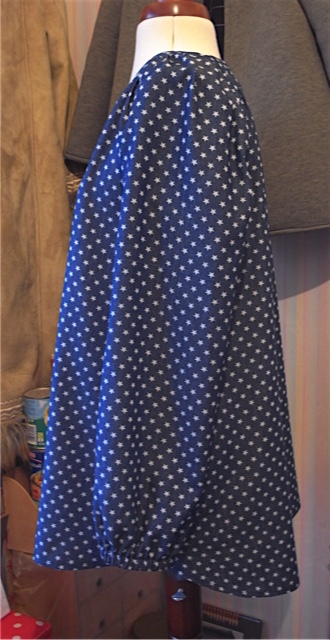
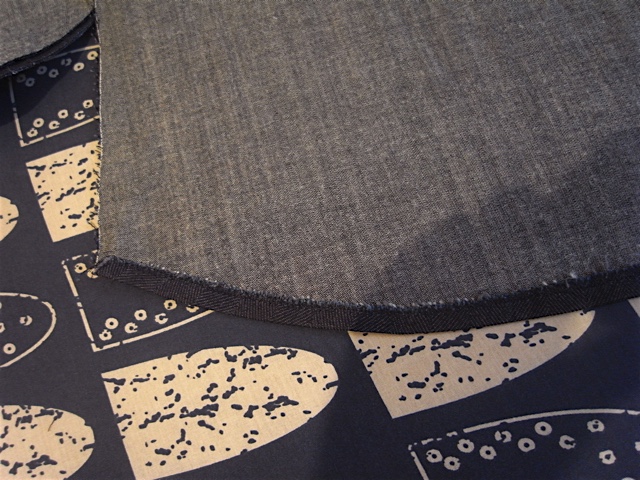
I do love that curved hem too.

January 13th, 2017
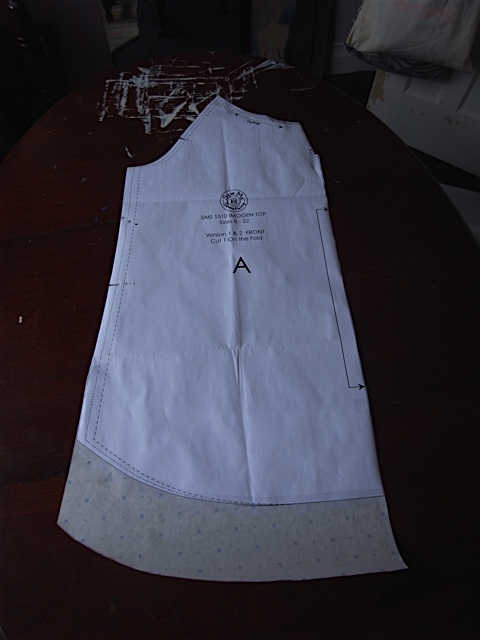
The last Imogen top I made if you remember I made about 8cm longer in the bodice and 11cm longer in the sleeves. I really really like those lengths on me so I’ve made an addition to the paper pattern to make it easier for me next time I make one (which will be soon).
Recent Posts
- More sleeve loveliness…
- Its all about the sleeves…
- Could not decide…
- Couple of alterations…
- Bags for a pandemic…
Recent Comments
- on Merchant & Mills, Jack Tar bag…
- on Merchant & Mills, Jack Tar bag…
- on Merchant & Mills, Jack Tar bag…
- on Merchant & Mills, Jack Tar bag…
- on Another successful pattern hack…
Archives
- November 2020
- October 2020
- July 2020
- April 2020
- March 2020
- February 2020
- December 2019
- October 2019
- August 2019
- June 2019
- May 2019
- April 2019
- February 2019
- December 2018
- November 2018
- September 2018
- August 2018
- July 2018
- June 2018
- May 2018
- April 2018
- March 2018
- February 2018
- January 2018
- December 2017
- November 2017
- October 2017
- September 2017
- August 2017
- July 2017
- June 2017
- May 2017
- April 2017
- March 2017
- February 2017
- January 2017
- December 2016
- November 2016
- October 2016
- September 2016
- August 2016
- July 2016
- June 2016
- May 2016
- April 2016
- March 2016
- February 2016
- January 2016
- December 2015
- November 2015
- October 2015
- September 2015
- August 2015
- July 2015
- June 2015
- May 2015
- April 2015
- March 2015
- February 2015
- January 2015
- December 2014
- November 2014
- May 2014
- April 2014
- March 2014
- February 2014