May 20th, 2015
How much equipment I’ve gathered over the last couple of years. Here’s a little run down of my most used items.
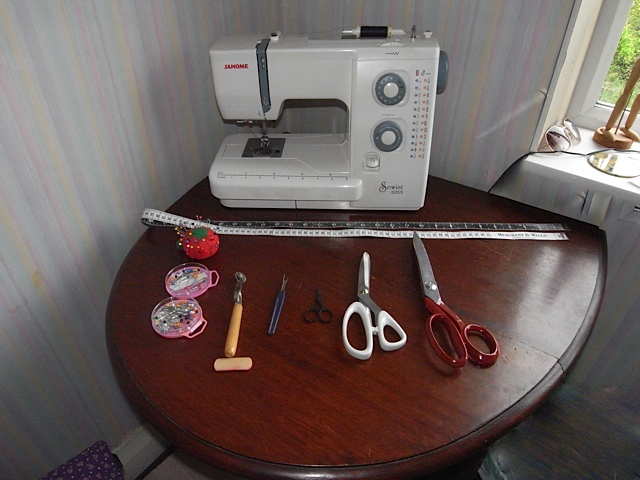
Clockwise from the top. Janome 525s sewing machine, Obviously need a sewing machine. Tape measure, shears of which I have two pairs. The red pair are from Merchant & Mills , the grey pair, I can’t remember the make but I know they weren’t cheap, but for some reason they don’t cut nicely. They seem to have a nick in one of the blades and therefore I can’t do a nice long cut in any fabric as they stick. I think they were about £20ish, but the M&M pair were over £50 and well worth the money. Its so worth spending the extra pounds if you can afford too. I had some birthday money which is how I justified it. Then there’s the tiny black scissors, I love these. Endlessly useful and sit on my sewing machine to snip threads whenever I need them to, and you can get really close to the fabric so you can snip threads nice and close.
It can be useful to have multiples of things. I have my ironing board down stairs so am often up and down stairs whilst making things and I find having a pair of scissors by the ironing board useful for snipping threads that I’ve forgotten to snip whilst upstairs.
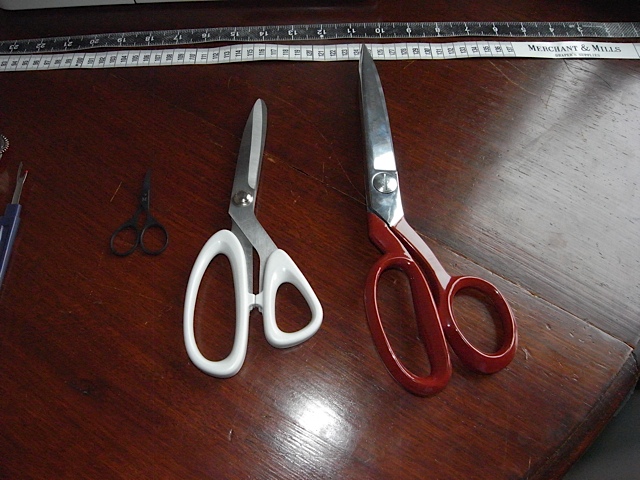
close up of the scissors/shears.
Then there’s the seam ripper, or as I prefer to call it thread unpicker, I sometimes don’t feel like I’ve done a proper job till I’ve unpicked at least one seam. Tailors chalk, and this funny little gadget, can’t remember what its called, but you use it to create perforations in the fabric, with coloured carbon paper underneath to mark out darts and suchlike. Pins, I love the coloured plastic head ones. You can never have too many pins. And of course a pin cushion.
I never ever thought I’d own so many ironing accessories, never ever thought I’d enjoy ironing so much. I call it creative ironing.
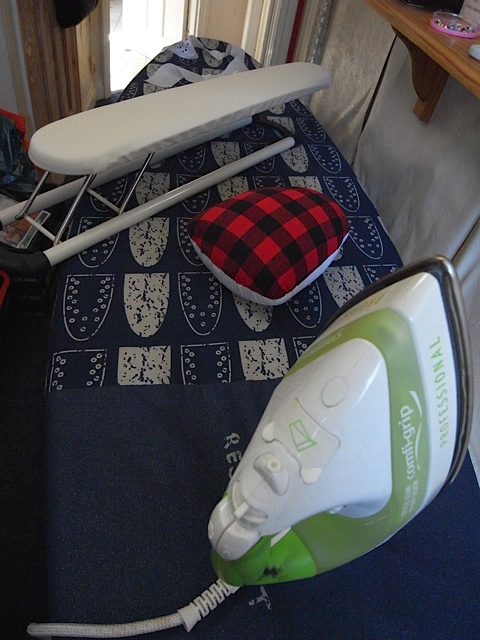
Sleeve board, who knew you could get a little ironing board just for your sleeves. Love this though. Really makes a difference to your garments. Tailors ham, which I’ve yet to learn how to use properly. And the iron, this ones OK but I think I need a new one. The ironing board that they are all standing on was new last year. My old ironing board was about 100 years old and was really tired and sad. But until I started this sewing lark I didn’t iron anything if I could avoid it. My new one is huge compared to the old one. And often reminds me of a surf board. Its really long and quite wide too. And has lots of different height settings.
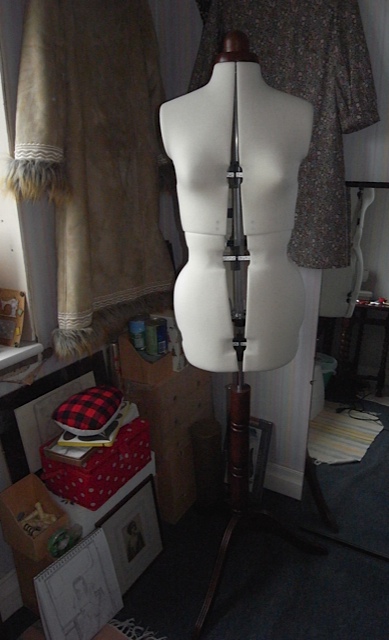
And then last but not least is Gertie. So so useful, I really urge you if you are thinking about a dressmakers dummy to get one. Though it is a little scary when you see what your figure apparently looks like! Especially from the side.
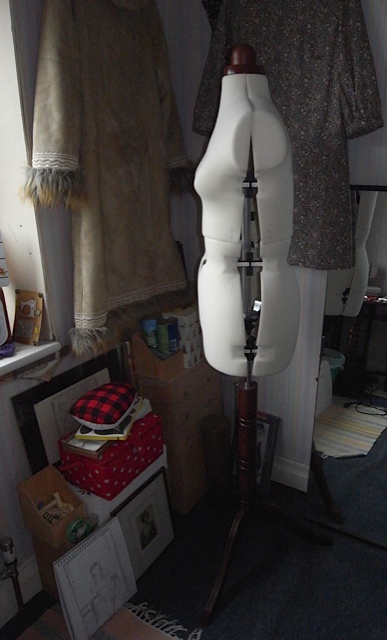
Weird shape or what?
If you’re new to sewing I hope this has been a little bit useful. When I first started sewing I had no idea how much equipment I would need. Thankfully not all of it is expensive. The biggest outlay should most likely be your sewing machine.
April 15th, 2015
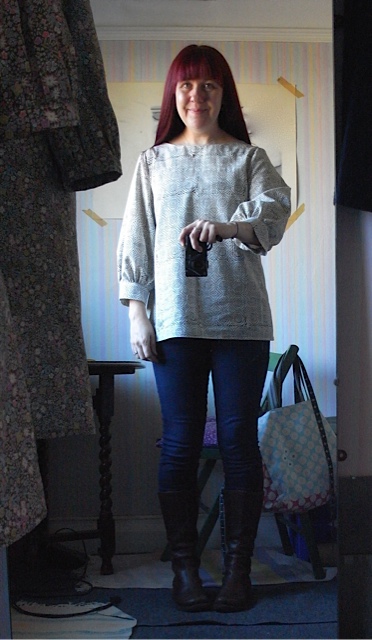
When I bought the lovely white eyelet fabric from Fabric Godmother I also bought 2m of this
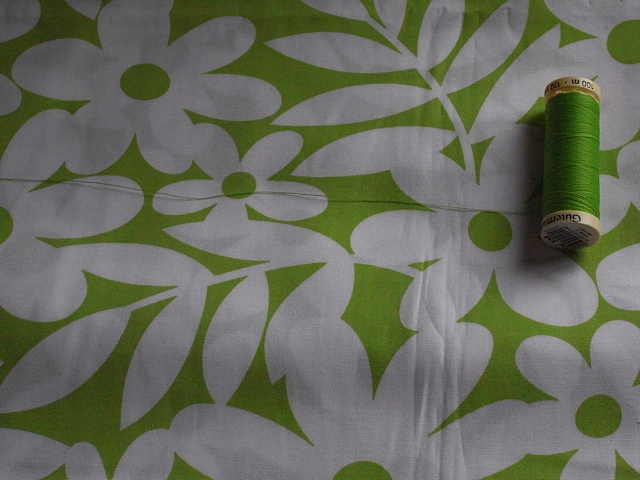
and I was very happy to get some thread to match.
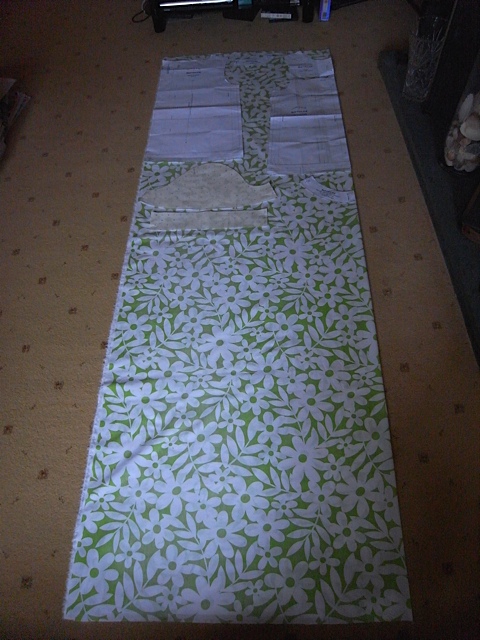
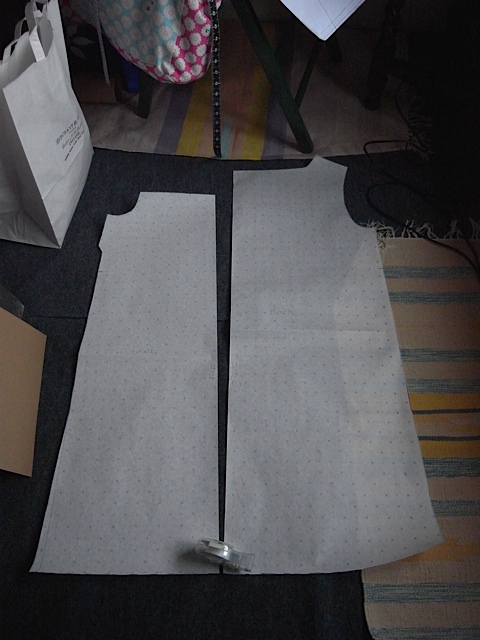
Pattern pieces laid out on the fabric. again I will get 2 tops out of this.

Another view. Can see the pattern pieces better.
Looks a bit like an hawaiian shirt at the moment!
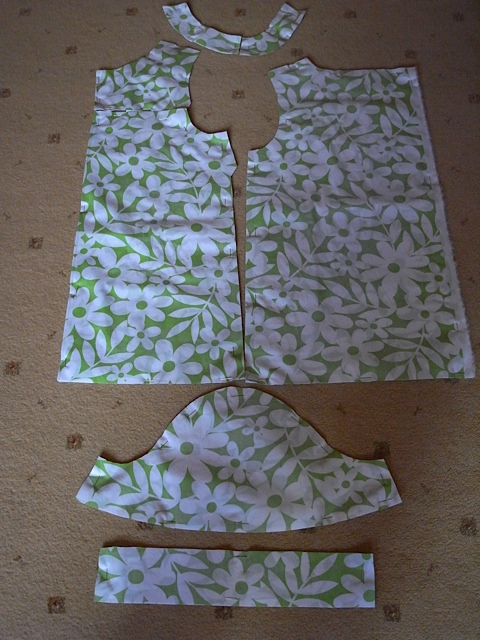
I wouldn’t normally wear such a bright shade of green, but it’s diluted quite a bit by all the white flowers, so it doesn’t appear quite so vibrant. I’m not too sure about the cotton Poplin yet. Its quite a crisp fabric and at the moment feels a bit stiff, I’m hoping it will soften with washing and wearing. Otherwise its a gorgeous fabric and pretty good value for money, I’ve got two lovely tops for the price of £28, which lets be honest, you can’t really get a decent top on the high street now a days for that.
A very spring/summery top.
I’m also very pleased that this blouse only took me 6.5 hours to make. That does not include the cutting out of the fabric. I’m really happy as the first blouse I made back in January took me about 12.5 hours (not including the cutting) so i’ve come down to just under half the time. And although I am happy to take it a little slower now a days, I am also happy to know that I can make one of these blouses in a day.
April 10th, 2015
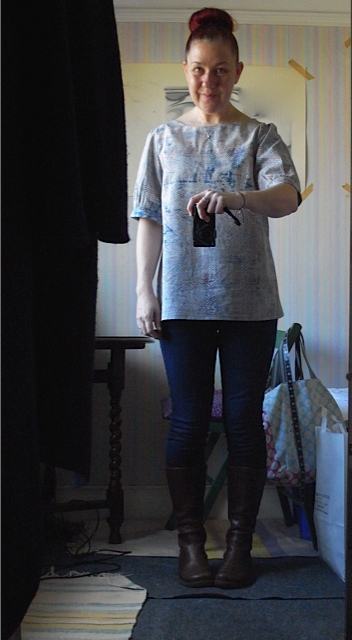
I now have two of these white blouses. And I love them.
I am a bit sad, I nearly always used to buy two, sometimes three of something if I really liked it. So it comes as no surprise to me and those that know me that I make more than one of something if I really like it. I now have seven variations on the Mathilde blouse (Sarah style) SEVEN! FFS! What am I like? But you know what, I don’t care. I really don’t. This style of top suits me to a T, and is what my wardrobe has been waiting for. And this has basically been my reason for starting to make my own clothes. So I can have exactly what I want, when I want it. Wow that makes me sound slightly nutty and very spoiled. But in my mind its just good sense. If you find something that you love and it suits your style then why not have it in a million different fabrics. There are so many gorgeous fabrics out there and I enjoy making these tops in a different fabric each time and seeing how they turn out. And of course occasionally I’ll make it in the same fabric, simply because I love it and I have enough fabric for two. So there you have it
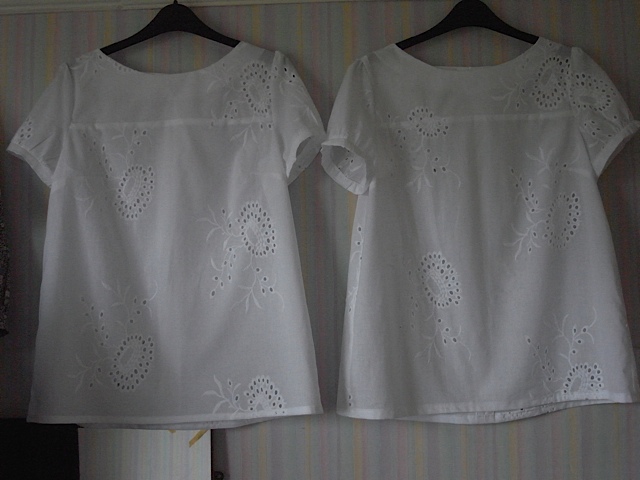
Don’t they look pretty.
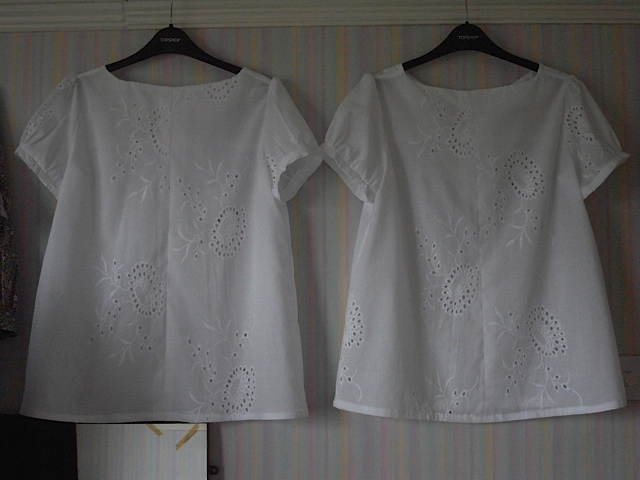
The backs. So very similar, but ever so slightly different.
I really love how it looks with jeans.

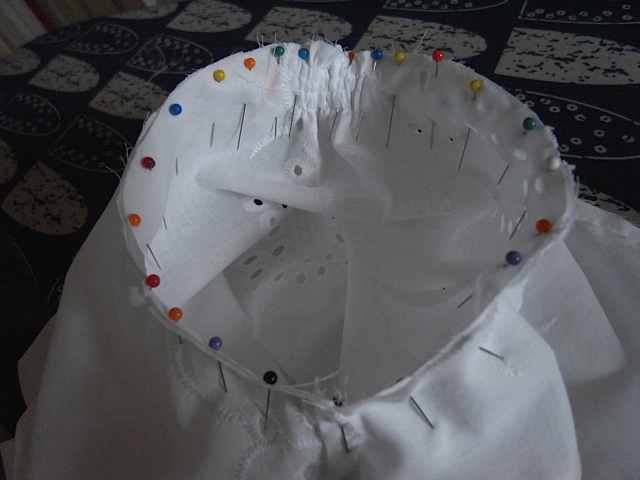
I would like to share this picture of the pins in the sleeve head, I just love how the coloured pins look against the white. Thats all.
April 6th, 2015
Just want to share the changes I’ve made to the Mathilde pattern. It no longer really resembles the Mathilde top as Tilly intended it. I’ve turned it into a dress and a top that suits me and my sewing style, both of which are simple!
The dress pieces

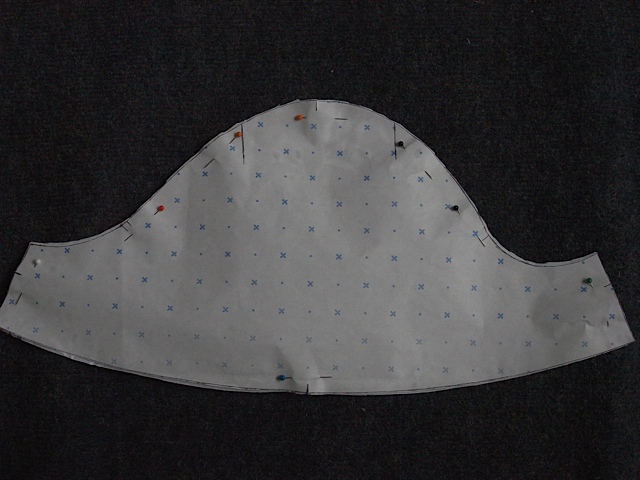
The different sleeve lengths.
close up of the shortest sleeve.
all I did with the sleeves was trace around the original and then move the original up the sleeve to the desired length and then trace along the bottom of it to keep the curve. Works really well. And with the dress pieces, again traced around the original pieces and then carefully added the extra length remembering to keep the curve at the bottom of the pieces. as there is a slight curve to the original bodice pieces. Hope that makes sense.
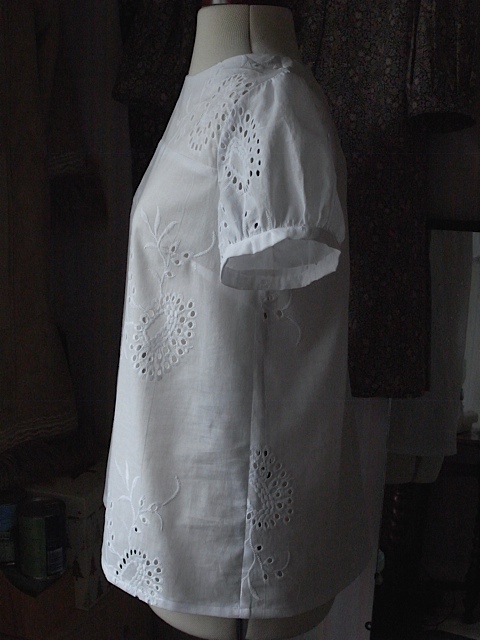
April 2nd, 2015
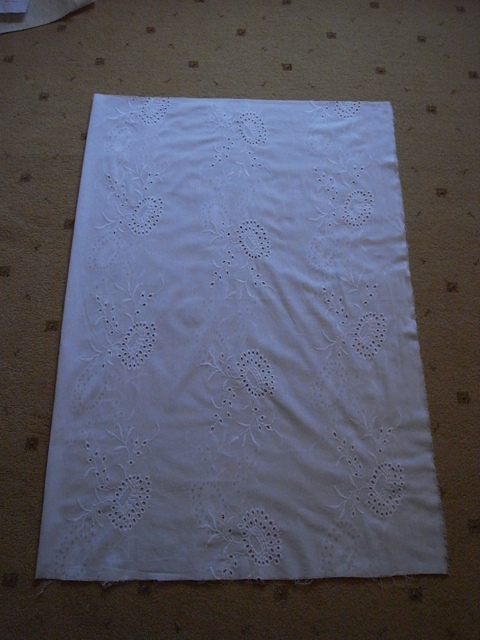
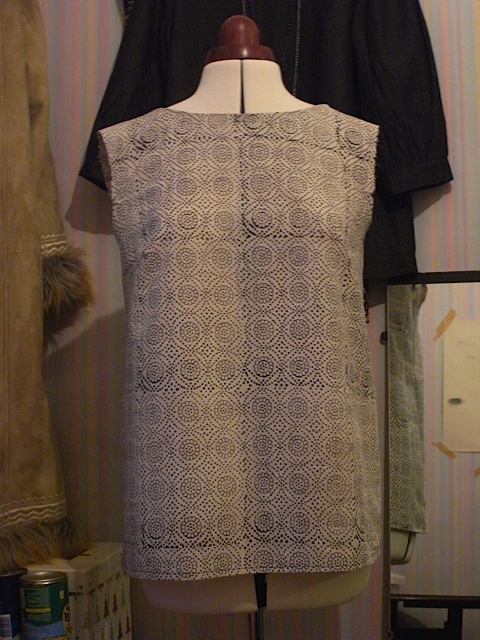
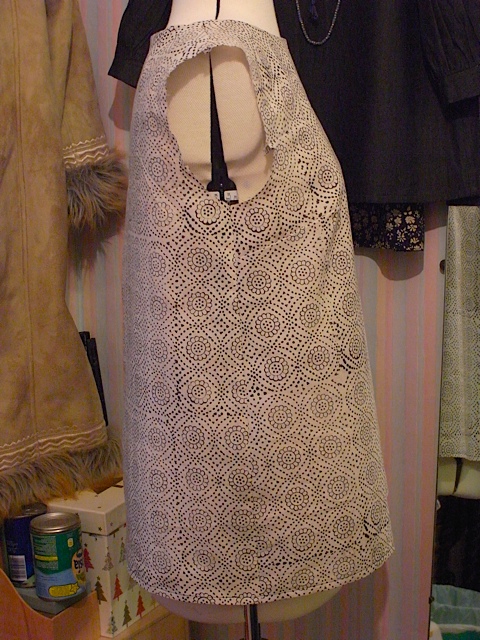
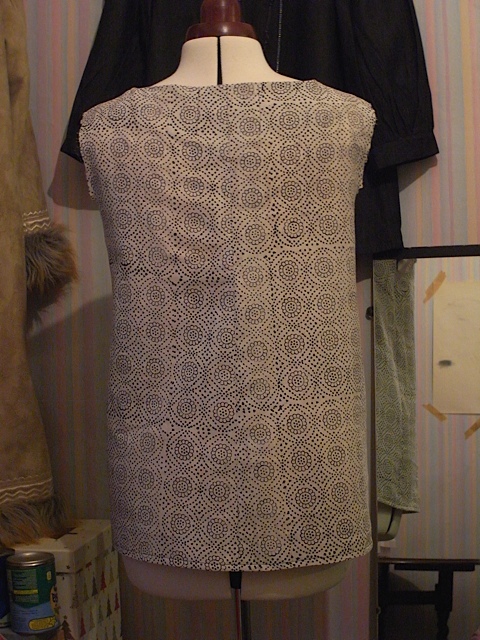
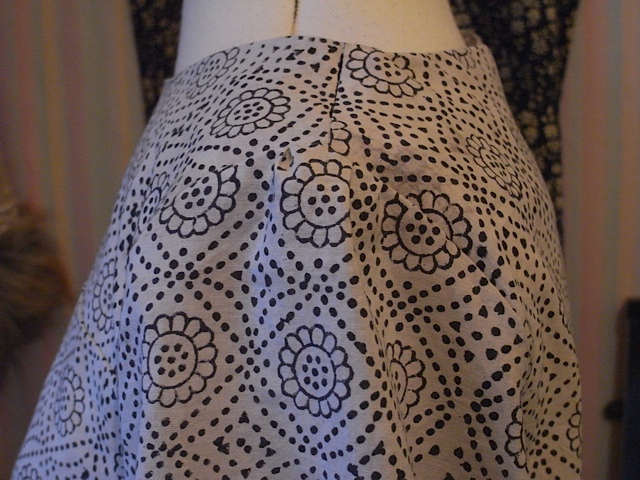
For years now I’ve been on the look out for the perfect white cotton blouse to go with jeans. I’ve bought various versions of OK ones but have never found the perfect one. Whilst browsing “Fabric Godmother” I found this beautiful white eyelet cotton lawn fabric. Now I’m not always keen to buy fabric on-line as I usually prefer to be able to see it & touch it before I buy, but occasionally something pops up that just shouts “BUY ME” and this beautiful white fabric did just that. Initially I was thinking maybe a dress or perhaps another 3/4 length sleeve blouse and I wanted to buy 1.5 M of the fabric but it appeared I could only get whole meters. So I purchased 2M At £14 a meter. Along with 2M of this gorgeous fabric, but that will be another post.
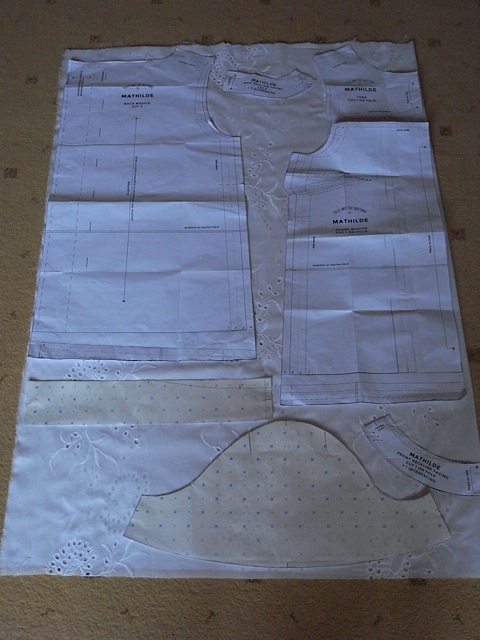
When the fabric arrived it was so beautiful I knew I wanted to make the most out of it. If I made a dress I would be using most of the fabric and it would be value for money, but I decided against a dress. A white dress is not the most practical thing for me. However a 3/4 length sleeve blouse would mean that I’d have a lot of fabric left over but not enough for another garment. So I decided to re-draft the short sleeve pattern even shorter. This was an excellent idea as when I laid the pattern pieces out on the fabric I knew I’d be able to get 2 blouses from the fabric. It looked like the 2nd blouse might have un-cuffed sleeves though. That wouldn’t matter. I was just happy that I’d get 2 blouses from the fabric. Making it great value for money.
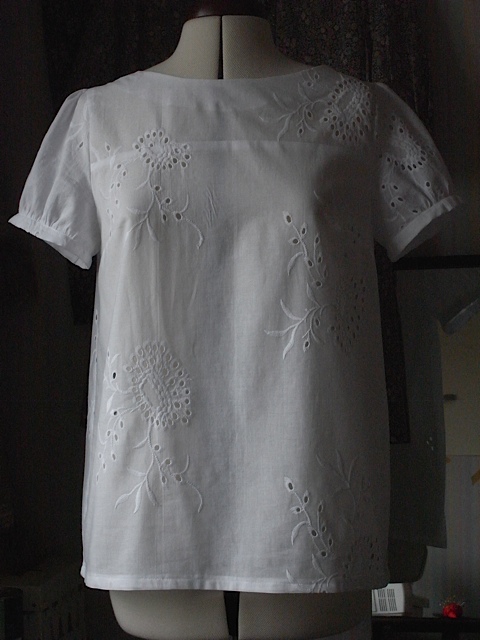
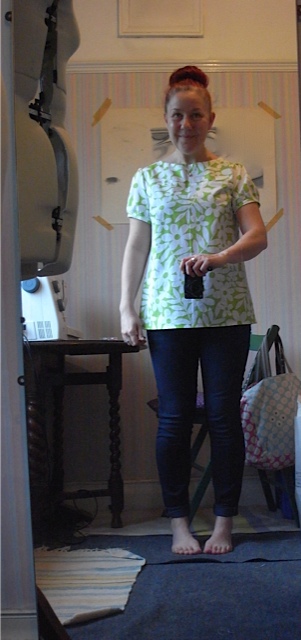
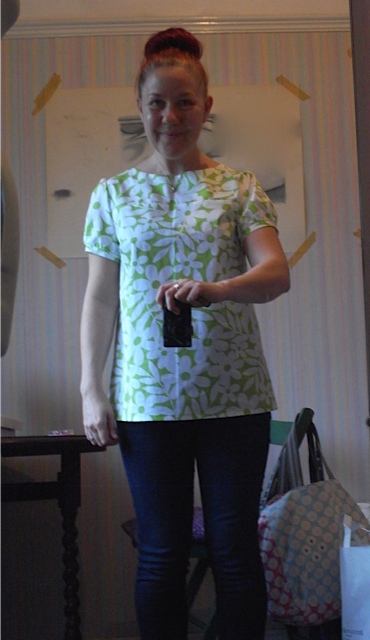
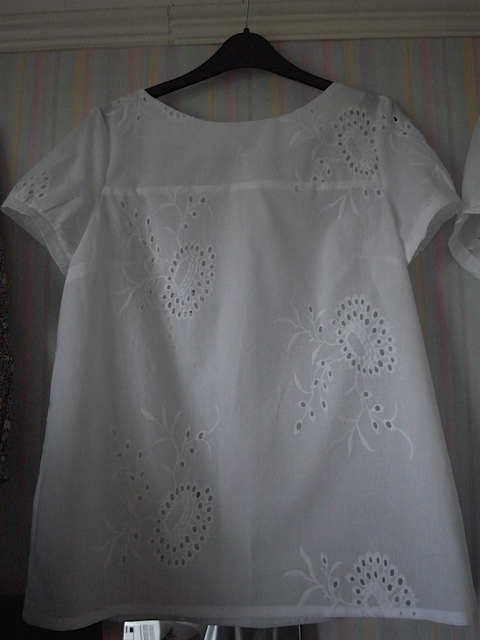
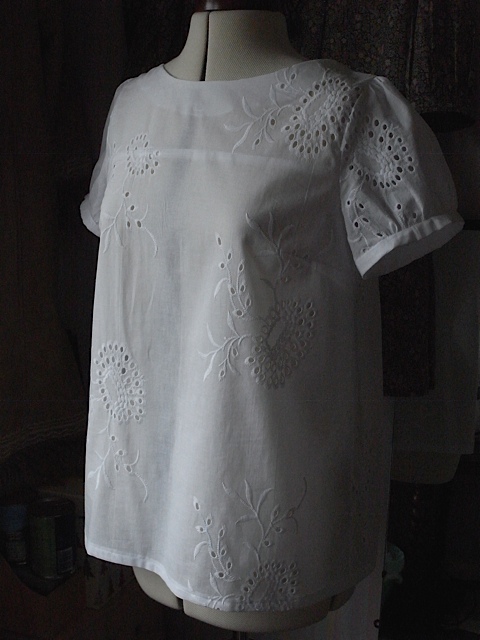
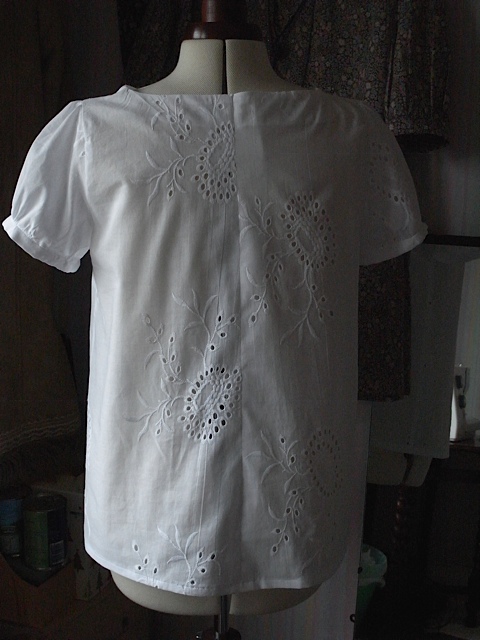
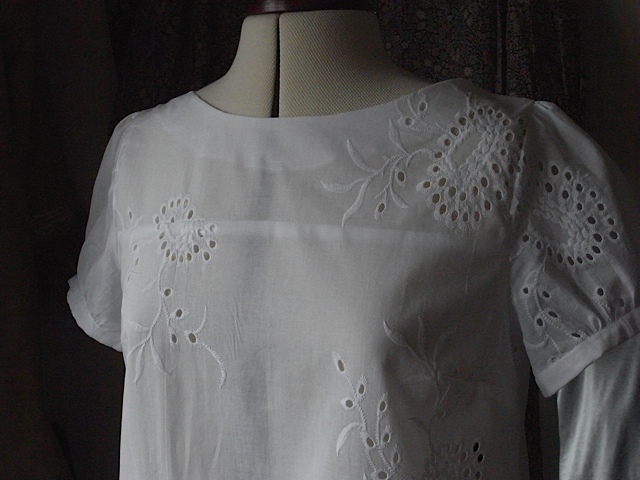
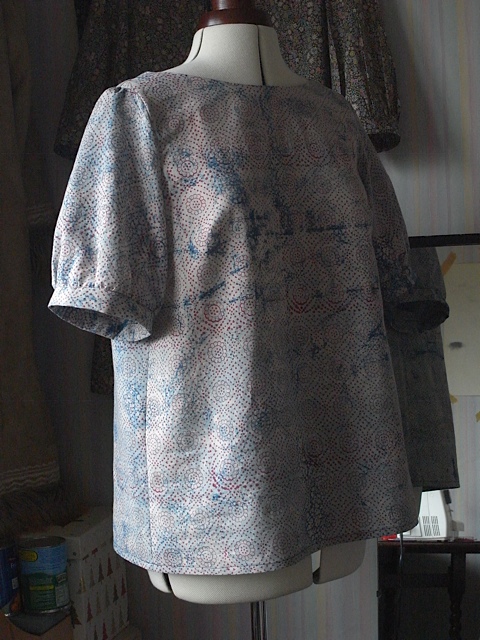
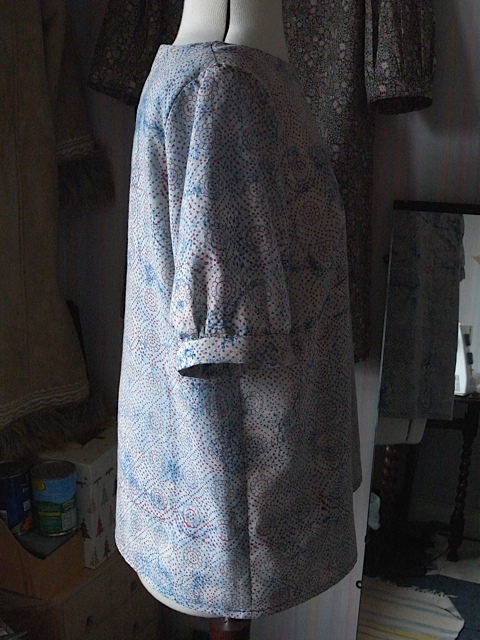
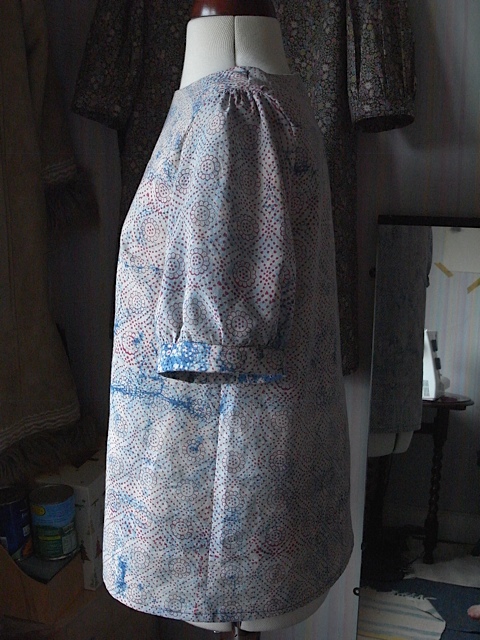
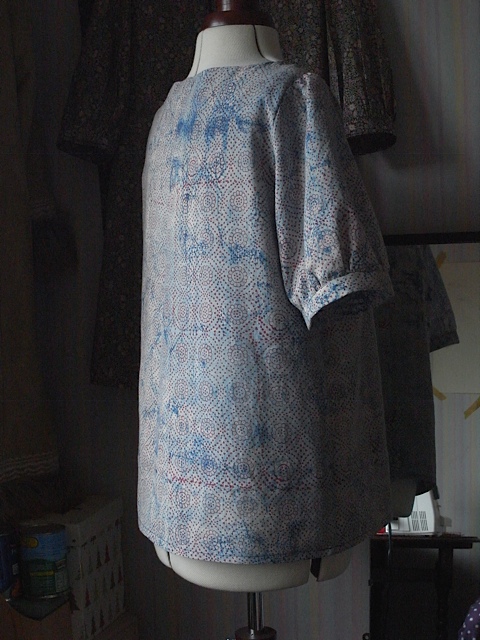
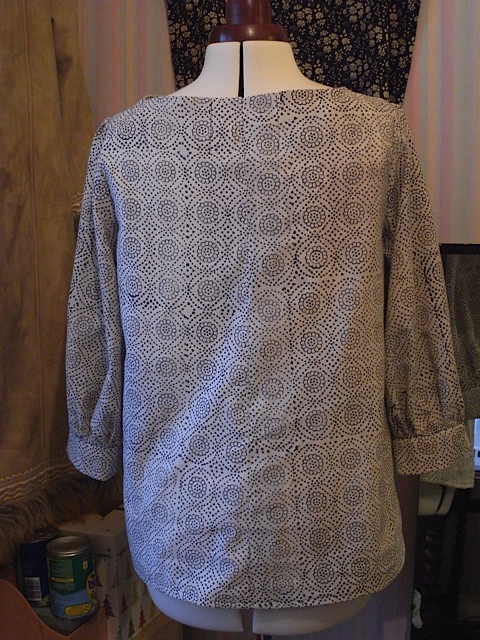
I just love how beautifully this has made up. The eyelet pattern is quite big but looks quite effective I think. Gives the blouse a really professional look. I’m so so so happy with how its turned out, the little puff sleeves are so cute and pretty and look exactly as I wanted them too. I’ve compared this blouse to one I bought from Dorothy Perkins a couple of years ago for about £24 or something like that and it simply doesn’t compare. Don’t know if its the fabric or the pattern or the finishing but this blouse is for me PERFECT! I love the high neck line, the shape the sleeves everything. And I can;t wait for warmer weather to wear it. Looks fab with jeans, really does.
Anyway lots more pics to bore you with…

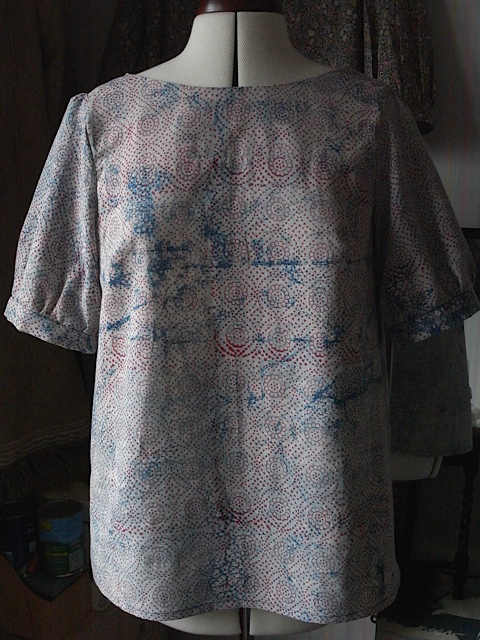
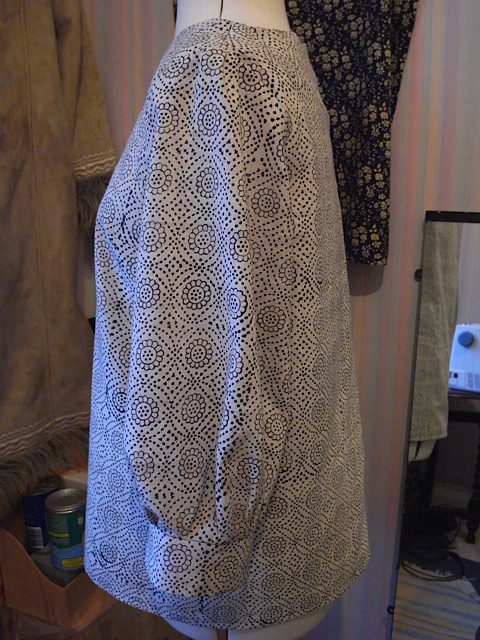
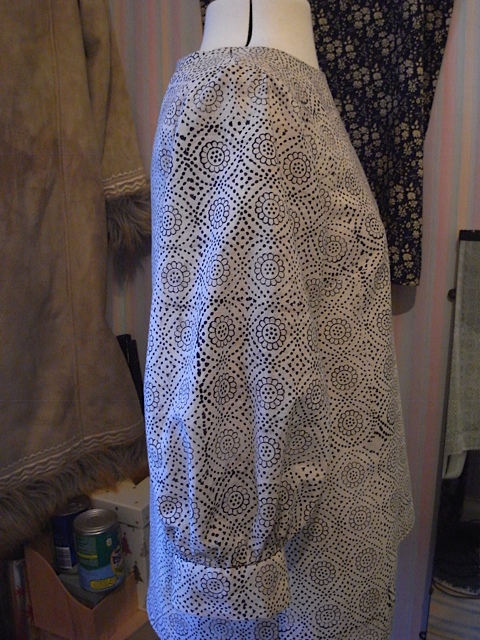
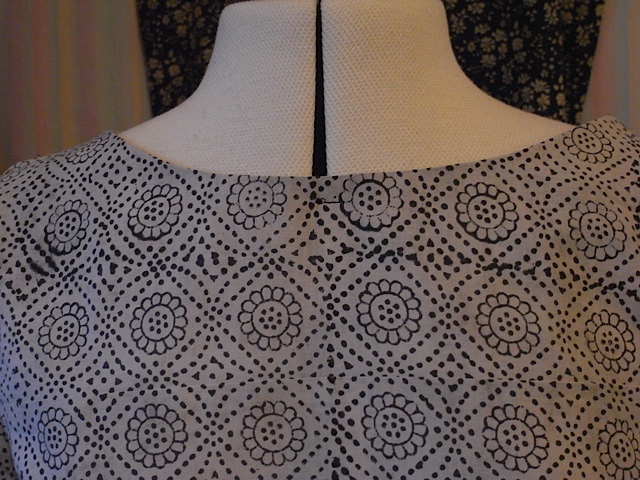
Lovely shoulder detail.
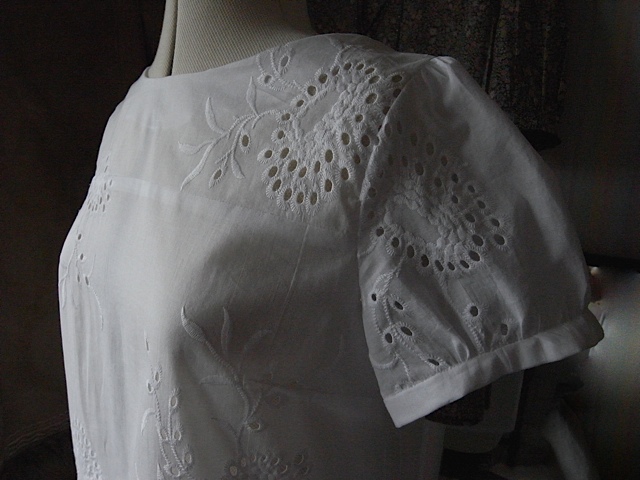
More lovely shoulder detail. Love that both shoulder sleeves are different.
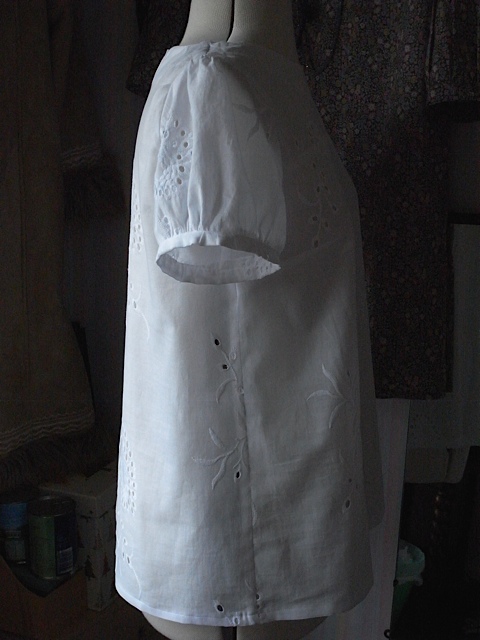
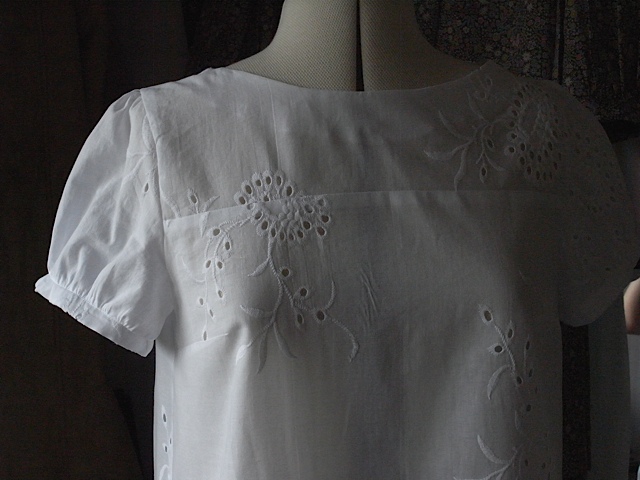
I also love that you can see the seams through the fabric, shows off the beautiful french seams I love so much.
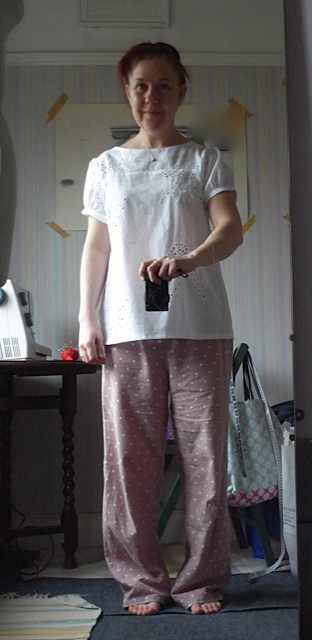
Shameless pic of me in PJ’s and messy hair, but its my blog and I don’t care!
Like I say I really really really love this top and am going to make another. Have already cut out the fabric.
Here’s a pic of the fabric that was left, a meter of fabric, and then a pic with the pattern pieces laid out on it.
I do love being able to turn a flat piece of fabric into something lovely.
Happy days :0)
March 29th, 2015
I wanted to try making shorter sleeves on my blouses so I re-drafted the sleeve pattern

Can just about see what I’ve done.
I’d been meaning to buy some of this paper for months & finally did so in February. Its so useful I’ve re-drafted several things already. Anyway this is my first attempt at short sleeves.
Having the shorter sleeves has enabled me to get the sleeve pattern on the fabric the right way round this time. when i made the last blouse with the Merchant & Mills black & white fabric I had to put the sleeve pattern side ways as it was too wide for the fabric. The fabric was only 112cm wide and you need at least 140cm width really. But this time with shorter sleeves all fitted properly. I’m using more M&M fabric, the same as the black & white one but this is sort of red & white with a blue wash. Gives quite an interesting effect. This top will go beautifully with jeans me thinks.

Bit of a tight fit on the fabric when its 112cm wide.
Here’s me wearing it.
I’m quite pleased with the shorter sleeves but now know I can go even shorter. Back to the drawing board.
March 28th, 2015
I bought a couple of cards recently because I loved the pictures. I wash’t sure what I was going to do with them, but then I remembered about 17 years ago bulk buying picture frames in IKEA and I wondered if they would fit the cards. I had to cut the cards down a bit, but otherwise a perfect fit.

Beach huts
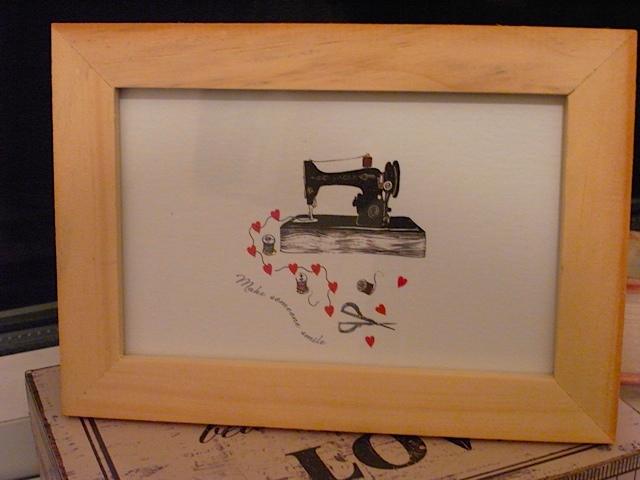
Sewing machine.
They look really cute in my little sewing room.
March 13th, 2015
I made another Mathilde top, in my own style. I made it longer again. I definitely prefer it a bit longer, suits me much better. I love this fabric too. another one from Merchant & Mills. Now for lots of pics.
Sleeveless from the front
Side view
Back

Other side
I love how the extra length just gives it a little bit of a flare.

Front with sleeves
Side, you get the idea… I love the puffiness of the sleeves, my gathering technique is getting better.
Love the daisies running down the centre of the sleeve. Didn’t work out quite as well on the other one.
I put a couple of stitches at the neckline just to help the facing stay put.
Ta daa…
I love this one. Think its my favourite so far. Each Mathilde has turned out a little different to the last, so I’m quite happy to keep making the same pattern at the moment. Does anybody else make the same pattern over and over again? I know some people never make the same pattern twice, but this is what I love about different fabrics. They can lend something new so no two garments ever look the same. Or so I like to think.
January 4th, 2015
In August I went to visit Kristina in Fuerteventura where her and her partner had bought a home. Its a volcanic island, part of the Canary island group. The landscape is mostly volcanic rock and looks pretty bleak, but it does have some lovely beaches. Although a very windy area and the sea gets some pretty big waves which can make swimming in the sea a bit tricky. Having local knowledge Kristina knew of some areas that had a bay which made swimming a lot more comfortable. The town nearest to their house was Corralejo, once you get down to the water front its a very charming area, with lots of beachfront bars and restaurants.
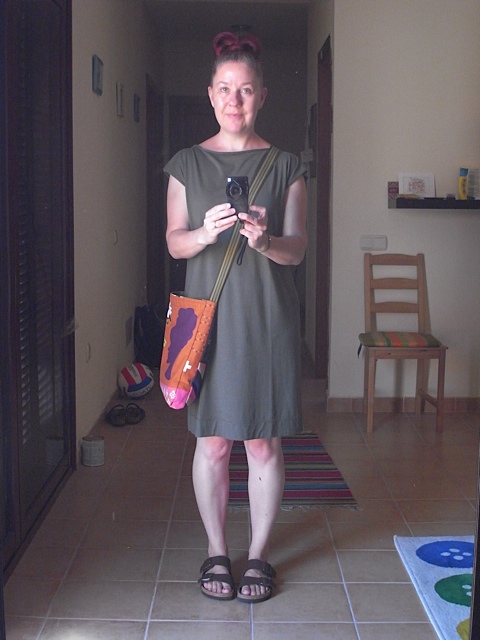
Wearing jersey dress and carrying one of my bags. I love it when my outfit is all handmade!
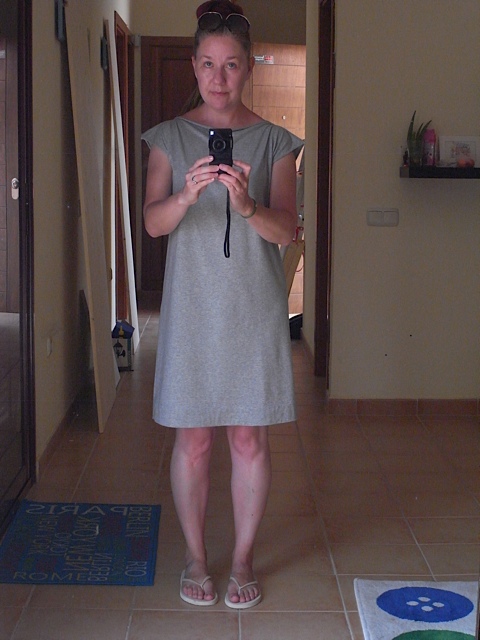
Grey jersey dress. I love this one. Have to say these jersey dresses are so comfortable to wear.
I also took my Jersey T shirts, which went really well with shorts and a couple of the jersey tunics. And I took the long version of my Liberty print dress but definitely not showing the picture as my hair looked bloody awful. I think I wore something homemade everyday. YIPPEEEE!!
Now for some travel pics…….
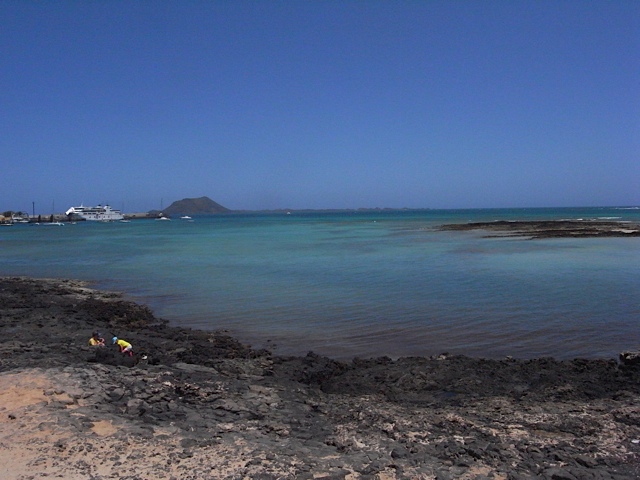
Waterfront at Corralejo, lots of rocks.
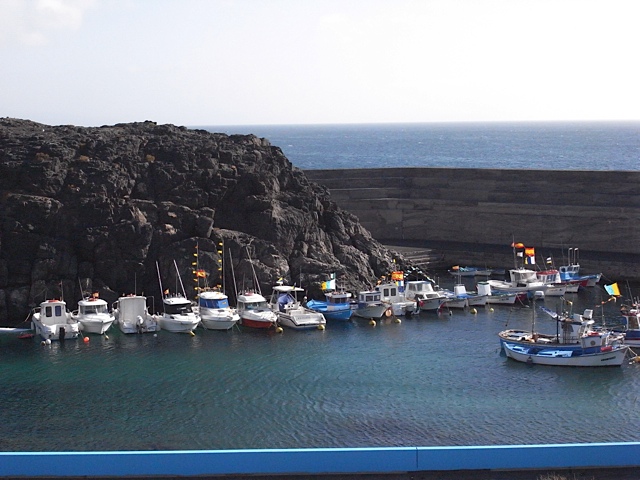
A small harbour, can’t remember what its called.
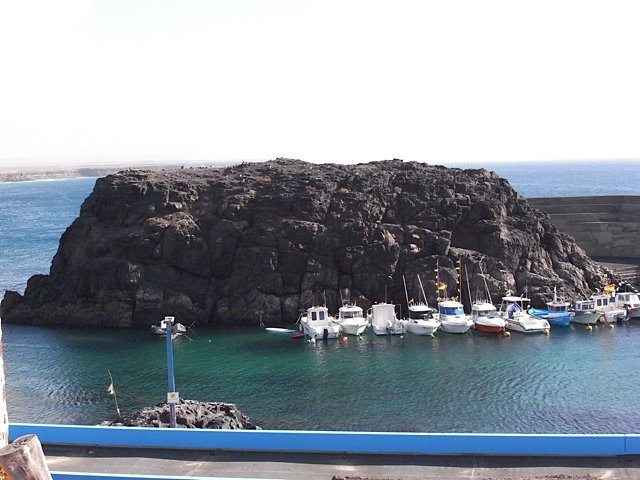
Same harbour.
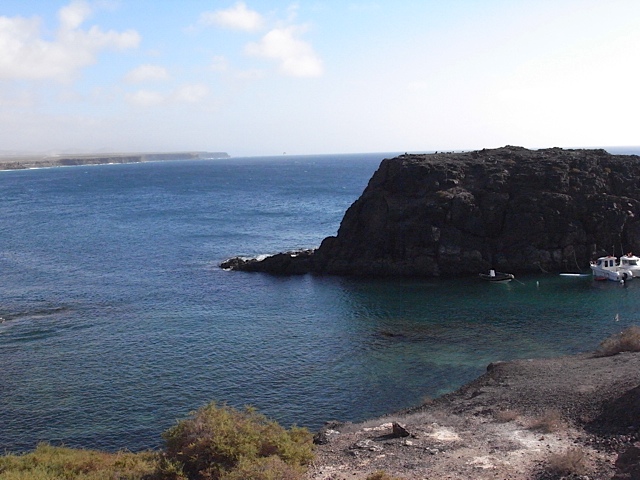
Another one. This was a really pretty, rustic harbour. Loved it.
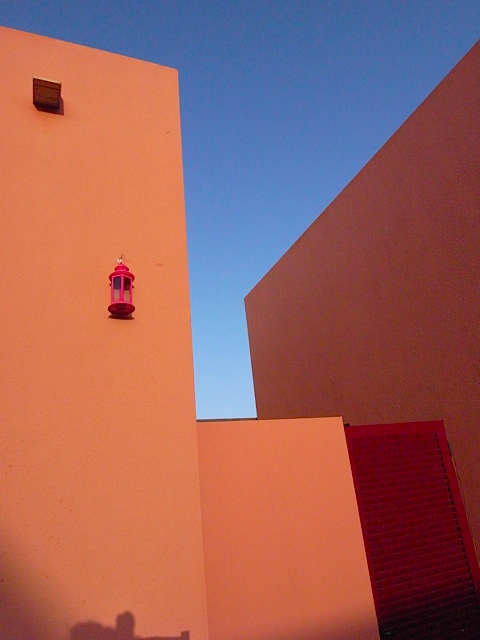
This is my attempt at an artistic shot. The back of Kristina’s house. I just loved the colour of the walls against the colour of the sky.
I never took my camera to the beach so unfortunately I have no pics of any of the beaches. Sorry.
December 28th, 2014
So where do I begin? I’ll begin by saying that although I’ve badly neglected my blog for the last 7 months, I haven’t neglected my sewing. So here I go with the start of my catch up.
Back in June my Husband and I went on holiday to Florence, Italy. I will show you some holiday pics, there are some photos of me wearing my hand made clothes so it is relevant.
I took lots and lots of photos throughout our trip but I won’t post them all by any means. Most of my pics don’t do the scenery any justice at all so its not worth it really. My Husbands are probably better but I haven’t seen them yet!
First up is me wearing one of the jersey dresses that I made specially for this holiday. You might remember the post I made about them and what I did with the sleeves/shoulders. Well I took the extra fabric off the shoulders and went back to how they were. Decided I preferred them that way. I’m so fickle sometimes I do my head in!
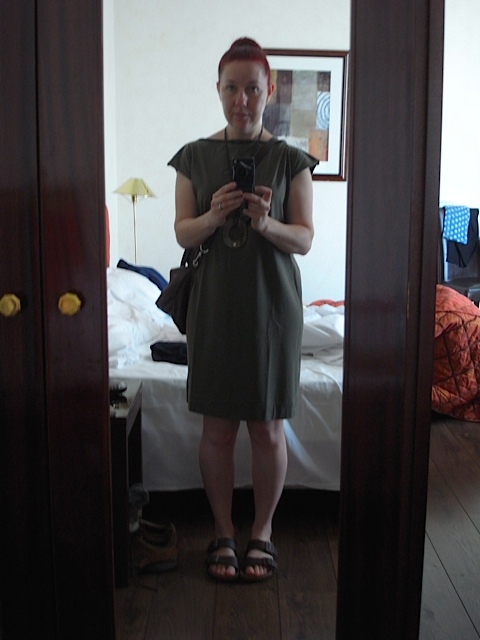
Its not the most flattering shot of me, but it will have to do. I took three of these dresses. Two in khaki and one in grey. I wore both the khaki ones but didn’t get round to wearing the grey one. Have to say they were very comfortable in the sometimes unbearable heat.
Next up grey jersey T-shirt

Loved this. Thats actually all for the clothing shots, now for some of Florence and Venice. I took quite a lot of my own sewn clothes and think I wore something I made at least 7 days of the ten.
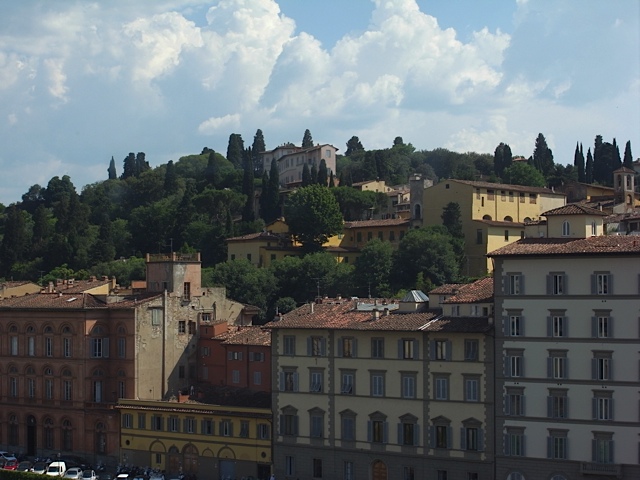
View of the hills in Florence, from the Uffizi gallery.
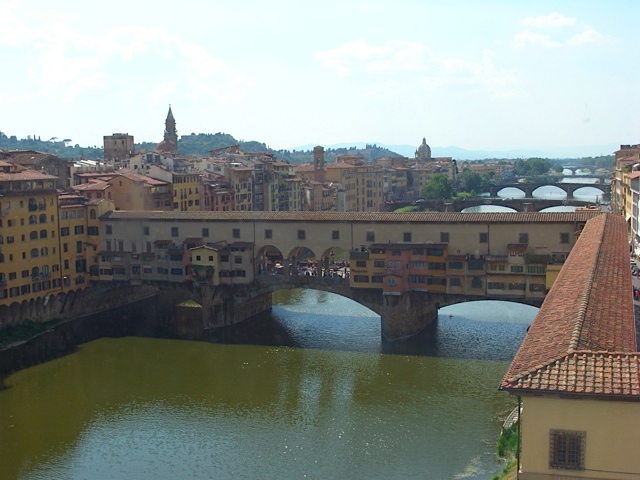
Ponte Vecchio bridge, also from the Uffizi gallery.
We took a day trip to Venice on our last day. And OMG, what a truly beautiful, magical place. I loved it. I don’t just mean loved it. I mean L.O.V.E.D it! I didn’t want to leave and badly want to go back. I didn’t even mind all the tourists/crowds that much. I somehow managed to block them out and just enjoy being there. If you’ve never been, but fancy going I strongly advise it, you won’t be disappointed. The pictures that follow really don’t do it justice and you can’t get the sense of what its really like, but trust me, there’s nowhere else like it!
I took 194 photos on this day, be thankful I’m only showing a handful.
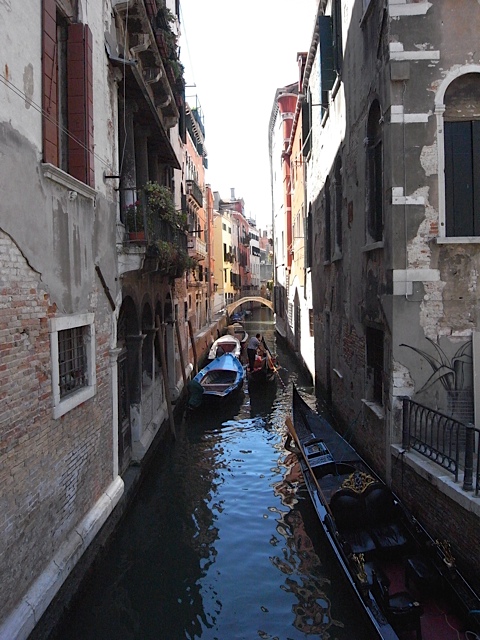
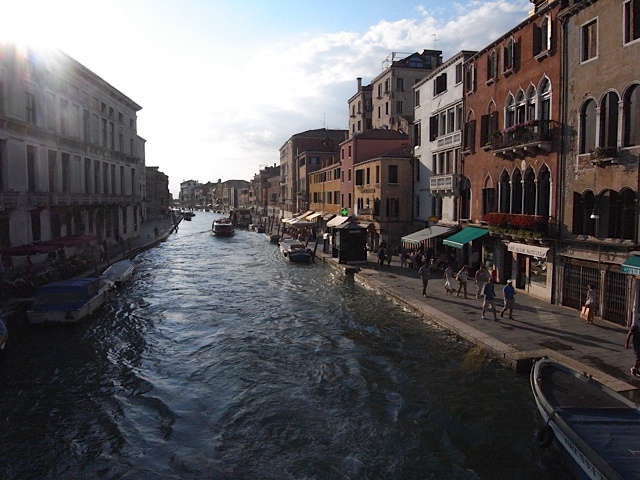
One of the many narrow canals. I think this represents Venice perfectly.
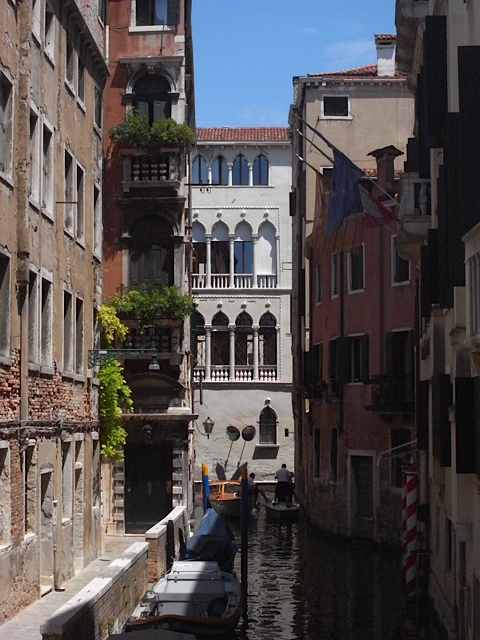

I love this. Look at the steps under the water.
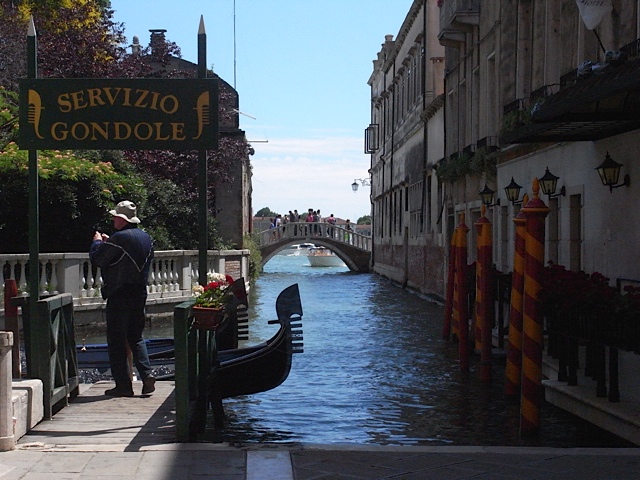
This was nearly a tourist free shot! Well apart from all the ones on the bridge…..
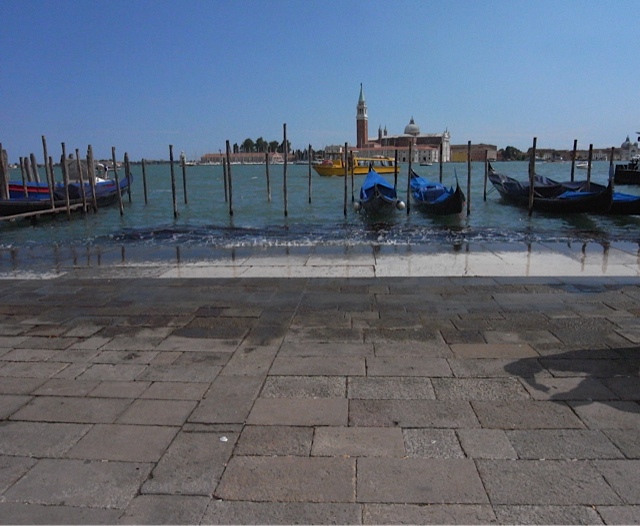
I cropped one woman out of this shot. Considering how many people there were its amazing I got this. Looking out to the Grand Canal. See how the water laps onto the pavement.
Last one.
I hope you’ve enjoyed my little travel post. Posts about sewing to follow.