April 30th, 2016
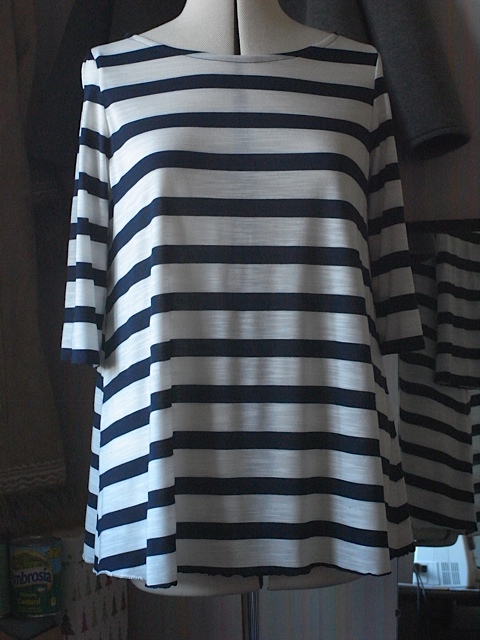
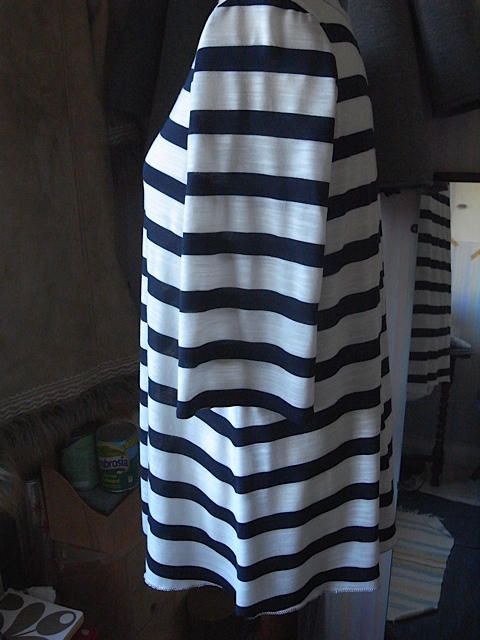
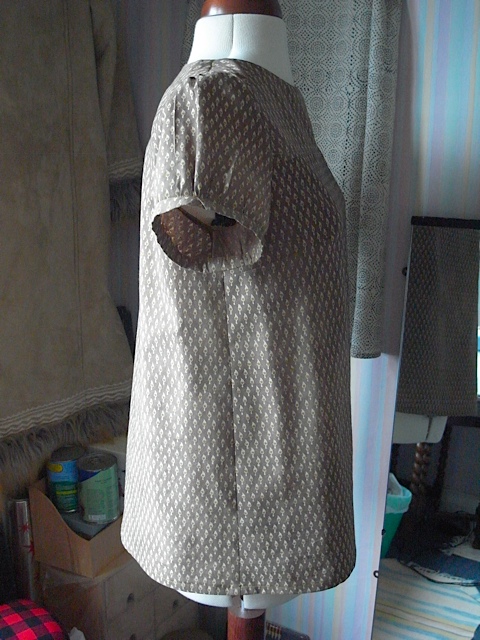
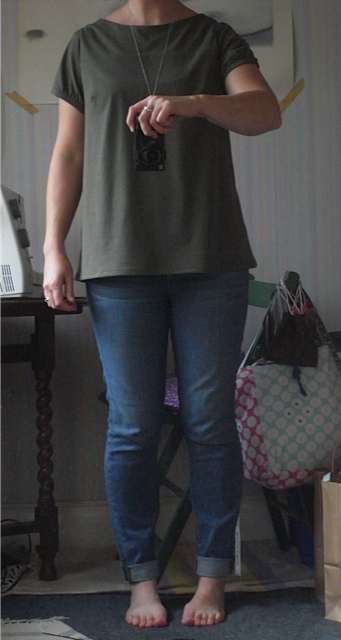
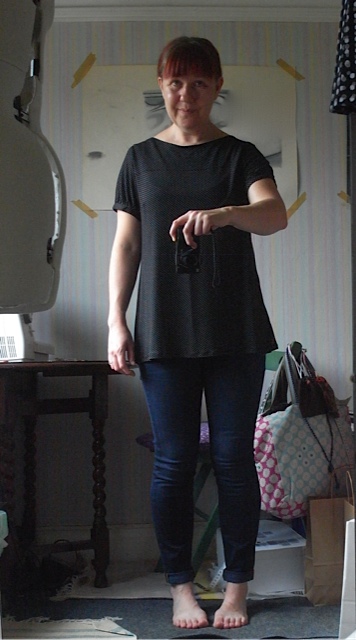
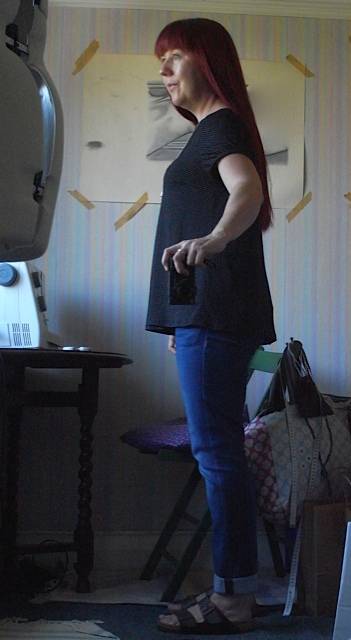
That is the question? I decided to shorten this stripy top the other week, as I just felt it needed it. I felt something was not quite right with it as it was. Below is the before pic.
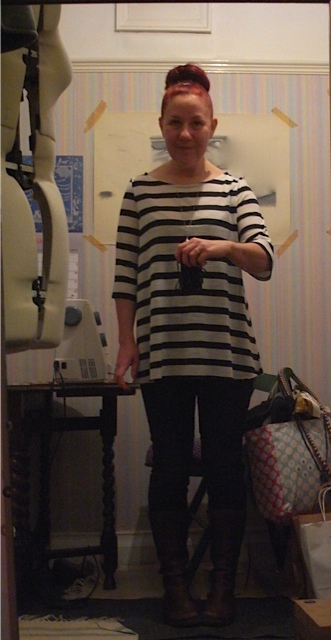
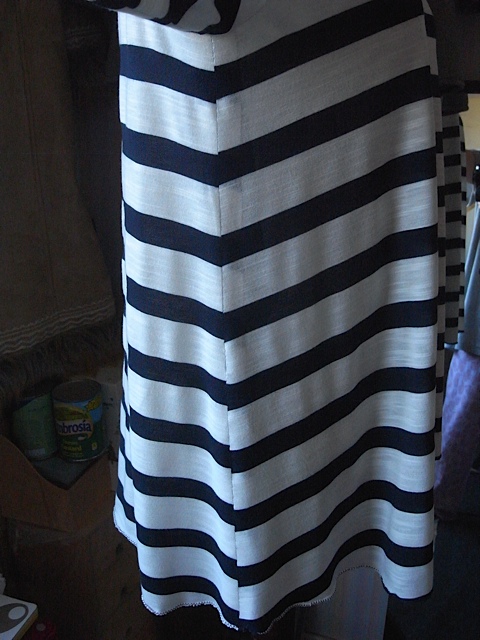
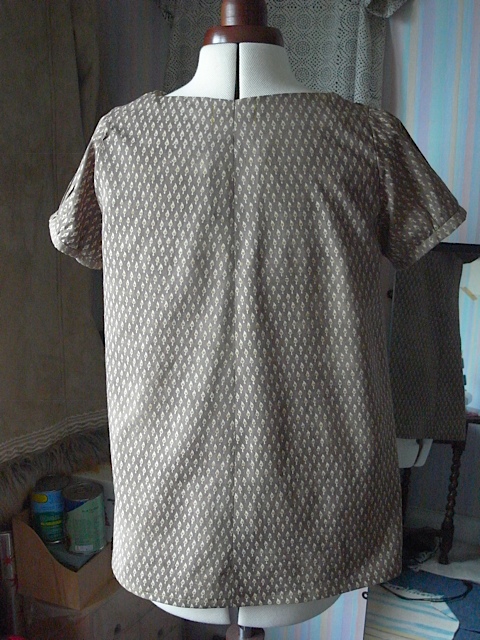
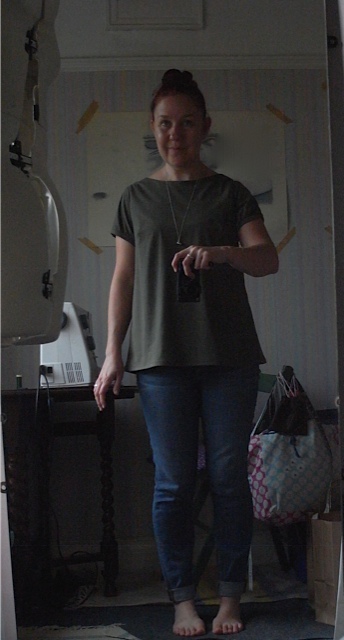
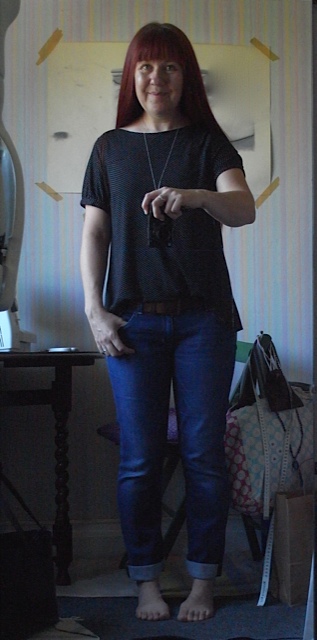
And now the after
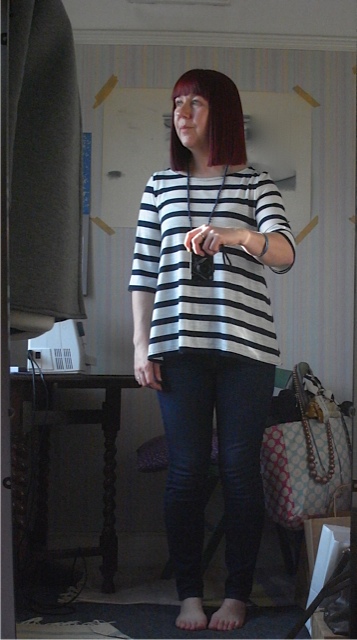
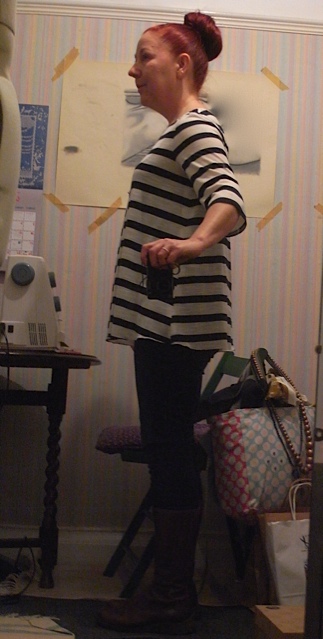
I think I prefer it. Goes with two different styles of jeans now. I don’t know though there’s still something I’m not quite sure about with this top.
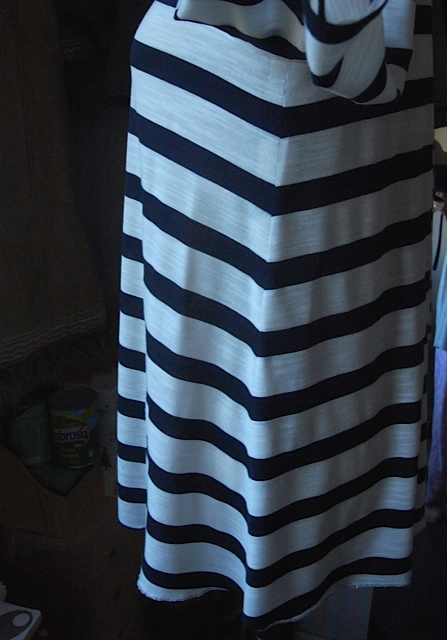
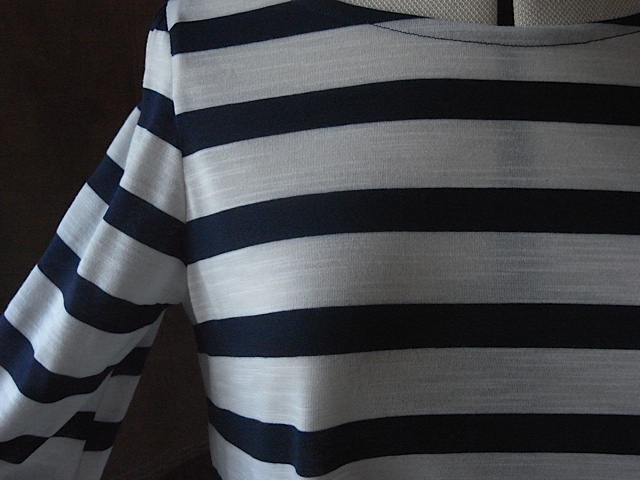
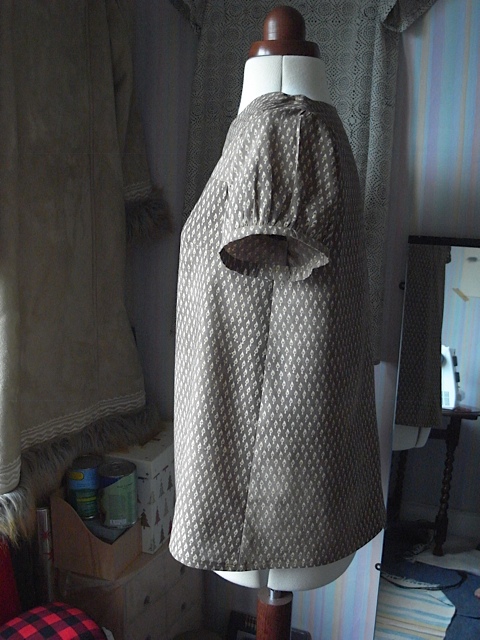
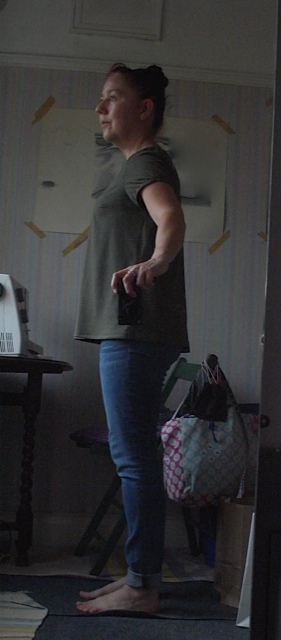
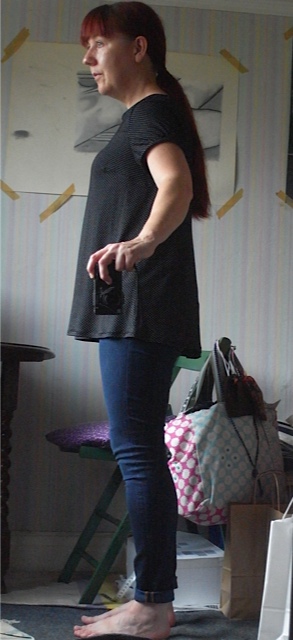
I pondered yesterday on whether to shorten the sleeves, so took this pic. Below is the pic with the sleeves turned up.
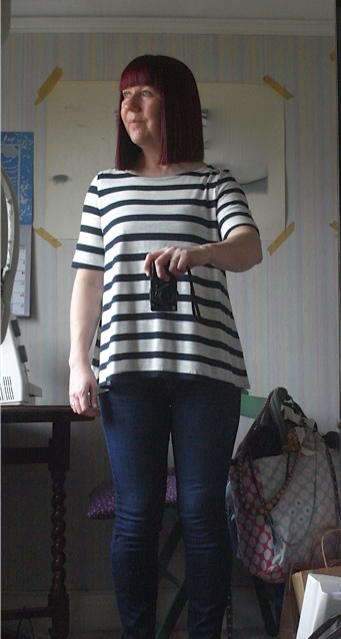
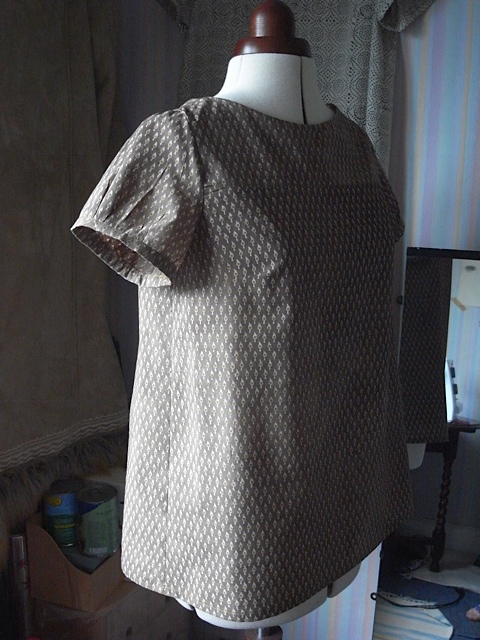
I immediately thought I loved it, but sensibly took some photos before doing anything about it. And having compared them I think I’ll leave the sleeves longer, for now anyway.
Have you ever made anything that you keep revising? Have you regretted any revisions? I know I have.
March 28th, 2016
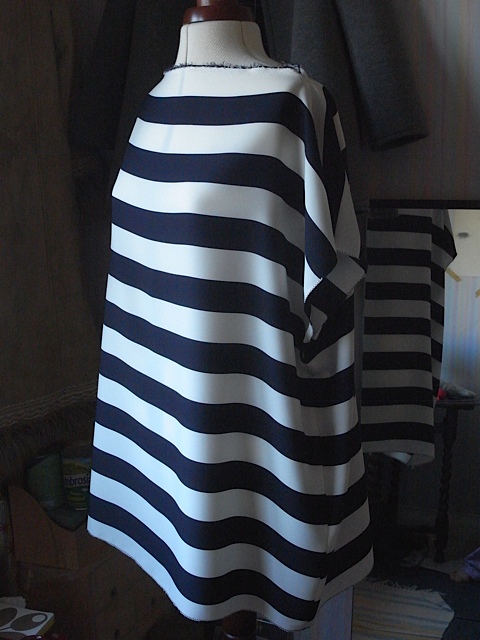
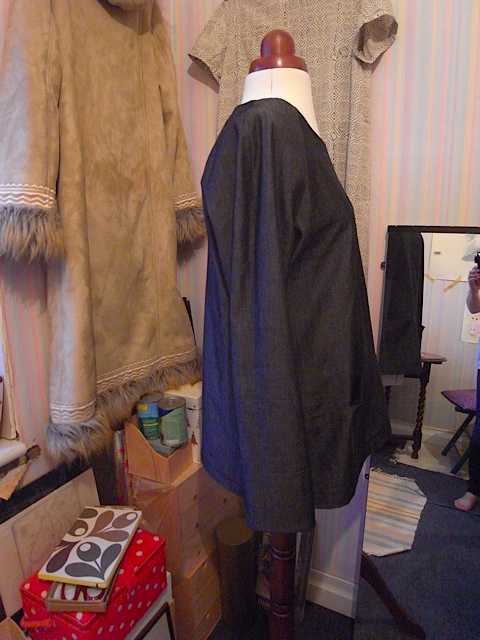
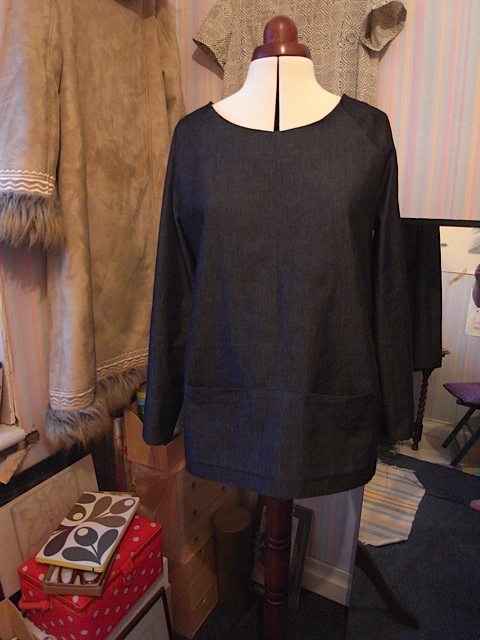
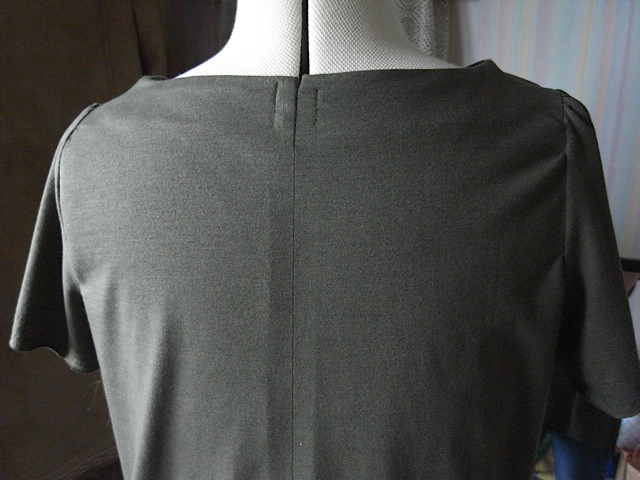
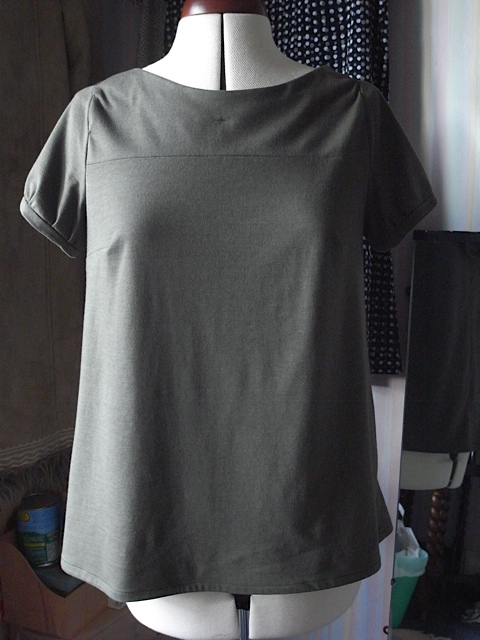
I’ve gone back to my old tried and tested rectangle top. I have learnt so much since making my first top, that although this is a very basic shape and very easy to make, there has been a lot of thought that has gone into the making of this top.
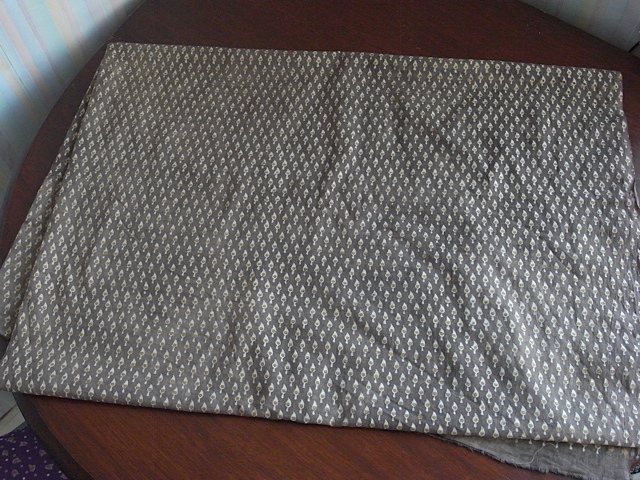
The fabric is a viscose/crepe type, and its thicker than I imagine it is every time. I always think of it as being quite flimsy and delicate, and its really not. Handles really nicely. I bought this one a year ago but have been too scared to use it. I tried about 8 months ago but when I pinned the pattern to the fabric the fabric just moved all over the place. So I gave up and put it back in my fabric pile.
I wasn’t too sure how to use this fabric for a couple of reasons, one being that it was going to be tricky to pin a pattern to and cut it out, and the other being that the stripes didn’t run horizontally from selvedge to selvedge, but ran vertically. I did not want a stripe top with vertical stripes. So the fabric has sat there for best part of a year.
Now that I’ve started my little love affair with stripes I was ready to tackle this fabric again. I really can’t remember how much I bought but I do know it was 150cm wide, I think I only bought a metre but it might have been a metre and a half, and it wasn’t at all expensive. £4 a metre to be exact. I decided to fold it with the raw edge running down ,if that makes sense? So that the stripes would run horizontally. As the fabric has no stretch in it whatsoever this has worked out quite well.
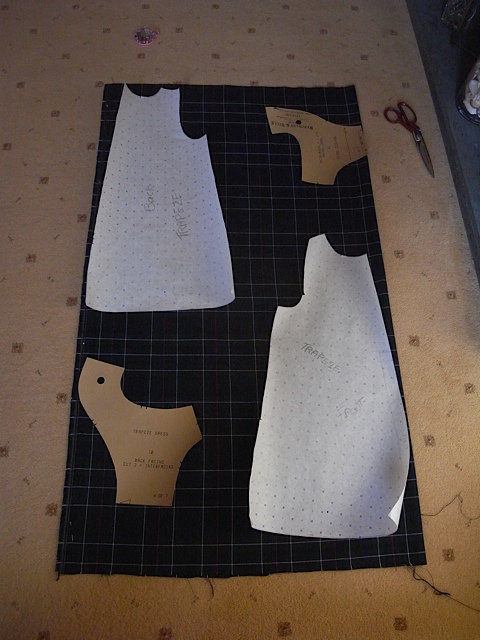
It was much easier to cut out not having an actual pattern to cut round.
It took me a little while to remember exactly how I made these rectangle tops but I got there in the end. I decided to make this one a little wider than the ones I’ve made in the past, as I felt the fabric would probably drape quite nicely.
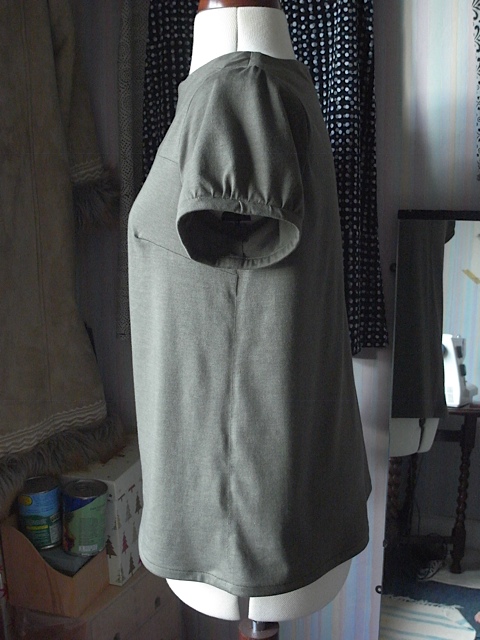
I aslo incorporated the selvedge into being part of the top and have used as a bit of design feature, I’m really happy with how it looks and think it works very well. And I have once again left the bottom edge un-hemmed and just zigzagged it.
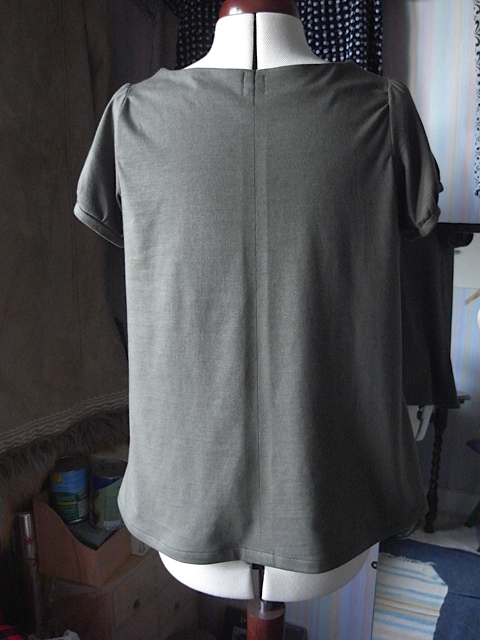
I had to be really careful with stripe matching at the sides. As this is such a large stripe I think it would have looked so bad if they had been mismatched. It took some time and effort but it paid off.
So lovely not having a centre back seam to worry about.
I love how it drapes.
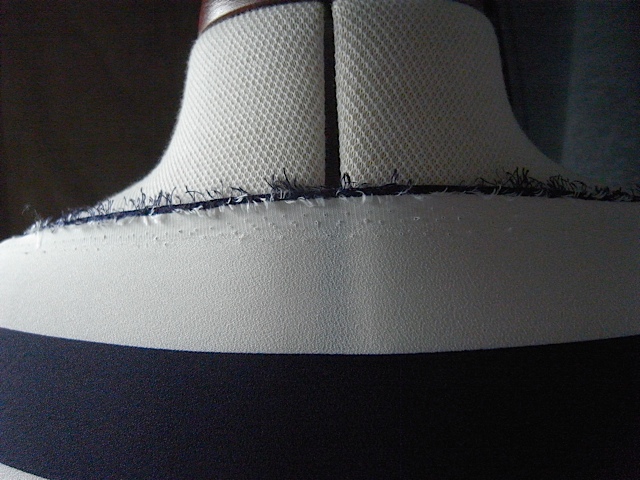
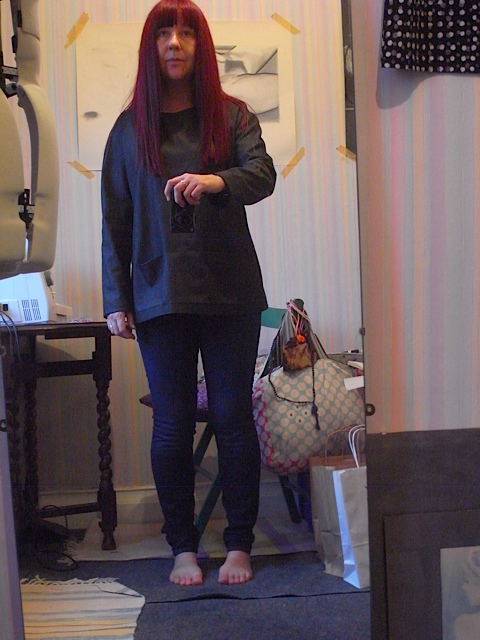
See what I mean about the selvedge. I particularly love that it ends with the navy colour. What do you think?

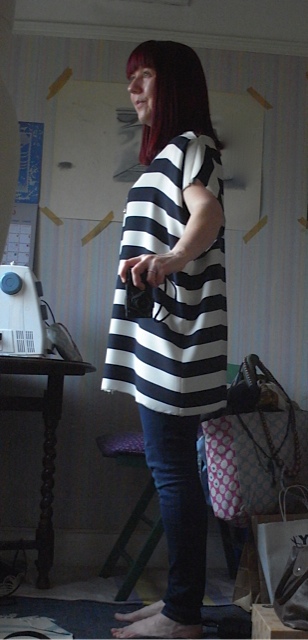
This might not be everyones cup of tea, but I’m so happy with it and I love it. In my opinion its a very stylish tunic that will be perfect for evenings out or nice lunches with friends.
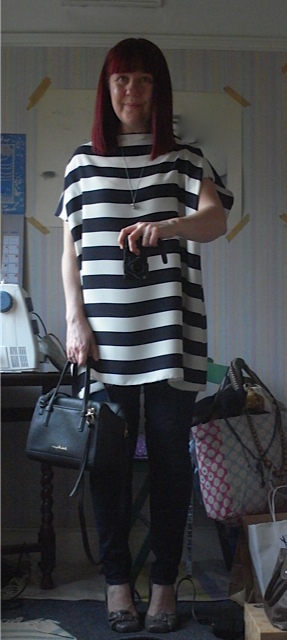
So comfortable and easy to wear, whats not to love?
I also love that I can make this style of top in just a few hours.
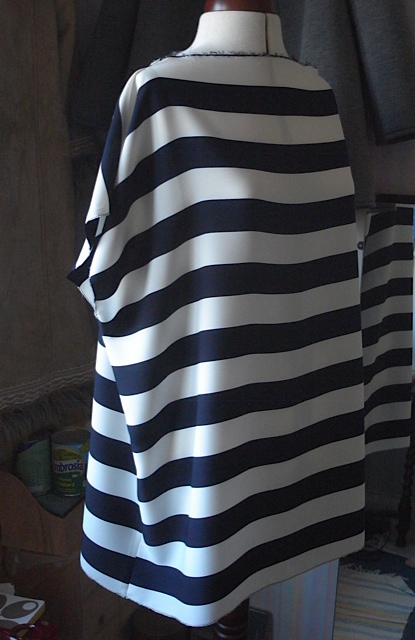
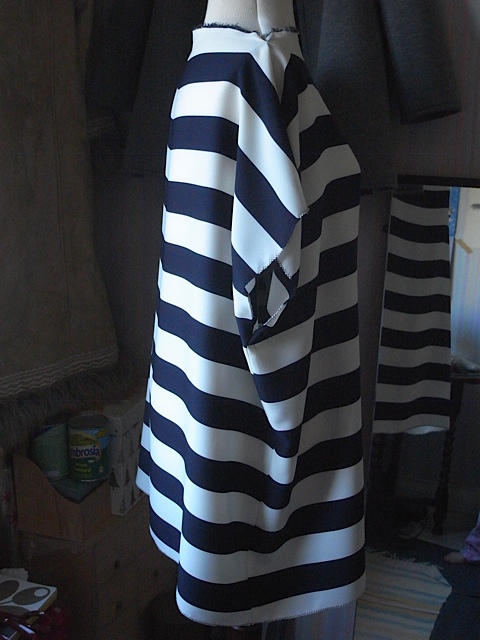
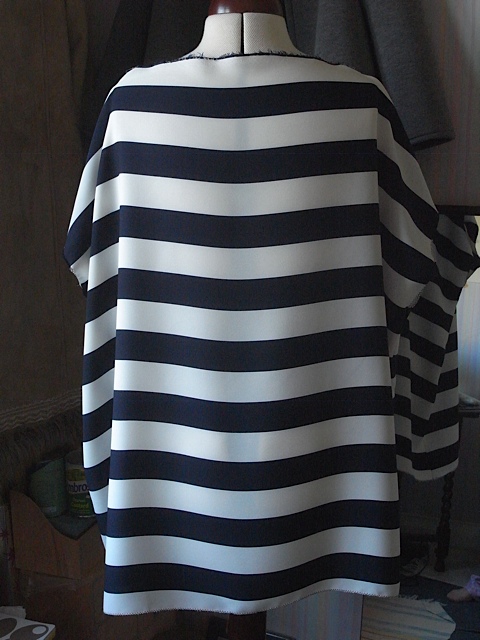
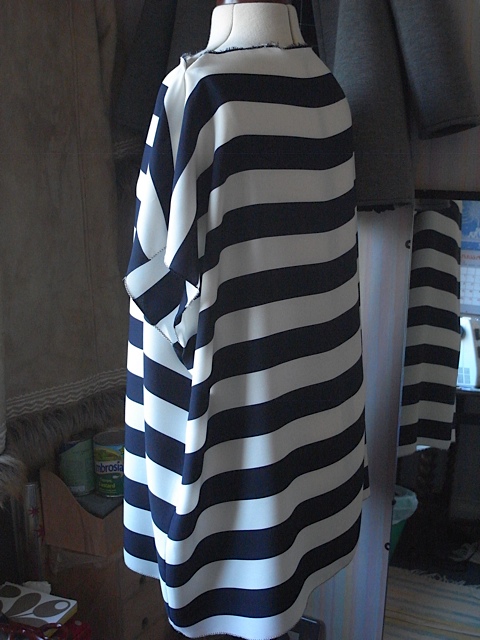
March 21st, 2016
Stripes, yep, stripes are definitely my new favourite thing. And look at this gorgeous fabric. I bought it about 9 months ago, along with the stripy fabric from the last top I made. Both came from fabric godmother.co.uk.
Its the same Trapeze top pattern, and once again it was a fairly quick make as no seams to finish. This is why I love jersey. I thought it might be more of a problem than the last one as the fabric is a finer jersey and I thought it might misbehave a bit, but it didn’t. So I’m very happy about that.
Can’t complain too much about the stripe matching. Always more luck than judgement.
This side not quite as good.
Back gone a little off half way up! Don’t know quite what is up with that.
Quite like how the sleeve stripes line up with the body stripes.
Lovely.
I’m sorry the modelling pics are so dark, but it was dark when I took them.
I again just zig zagged the hem to finish.
Another lovely comfortable stripy to wear, me happy :0) This one is a very dark navy and a sort of off white/cream.
February 5th, 2016
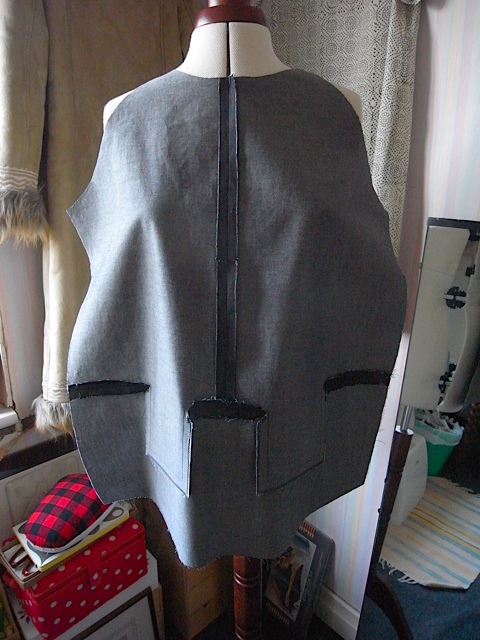
What a F*****g nightmare! I do not exaggerate , I really don’t. Making this was, how shall I put it? Traumatic! I am not one to over dramatise but this really was one of the most mind boggling things I’ve ever made.
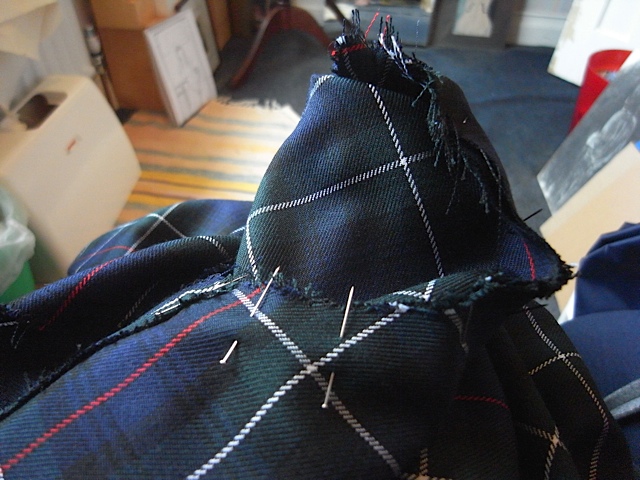
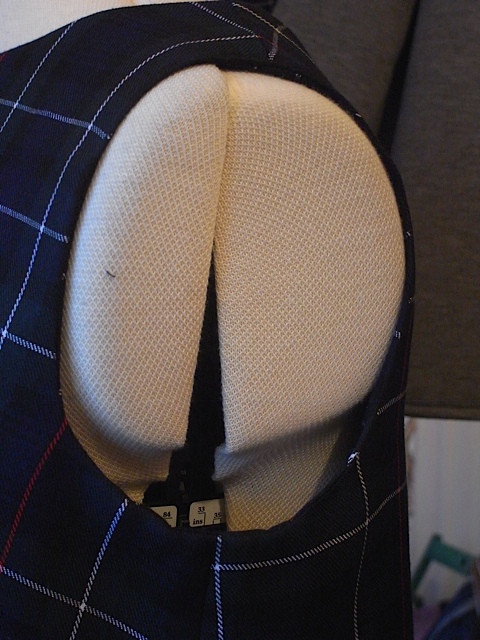
It all started off innocently enough. All was going to plan. Cut out the fabric, put the front and back together. Constructed the facing, attached it to the neck. Was thinking, I might have this finished today. And then BAM! I hit a major brick wall. The armholes OMG the armholes, more to the point the armholes facing. WTF!
I started off OK, I pulled the facing outside and turned it over so right sides were facing each other. Started to pin in place pulling the inside out as I went, got to about half way up the armhole when it all started getting messy. And it was at this point that I decided that the good people of Merchant & Mills had lost their minds and missed out an entire section of instructions. It didn’t seem to matter what I did I could not get my garment to look like their illustration.
I can tell you now people, the air was pretty blue around me at this point, I was frustrated beyond belief. The Husband hearing my moans of despair came up to see what was wrong and when I explained, he had a look and tired to help. He couldn’t figure it out either. We were both convinced something was missing.
So I had to put it aside for a couple of days and wait till I could get to Rye and go see M&M in person. Which I did on the Monday. They were very helpful and assured me that they hadn’t missed anything out and that it was very common for people to get confused at this point. So that made me feel a bit better. Anyway the lovely lady pinned one half of the armhole for me and I watched intently as she did so. She said it really feels wrong and twisted whilst you’re doing it but it all works out in the end.
I couldn’t do anything till the next day. So finally I sat down to have another go. I stitched the side that was already pinned. And that takes some working out too. How best to place this deformed piece of cloth under the sewing machine? Once I figured out the best way for me to do it I started sewing. And let me tell you it still was not simple. I finished that half (oh and by the way I tacked it before sewing proper, just in case) and took a bash at pinning the other half. Trying to remember how she did it. Mine looked almost like hers. I tacked that side and then turned the facing to the inside. Hmmm, not quite right, nearly but not quite. It gets a bit messy at the shoulder seam. So I unpicked and had another go. Still not right. So I decide to have a go at the other armhole.
I will try and explain how its done.
What you do is, start by puling the bottom of the facing to the outside of the garment and matching the seams so right side is facing right side, and then pin, then keep pulling the facing to the outside keeping the edges together and pin as you go. You do one half at a time. Now as you get to about half way up the arm hole things start to get very messy but persevere, keeping hold of the edge of the armhole facing and the armhole you just keep pinning and the garment gets more and more twisted, as you approach the shoulder seam you almost turn it inside out, but just at the shoulder keep pinning until you meet the seam. Now attempt to stitch, once you’ve done one half you do the next half in the same way. working up from the side seam to the shoulder seam. Apparently once done you turn it back through to the inside and voila a perfect armhole facing. At least thats how it should happen. Good luck!
There will now follow some pictures in the hope that you get the gist of how horrible it is.
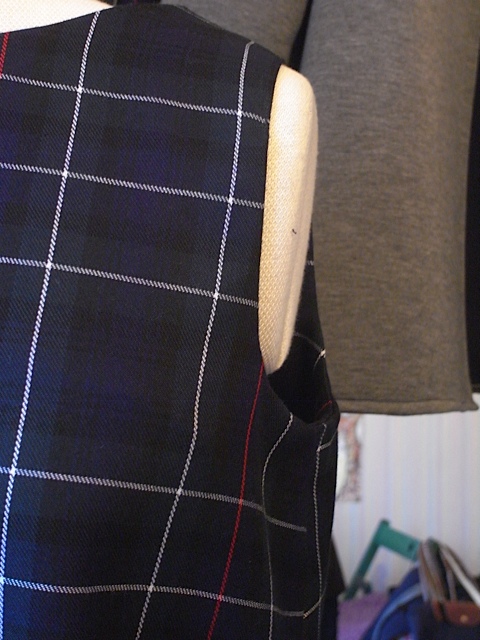
You can’t really tell whats going on here, and I can’t really explain it.
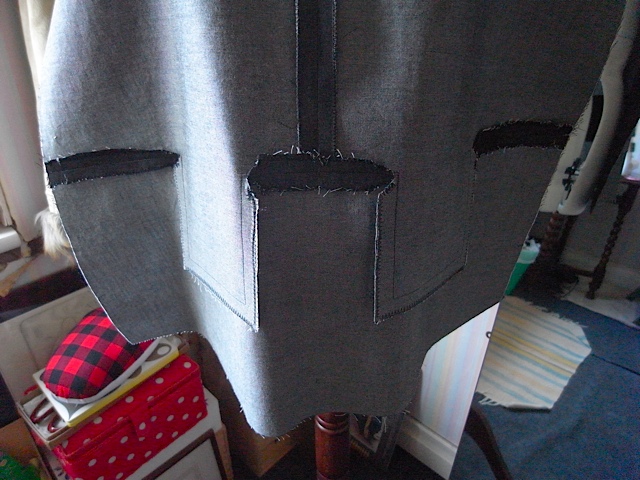
The bit sticking up is the shoulder seam.
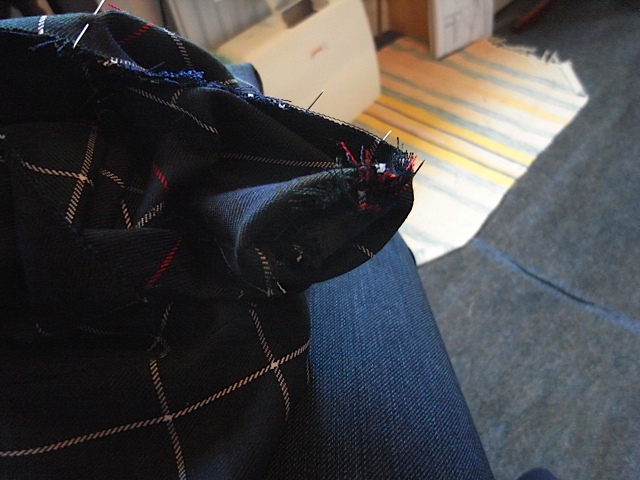
Thats a bit more shoulder seam. Clear as mud eh?
Once again The shoulder seam beat me. I just couldn’t get it to lay flat, looked horrible. In the end I unpicked about 3inches of the top of the shoulder and top stitched it down, very close to the edge.
I think it works quite well and stopped me from completely giving up. I shan’t wear it when I go shopping in M&M as they might disapprove of my method.
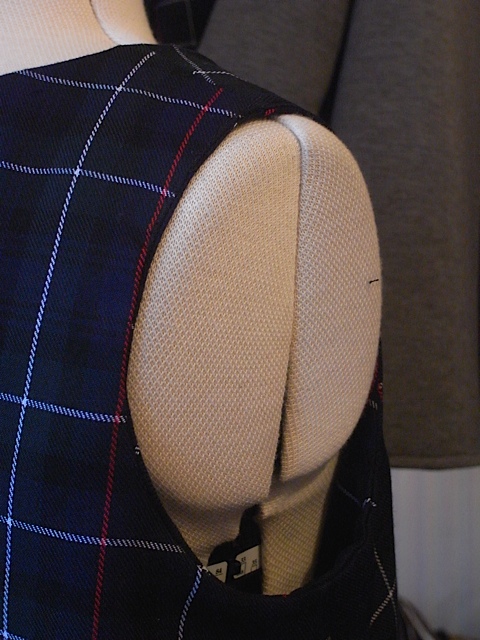
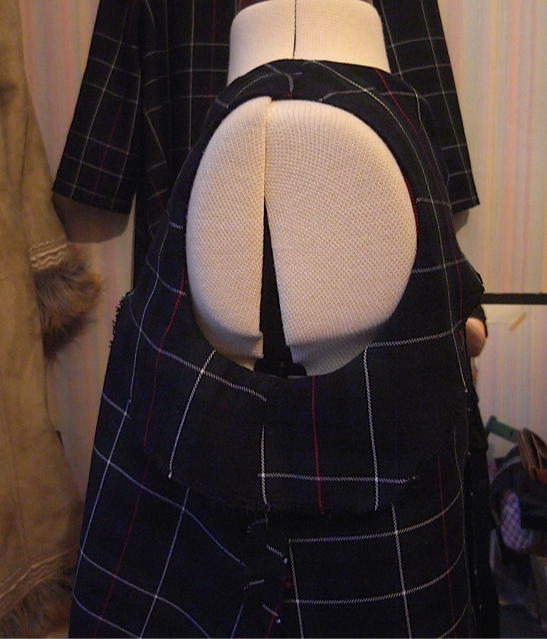
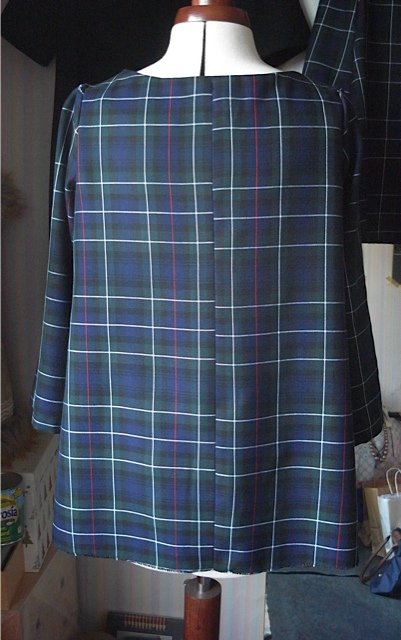
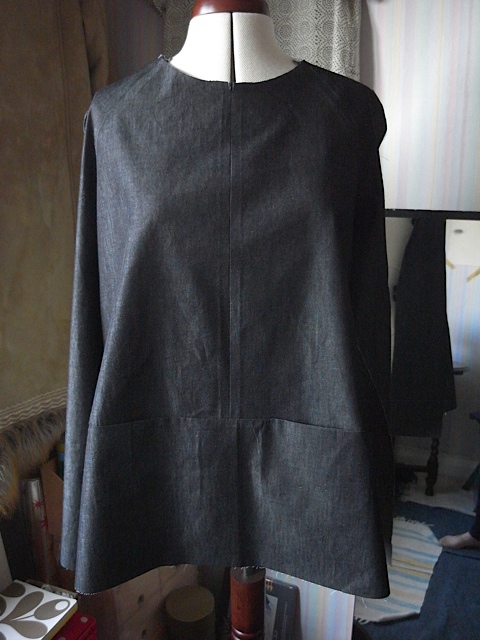
I’ve put the above picture in just to show what a difference a really good press makes to a finished garment. I am truly amazed that the armhole ended up looking so good. And it was all down to the magic of the iron. Above picture is pre-ironing, and below is after ironing.
Ta dah!
Looks all lovely and innocent now, but it truly was a monster!
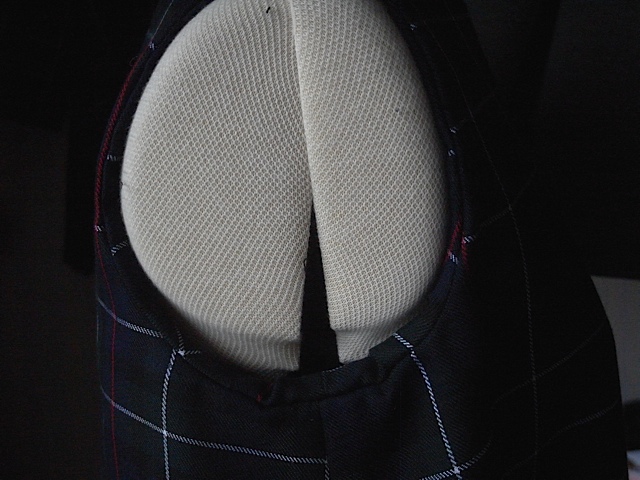
This is the inside of the garment. Look how well I’ve pattern matched it, right where nobody will ever see it…
One of the main reasons I made the sleeveless version was to have something that would go under my scuba cardi/jacket thing. The sleeves are quite snug on it so sleeveless is best for it really. And it does fit under it beautifully.
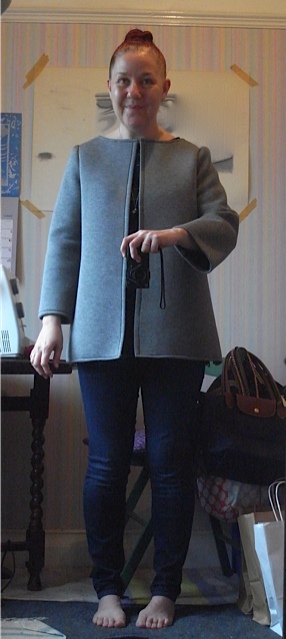
You can’t see it, but its there. Fitting very comfortably.
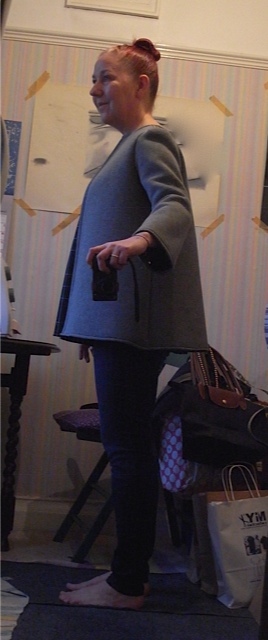
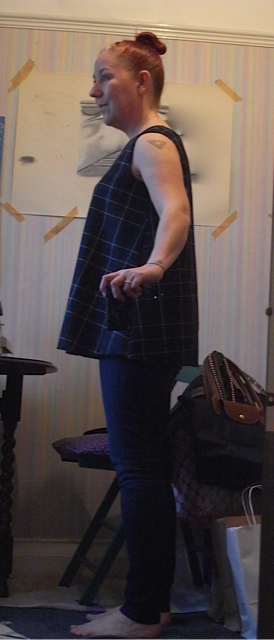
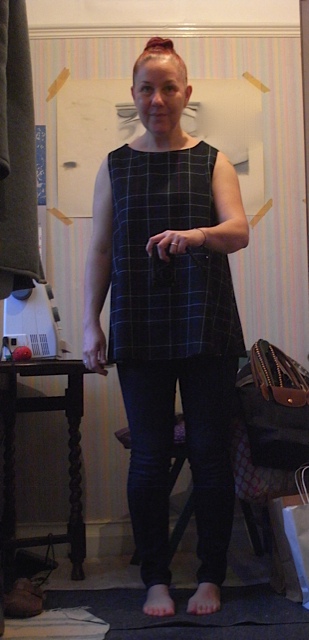
Have to say I’m not overly keen on the sleeveless look on me. My arms are not very toned anymore and look a bit stubby I feel, but needs must and I’m going to wear it. It was a challenge I have to say and I nearly gave up. So glad I didn’t. And even though I didn’t end up doing it exactly as I was supposed to, it still works and looks good. I partly blame the fabric, it frayed terribly and was quite difficult to manipulate. So there!
I have to add and this is quite important, might be obvious but I didn’t work it out I was told. Do not attempt to do the armhole facings with the garment on a dressmakers dummy. Can’t be done, end of!
Will I make another, yes, but a dress next time. And I’ll try and find more appropriate fabric.
January 22nd, 2016
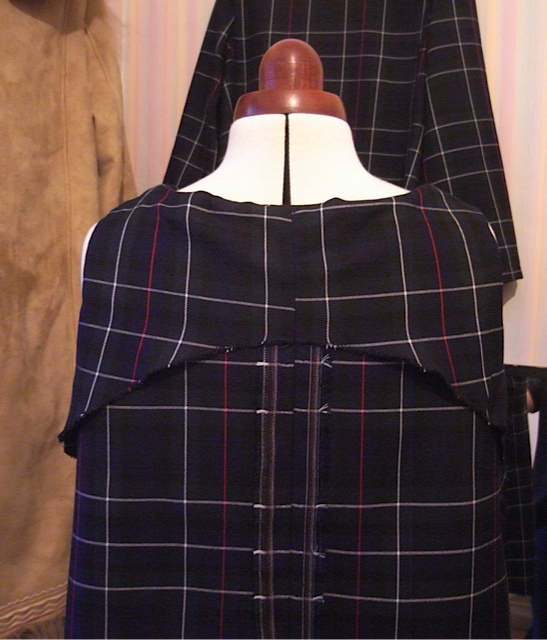
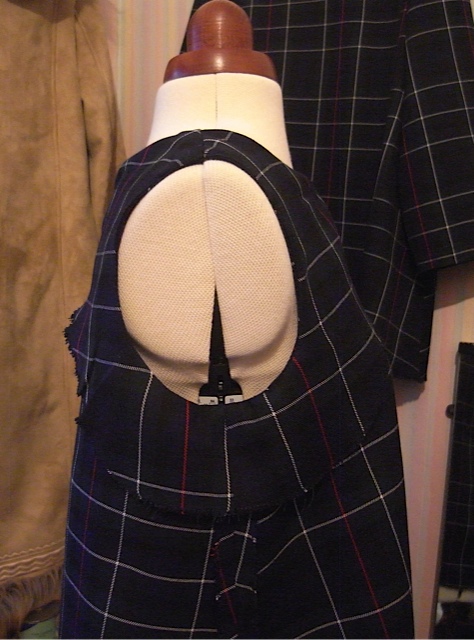
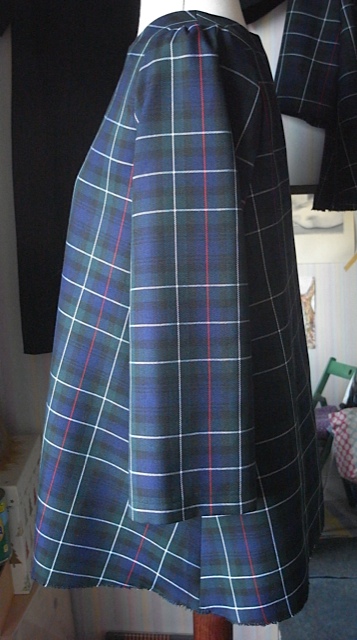
I didn’t properly blog about the first tartan Trapeze top, so I’ll make up for it by blogging about the second.
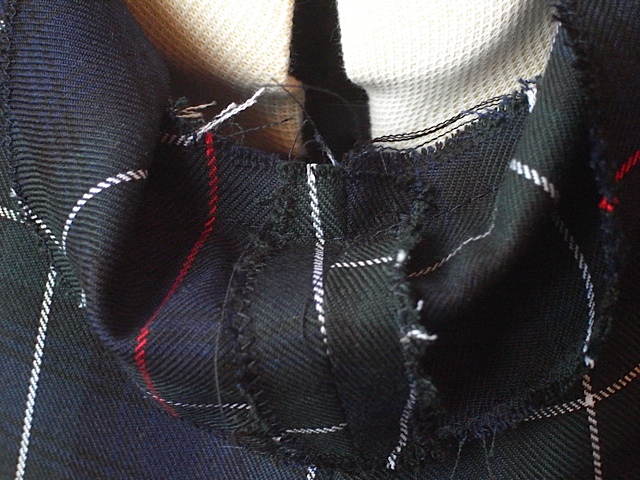
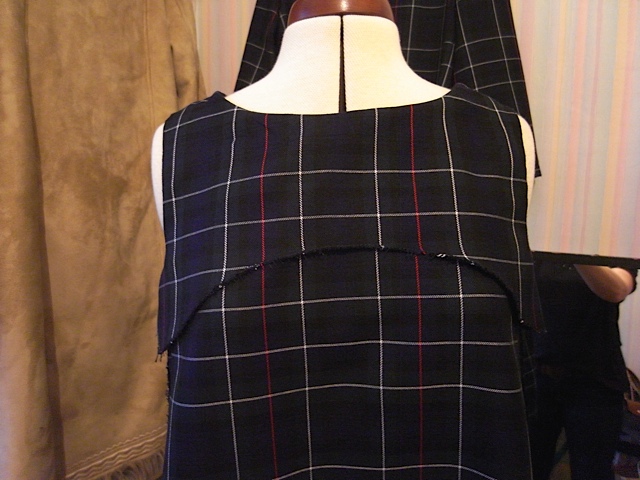
First thing I’ll say is, pattern matching tartan is a BITCH! Really really is. I thought I’d been so careful to get my edges to meet up so that the centre back seam would at least match. But when I looked at it after sewing the centre back seam I was greeted by this…
Just ever so slightly off. Now I am not always a perfectionist when it comes to my sewing, but I did contemplate unpicking and doing it again ( I know some people out there would not be able to tolerate this at all ). However I looked at the fabric and the stitches and well I just had a feeling that the fabric wouldn’t stand up to the unpicking. It does have a tendency to fray. So I left it as it was. All I can say is thank goodness I can’t see it when I’m wearing it. I will say that the first one was a bit better at the back as it matched at the bottom, but went off kilter half way up, which was weird.
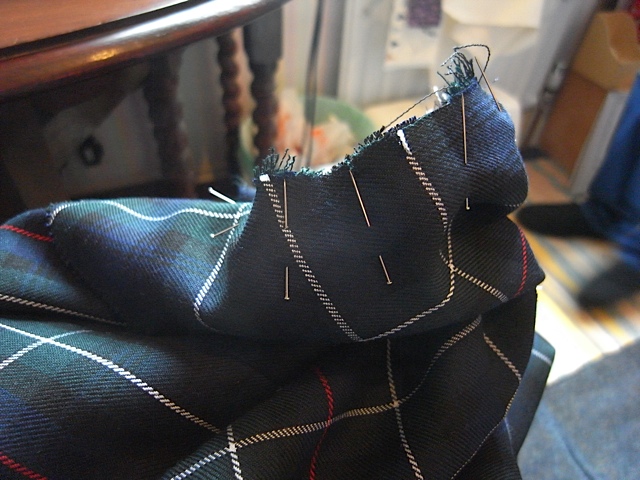
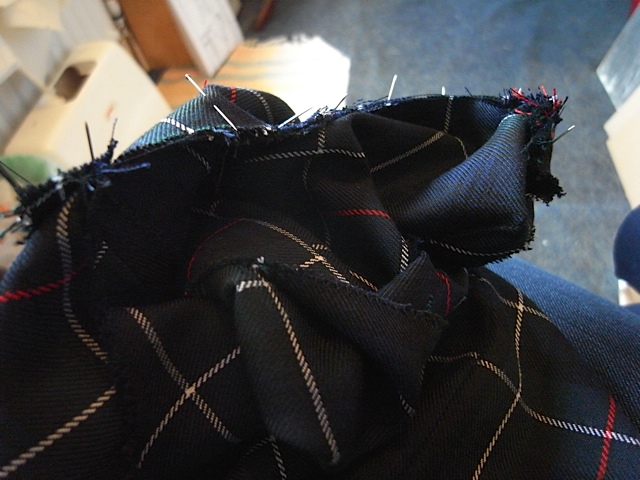
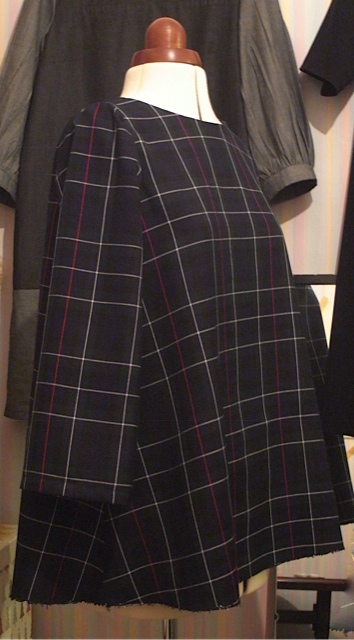
The sides didn’t fair much better either.
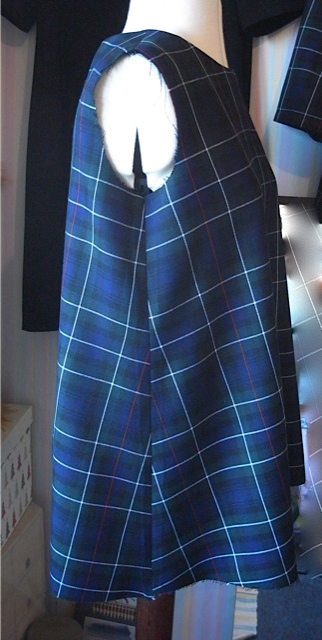
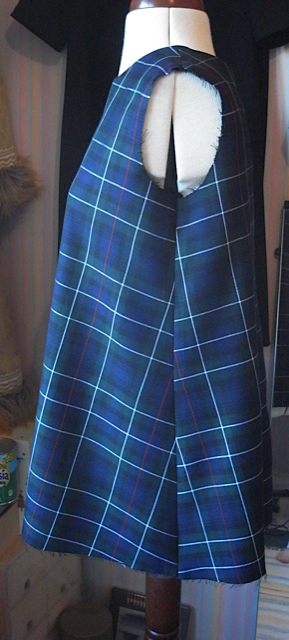
So close with this side! However they do look much better once the sleeves are attached.
I have at least got the red stripe running down the centre of the sleeve, on both sides too.
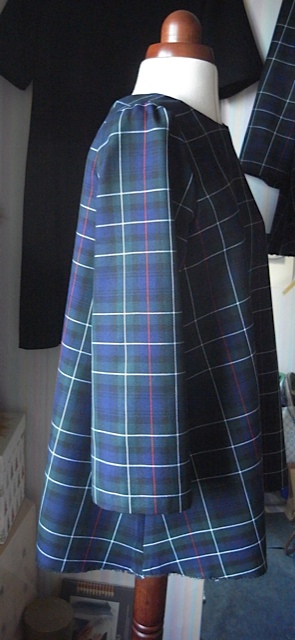
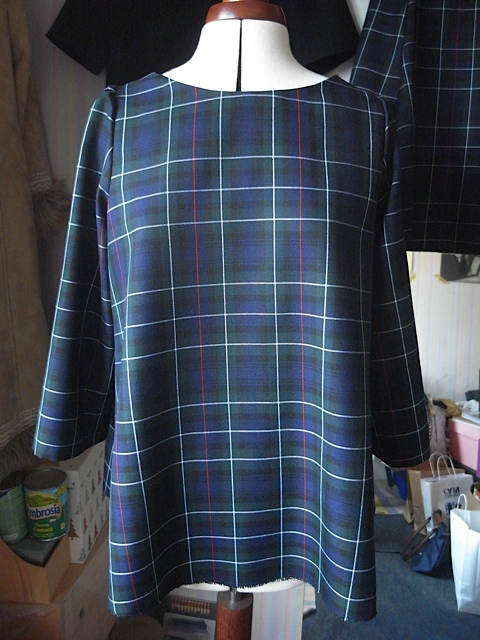
When its on the stripes look pretty good running across the sleeves and the bodice, so I’m quite happy with that.
I zigzagged the bottom rather than do a hem, as its not so easy on this shape. And luckily it seems to work really well.
So all in all, I’m very happy with this top. Its my first make of the New Year, so off to a good start.
December 24th, 2015
Well Christmas is upon us, but I just want to share what I’ve made in the last few weeks. Haven’t been terribly prolific as the usual Christmassy stuff gets in the way, but since I started sewing two and a half years ago I don’t think i’ve made anything in December before. So this has been quite productive for me.
This will just be a quick post to show what I’ve made and hopefully later I’ll get round to blogging the makes properly.
First up, a cushion for my Dad’s Birthday.
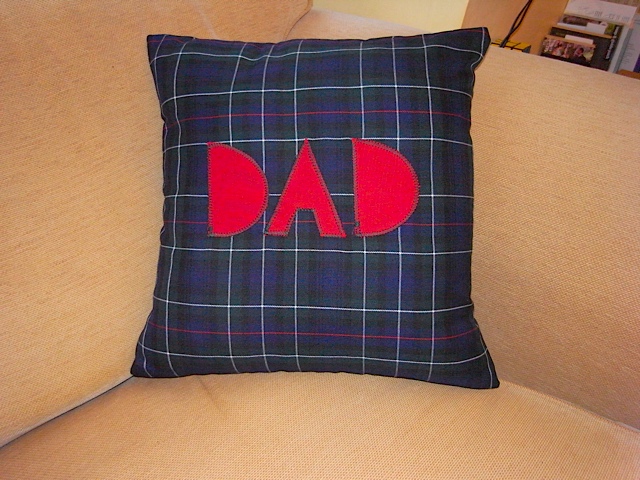
First time I’ve done appliqué, quite pleased with it but now know I’d do a couple of things differently. Dad liked it.
Next up is a Trapeze top, in the same fabric as the cushion. I thought it was quite appropriate for Christmas and the winter season.
So thats it for now.
I bid you all a very Merry Christmas and a Happy Healthy New Year :0)
November 4th, 2015
I suppose its not so much a sewing fail but a style fail. I hate it, I really do!
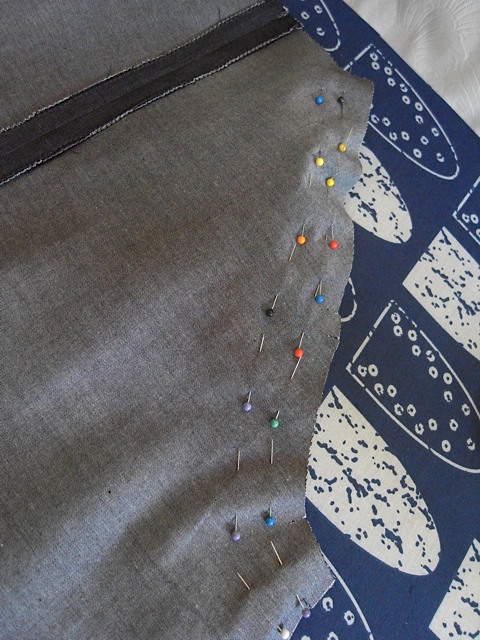
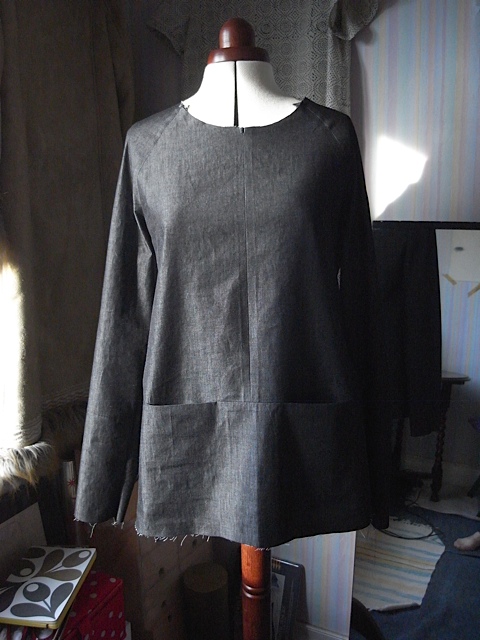
I wanted to have a go at something different. So I bought the Merchant & Mills Top 64, pattern. I also bought some top quality cotton canvas in blue for it. However I decided to make it up first in a dress weight denim also from M&M. And boy am I glad I did.
It wasn’t a complete fail I suppose, I enjoyed the making of it, and I learned some new things about construction. And this was completely different to my usual tops.
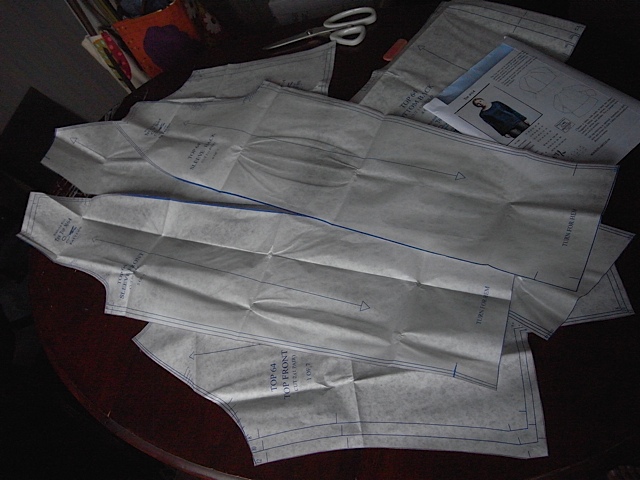
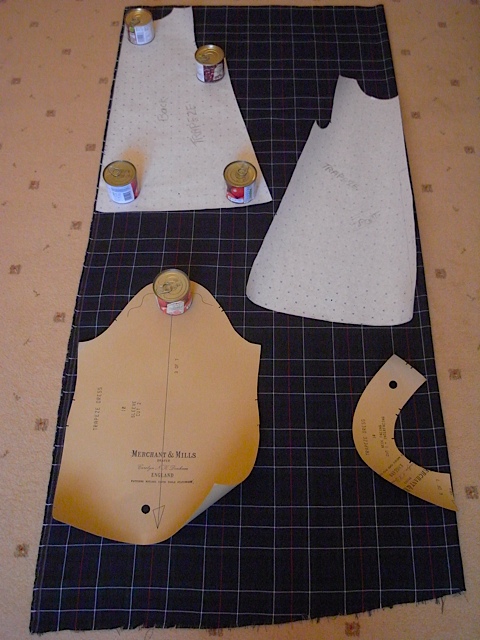
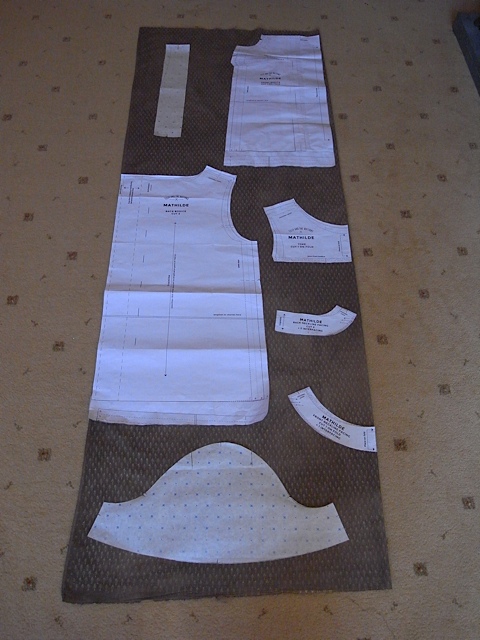
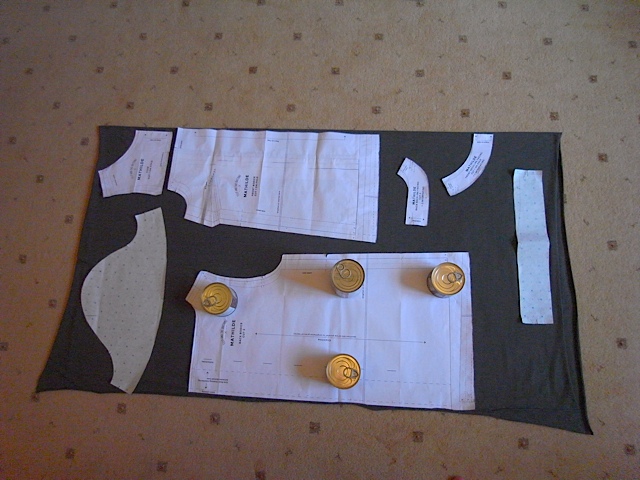
The pattern pieces all cut out and ready to go.
I cut out the size 12 after trying on the size 10 at M&M in rye and very nearly got stuck in it. The size 10 in their shop is made up in a waxed cotton canvas and has no give whatsoever! I knew I shouldn’t have put it on but I really wanted to know how the 10 would look. After nearly dislocating my shoulders to get out of it, I talked to Michelle who works for M&M and she advised me to make it up in a size 12, even though I’m usually a size 10 in their patterns. As she said that is what she does and she’s usually a size 10 too. So thats what I did.
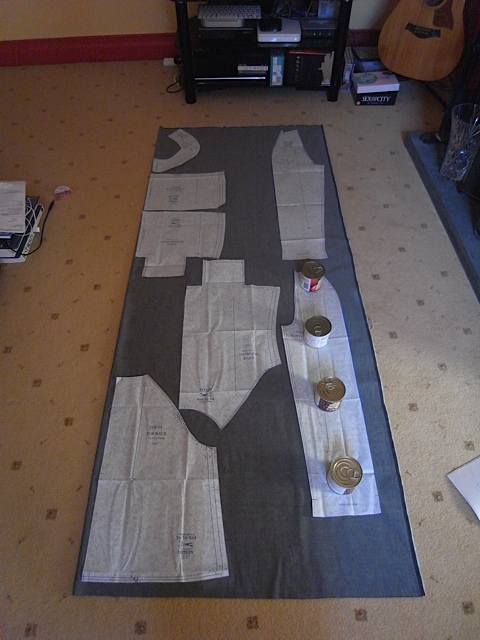
Pattern pieces laid out on fabric. And I now mostly use tins when I cut out.
Like I said I enjoyed the actual making process but I hate the finished product.
Inside of the front.
I decided against top stitching the seams, and I’m glad I did. Would have been a monumental waste of time and cotton.
Close up. Quite impressed with the straightness of my sewing.
This is what the front looks like before I attached it to the back.
Pins for the raglan sleeves.
front and back joined together.

Not used to doing the neckline facing after putting garment together. But it works really well and looks super neat.
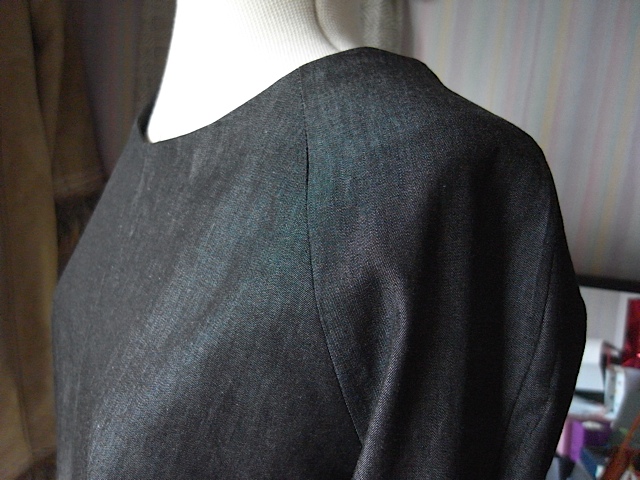
Sleeves/shoulders.
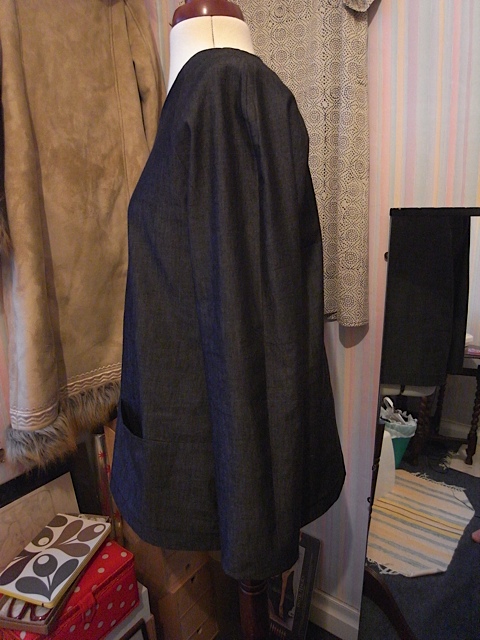
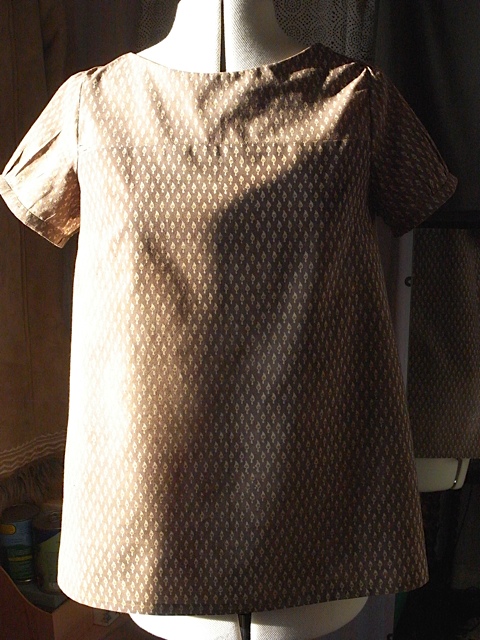
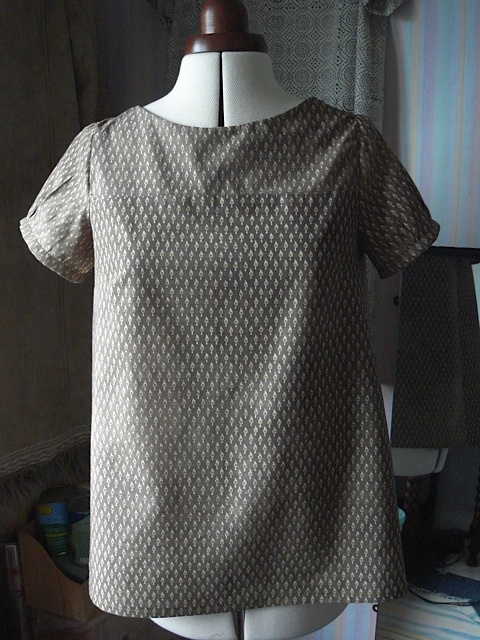
Hangs much better on the dummy than me. I’m pleased with the quality of my sewing on this but it just looks awful on me. Hangs funny, the centre front sticks out and just looks wrong. Don’t know why? Could be that the fabric isn’t sturdy enough, I just don’t know.
Can you tell I’m not happy? Please excuse the nude in the background, its not as rude as it looks. Its from my life drawing days.
I’ve put it down to experience, and like I said I’ve learnt new things. Who knows I might try it on again in a few months and decide I do like it. Never say never…
September 25th, 2015
Oh what a joy to sew with cotton again, what a joy what a joy what a joy!
Its good to go outside of ones comfort zone, but boy is it good to get back inside too. I can’t believe how much I enjoyed working with this 100% indian print cotton again, it was like saying hello to an old friend. However I have to add that I think I got a little too complacent and things went a bit pear shape on the sleeve insertion at the shoulders. So I had to do some unpicking on both shoulders, but even that was pleasant. So much easier to unpick on this fabric than it is to even try on the jersey stuff!
I picked this gorgeous fabric up from the wonderful La La Rookh workshop in St Leonards. Totally recommend a visit if you get a chance.
Always so difficult for me to capture the true colour.
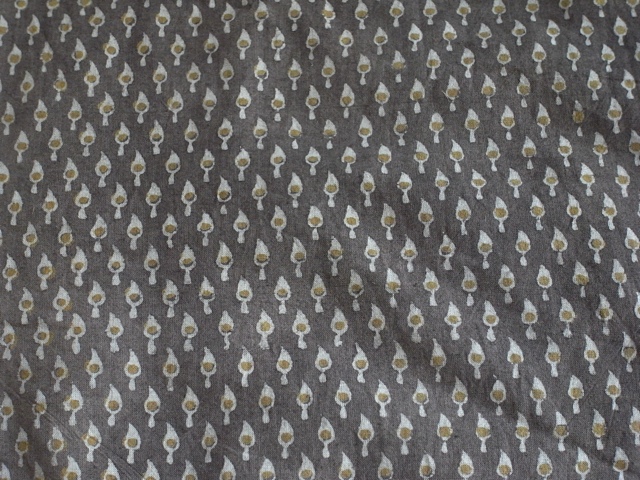
A close up of the pattern.
I restrained myself and only bought a meter and a half instead of 3 meters as I was tempted to do. And of course I now wish I had bought 3m, oh well, hopefully I can still get more.
Picture taken in sunlight, don’t know if it helps with capturing the colour or not.
Its a sort of khaki’ish browny green. I used a fairly vibrant greenish thread which matches well with the little dots in the middle of the pattern. Its a good job I don’t have to describe colours to people on a daily basis!

Thats 10 short sleeve tops. I think thats probably enough for now. Keep your eyes peeled for something a little different in the near future…
September 11th, 2015
As I love the last jersey top I made so much I decided to make another. You might remember though that I hated the making process very very much! But I decided it was worth the pain. And then I started making it and quickly decided I really really hated working with jersey and this better be worth it once more…
I’m using the last of the jersey I bought from Merchant & Mills some time last year. And I’m very glad they no longer sell jersey as it will stop me being tempted to buy more.
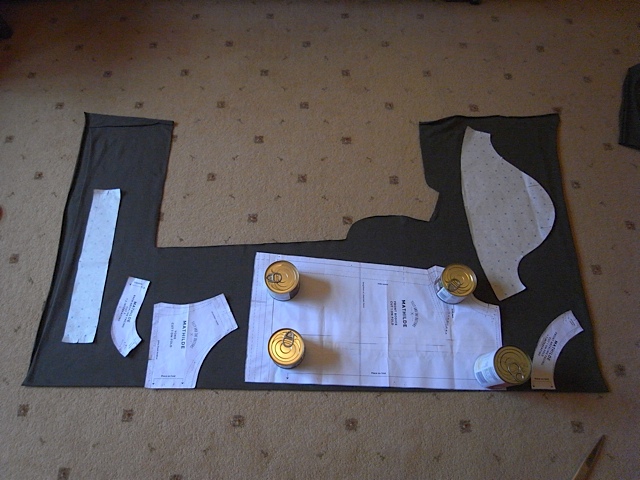
As you can see I’m using tins as weights to hold the pattern whilst I cut round it. This is proving to be the best method.
Once again some problems with puckering at the shoulders, but I really don’t care.
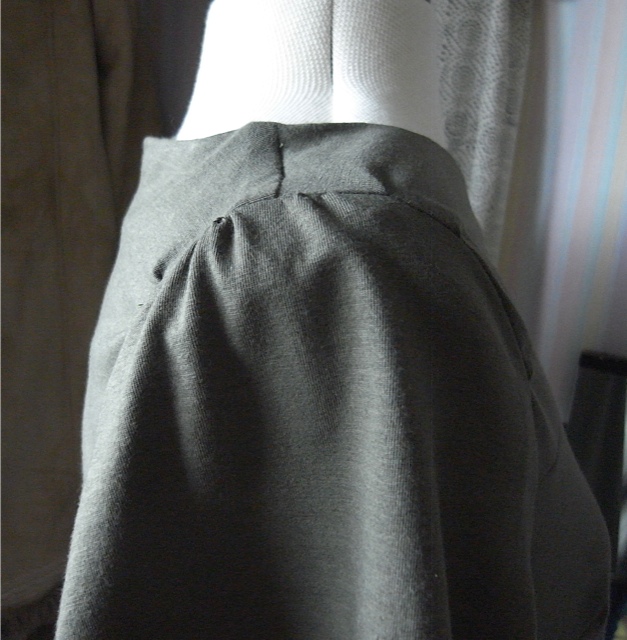
Both sides.
Looks a bit bad here at the shoulders.
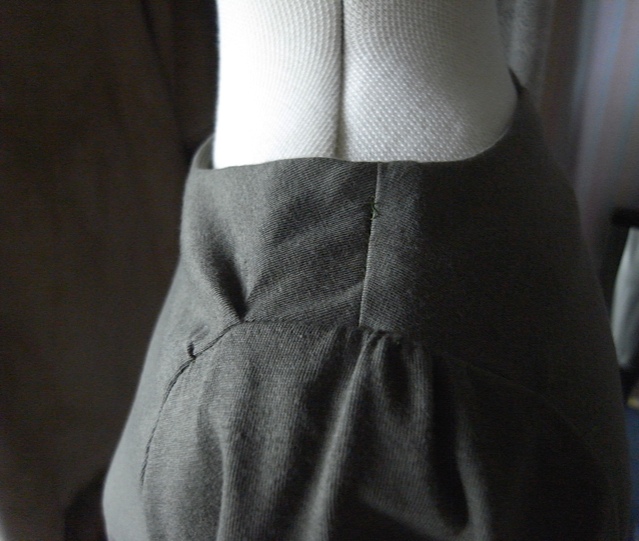
I’m not too happy with the bust darts either, they seem to sit a bit funny.
Doesn’t really show too much here. And doesn’t look too bad on. Its just that I know.

Side seams look a bit wonky, but once again doesn’t really show when being worn.
I think its safe to say I’m not overly impressed with it. I will wear it, and maybe I’ll grow to like it as much as I do the other one, but I’m not holding my breath!
(Sorry for the picture quality)
September 2nd, 2015
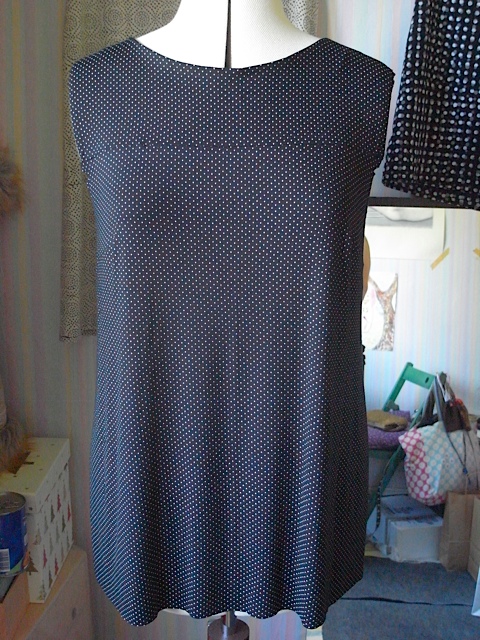
So I thought it would be a good idea to buy some more jersey fabric. I found some on Fabricgodmother.com, its a rather lovely jersey viscose, black with little white spots. I thought it might be nice to have a go at making one of my tops in a different type of fabric for a change. Thought it might be nice, HA!
The making of this top was a bit of a nightmare to say the least. I knew it would be a bit of a challenge but little did I realise just how much of a challenge. After all, I’ve worked with jersey before, back in the day when I was making those rectangle tops. It wasn’t difficult and in fact they were pretty easy to whip up, could make one in about 5 hours or less.

Like this one.
So I set about laying out my pattern pieces. That was when I remembered the first problem about working with jersey, the fact that when you fold it, the edges don’t usually line up nice and neat. If you try to get them to line up neatly you end up with a twisted fold. Not what you want. Once I finally got it to fold in a satisfactory manner, I set about placing the pattern pieces. As this fabric was 150cm wide I was able to get away with 1m of fabric, but only just.
Had to place the sleeve piece length ways. You can just about see at the bottom that there’s quite a bit of excess fabric, compared with whats underneath. And its the same at the top. Had to juggle with the layout a bit.
Instead of pinning the pattern to the fabric as I usually do, I weighted them down with tins. I found this to be the best method. Though I had to keep reminding myself to cut the notches, as to forget would have been a pain in the arse.
One of the things I hated about working with this fabric was its slipperiness. It just wanted to slip and slide all over the place, and once I had one of the back pieces attached to the front it made the fabric want to drape over the edge of the table and was pretty difficult to try to keep it on the table and not stretch the piece I was working on out. I hope that makes sense.
I encountered my first major headache with it though when I sewed the second bust dart. It would seem and you can correct me if I’m wrong, that a stretch stitch does a little back stitch as it sews. At least thats how it looks to me. When I did the first dart I did my usual back stitch and it was Ok, but when I sewed the second and attempted to back stitch well it went horribly wrong and my machine tried to chew up the fabric. It must’ve taken me at least twenty minutes to free it from its jaws. And then when I tried to unpick the stitches well nothing it would seem was going to prise those babies apart! In the end I decided I didn’t need to unpick and could just carry on where the stitching left off. This was after a lot of prolonged swearing and I’m ashamed to say having a major hissy fit at the fabric and chucking it on the floor. Yes I behaved like a two year old!
I was not going to let the fabric win though and was determined to make it into something wearable if it killed me. Lets just say though that this was one of the worst sewing experiences I’ve had so far. I hated every minute of working with it. And was pretty sure I was going to hate the finished garment as a result.
Here it is without sleeves but otherwise intact. and not loving it, as is usual at this point.
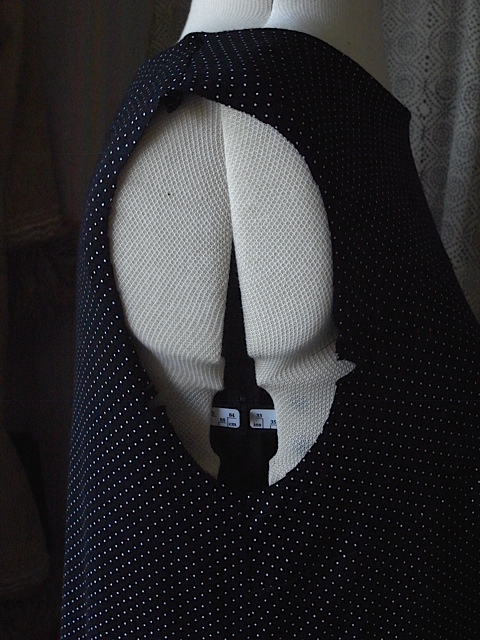
Look at how the armholes appear to be stretching out of all recognition. I decided to stay stitch round the armholes and I’m glad i did.
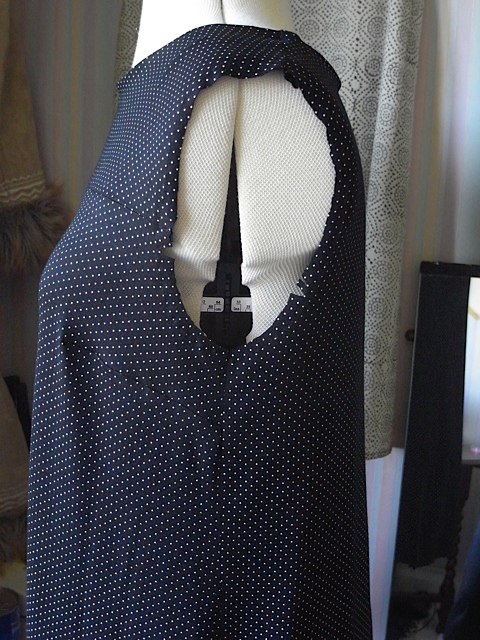
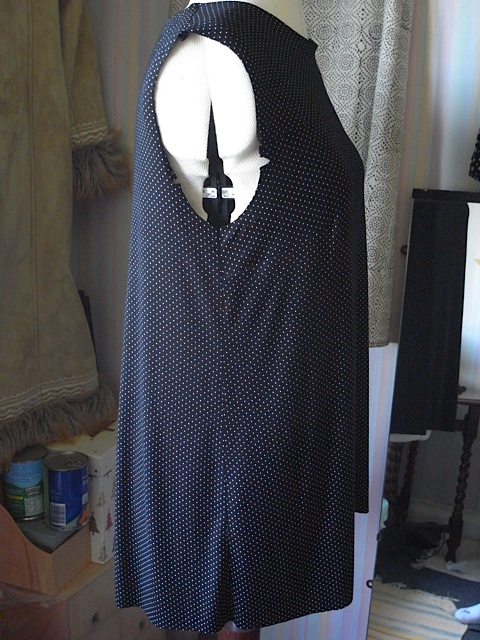
Really not loving how it looks at the moment.
I put off doing the sleeves for a few days as I knew it wasn’t going to be straight forward, but as it happens the sleeves went in relatively painless. They are by no means perfect and had I been using my usual cotton fabric I probably would have unpicked and done it again, but there was no way I was unpicking or even attempting to unpick here. So imperfections be damned!
I also had to do the hem a couple of a times. The first time I used the stretch stitch and it just didn’t look right and was too long.
first hem attempt.
And from the side. Sort of looks Ok looking at it now, but I wasn’t happy.
Here it is finished.
Doesn’t look too bad here but the neckline looked like it wouldn’t sit right either, but it actually looks Ok on.
Shorter now and I’m happy.

With the front tucked in, which is how i like to wear it.
Whilst this wasn’t my favourite sewing experience I am happy to say that I do like the top. Its very comfortable to wear in the jersey. And it doesn’t need ironing after washing either which is a big bonus in my opinion. So, once made up into the finished garment the jersey fabric is a delight, but the actual process is horrible. I must be a glutton for punishment though as I’ve just started another jersey top…