Made a big baby bag for a work colleague to give to her friend.
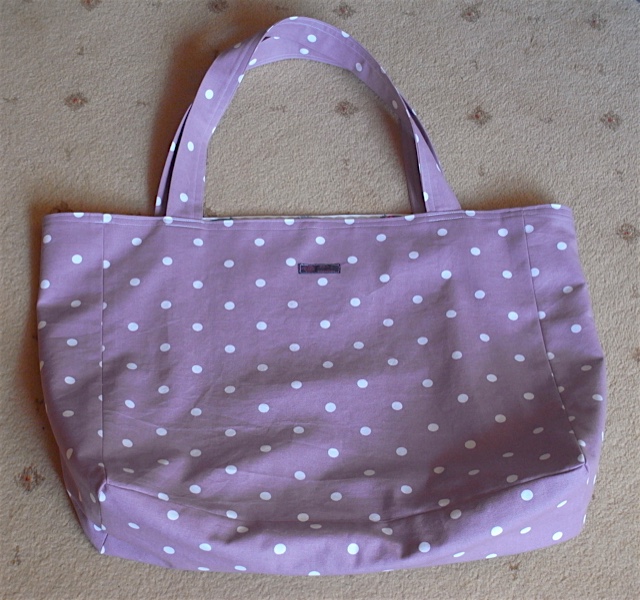
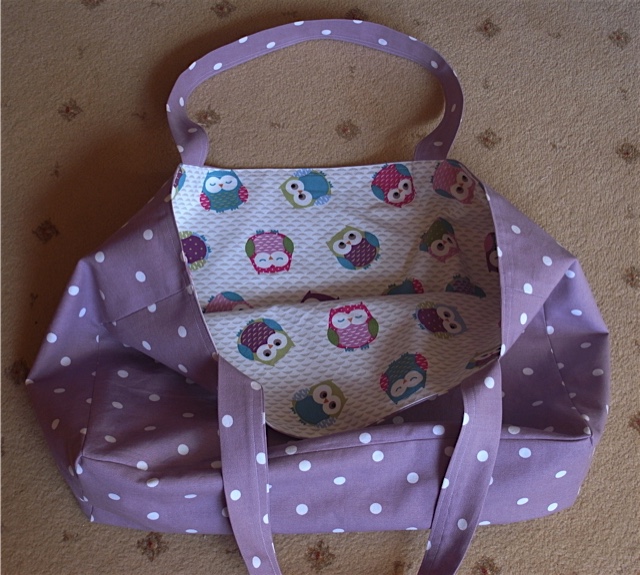
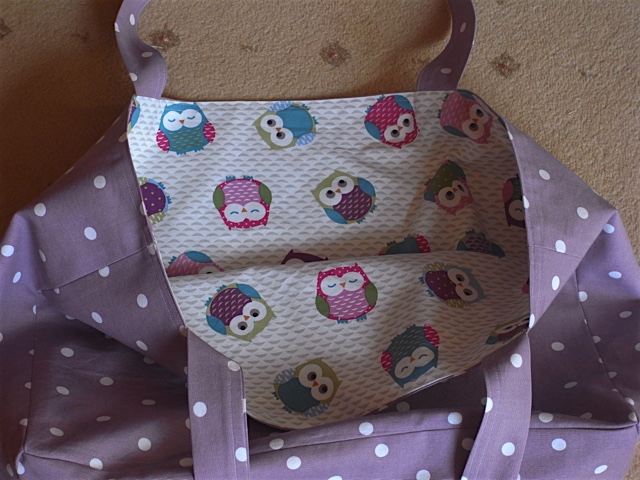
I think the inside contrasts nicely with the outside. Had feed back and the recipient loved it!
Made a big baby bag for a work colleague to give to her friend.
I think the inside contrasts nicely with the outside. Had feed back and the recipient loved it!
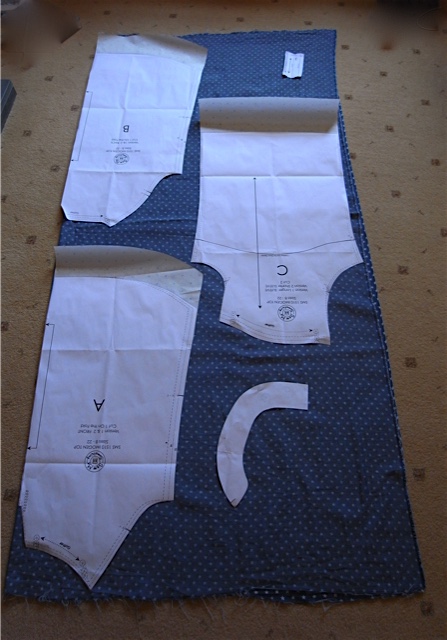
Last September I bought some gorgeous Japanese double gauze cotton from Merchant and Mills. It was quite expensive and I wasn’t really supposed to be buying fabric for me at that time, but it was just too divine to pass up. I bought 1.5metres, I can’t remember exactly how much it was a metre but it was around £22, so it cost me over £30, I haven’t bought fabric that pricey for a while and remembered why when trying to decide what to use it for. Needless to say it sat in my stash for a good few months. And then Imogen came along and I knew what I must do…
Not too sure how wide the fabric was but it obviously wasn’t as wide as the star fabric I’d previously made Imogen out of and it was really really tight getting the pattern pieces to fit. I had to compromise and use the original shorter sleeve pattern piece otherwise it just wasn’t going to work. As it was I literally had mm to spare between pattern pieces, had to be really economical with my cutting out.
At the moment I tend to make this pattern over 3 days, as I find it quite demanding in places. I usually cut out the fabric and attach the interlining to the relevant pieces, and then if I’ve started early enough in the day I might do the zigzagging of the neck edges and bottom edges of both bodice pieces and sleeves followed by the gather stitches. I will then start again afresh the next day.
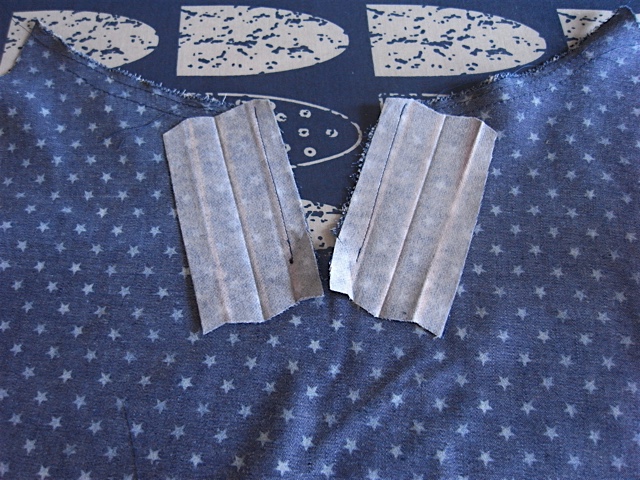
There will now follow some pictures that I hope will help with the inserting of the placket.
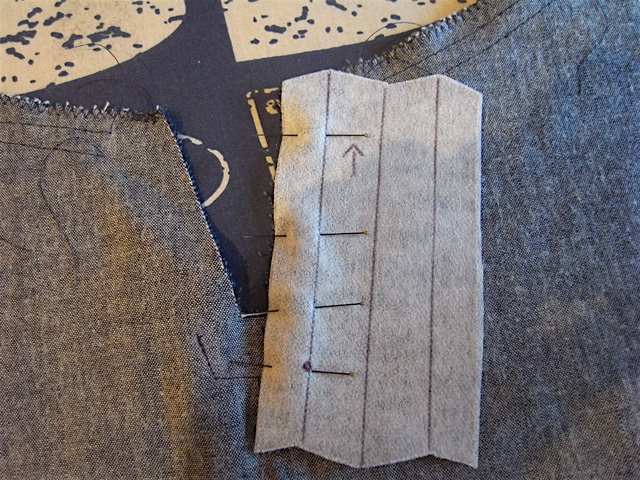
Make sure your pieces overlap before sewing.
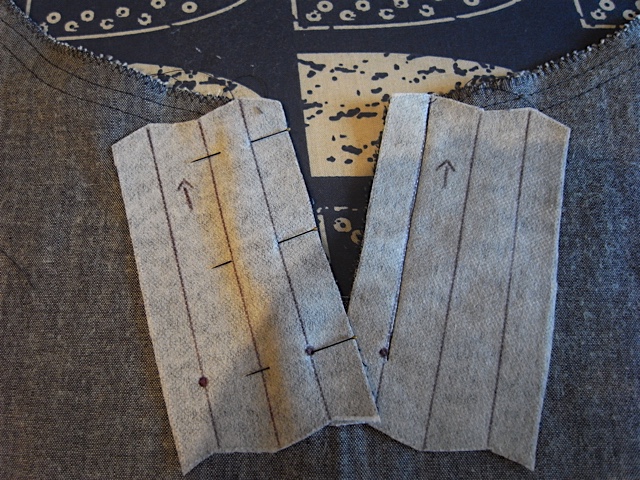
The pictures below are where it gets tricky. And I have to say it was particularly tricky with this fabric as it got pretty thick in places and I really wasn’t sure if I was going to get it through the sewing machine!

I honestly thought at this point that it wasn’t to work and that I’d made a major waste of this beautiful fabric! However it would seem I don’t like to give up too easily, especially when I love the fabric. So I persevered…
Look at that beautiful placket. I am so proud of this bit and I can’t believe it actually worked out!
After the plackets done, you then hem the back and the front pieces.
After that you attach the front and back at the side seams. And then comes the sleeves. This was also a little tricky as the fabric was so thick after turning up the sleeve hem twice that it was quite hard pushing the elastic through and took me way longer than previously. I left it after that and picked it up again the next day. Have to say if I didn’t have housework and washing and cooking to do I’d probably be able to make it in a day.
After making the sleeves comes the attaching of the sleeves. I’m always a little anxious when I put in the sleeves, have had many a sleeve insertion go awry. Happily this went smoothly.
Next up attaching the collar, I quite enjoy this bit as I love the gathering and getting the body to fit the collar. Again though it would prove quite difficult with this fabric due to its thickness. The gather stitches didn’t want to run smoothly through the fabric and I had to pull quite hard. I used lots and lots of pins. And I can’t recommend the entomology pins from Merchant and Mills highly enough. I leave them in the fabric as I sew and sew over them, they are fine enough to get it away with it. Have had the machine needle hit one a few times, usually makes me jump but haven’t had any major problems yet. Obviously I’m not recommending it as such but just saying it works for me.
Below is the outer collar piece
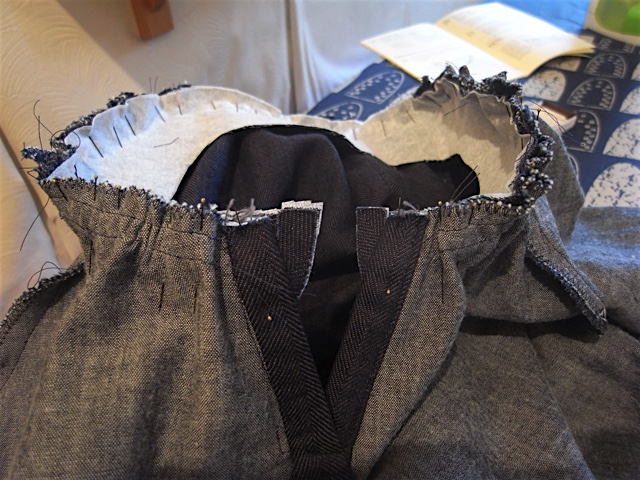
And below here is the inner collar piece being attached to the outer piece.
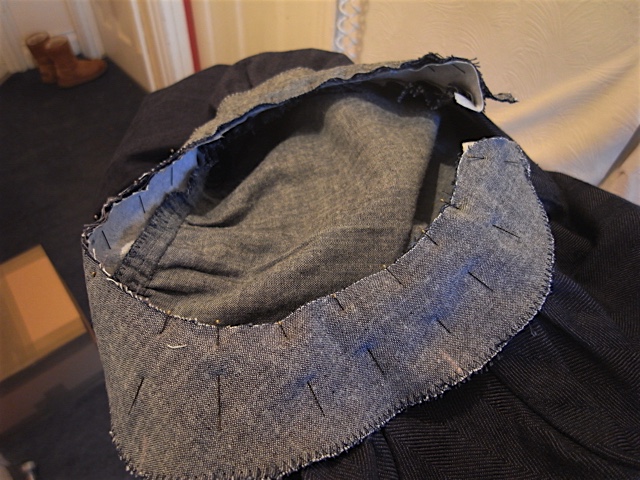
After both collar pieces have been attached comes the top stitching at the base of the collar. Now I did have trouble with the opening parts of the collar, I simple could not get it through the machine. I even tried hitting them with a hammer to see if that would help. It flattened them out a bit but not enough, so I just had to leave them unstitched at those two points. Doesn’t seem to be a problem though. Phew!
You can just about see in the picture above where I’ve had to leave it unstitched. Oh and the top stitch did go a little wonky in places, but I can live with it.
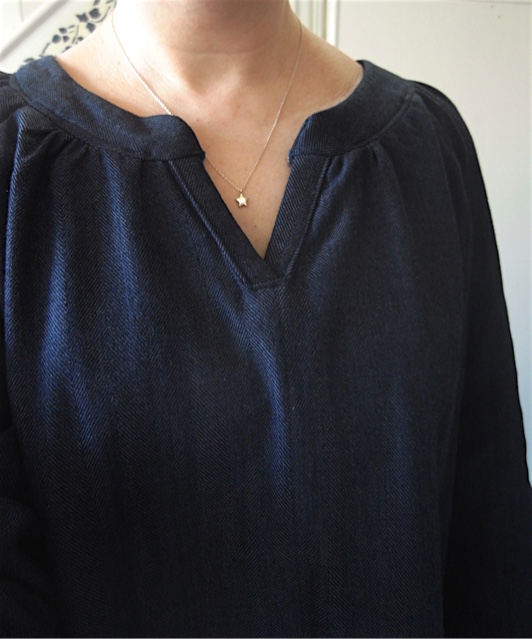
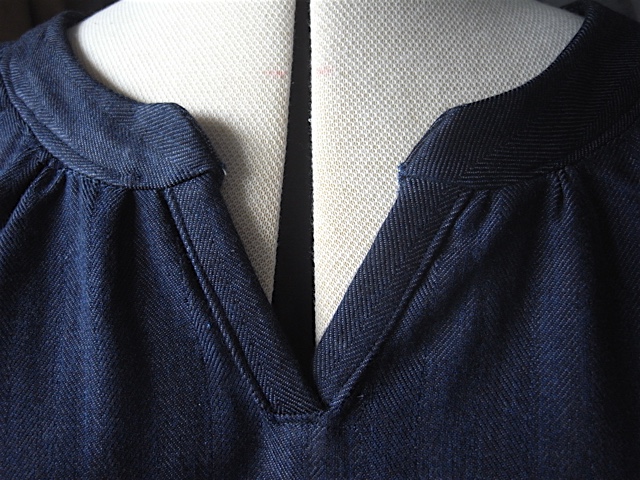
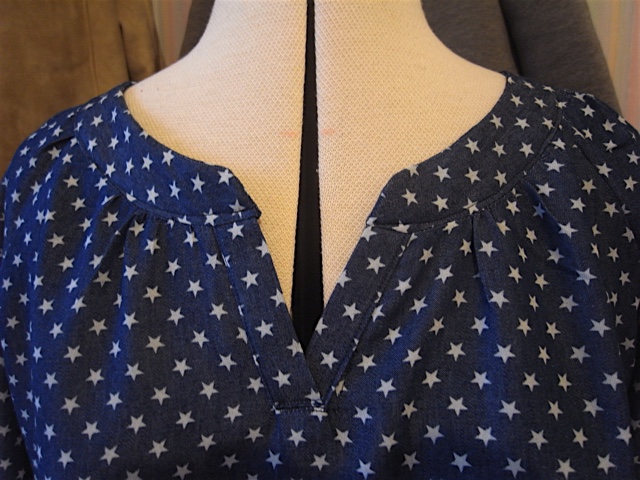
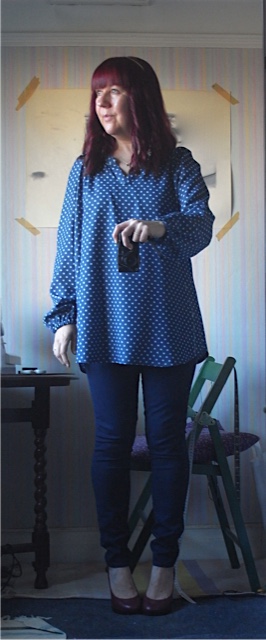
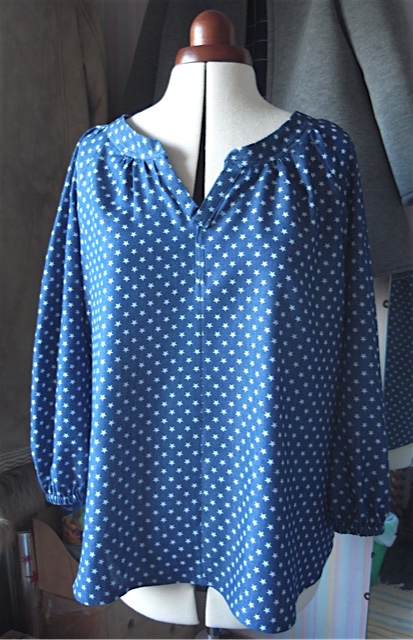
I really do love the neckline on this top.
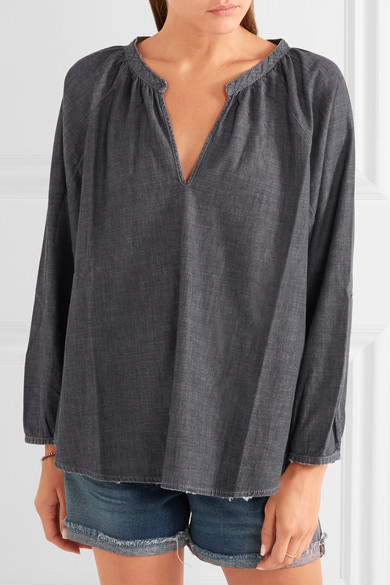
It reminds me of this top, which is designer and quite expensive, so I am so happy to be able to make it for myself. And I think it looks just as good if not better if I may say so myself! I like the fact that the Imogen doesn’t have such a low cut neckline.
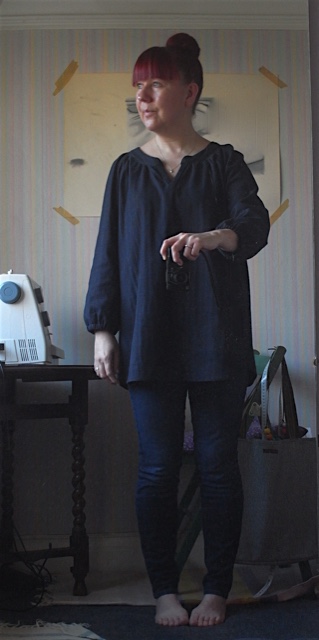

With the thickness of this fabric its a little more structured than the previous 3, but I like it. I think it worked quite well. Its pretty warm too.
So all in all I am extremely happy that I’ve finally used the fabric and happy that I ended up making the right choice. Although I reckon it would have made an equally lovely Trapeze top.
And I would like to say that when I posted this on Twitter shortly after finishing it, Jules Fallon of “sew me something” said and I quote “@essjcreative Yes, I thought that when I zoomed in. But it was worth it, this has to be one of my most favourite Imogens of all time!” How flipping happy am I! :0)
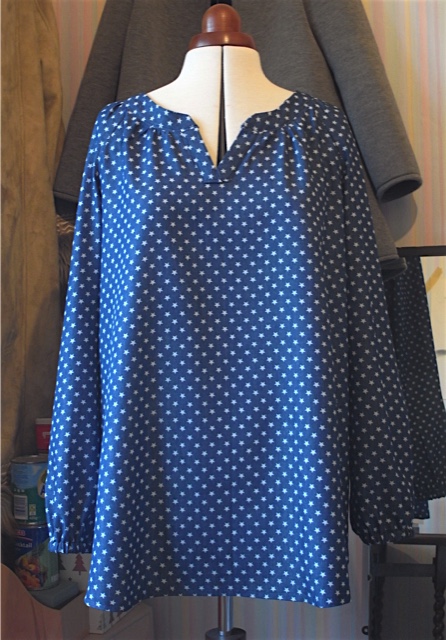
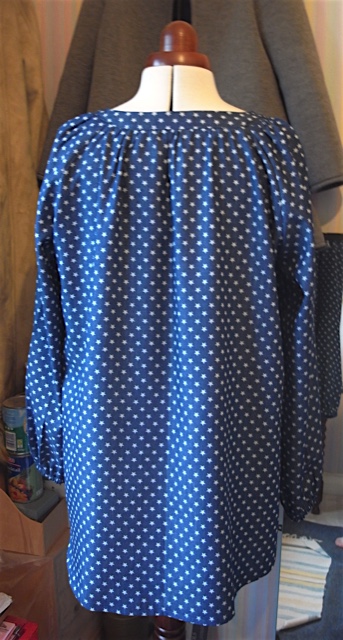
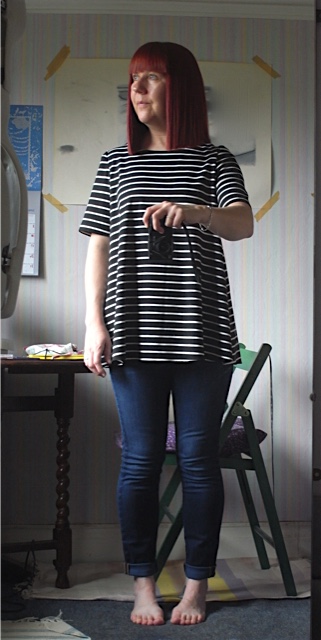
Here comes the third Imogen. I think we can safely say this will be the year of the Imogen!
Using my newly adapted longer pattern pieces.
I’ve used the same fabric because I like it very much. And it would seem third ones a charm. Finally got the hang of the placket and this one looks really good.
The collar edges are getting better too.
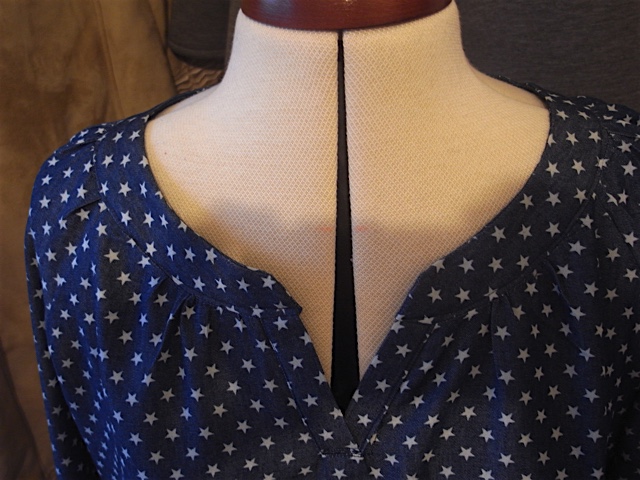
Another shot of the neckline, just cos I’m so pleased with it.
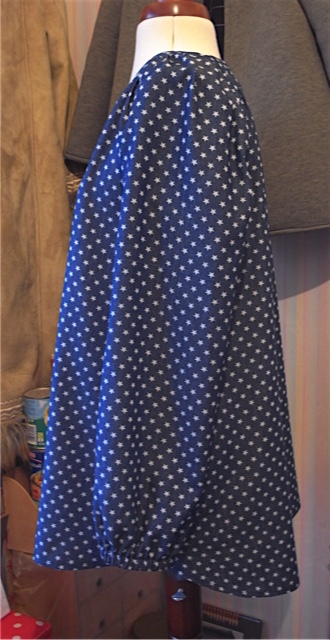
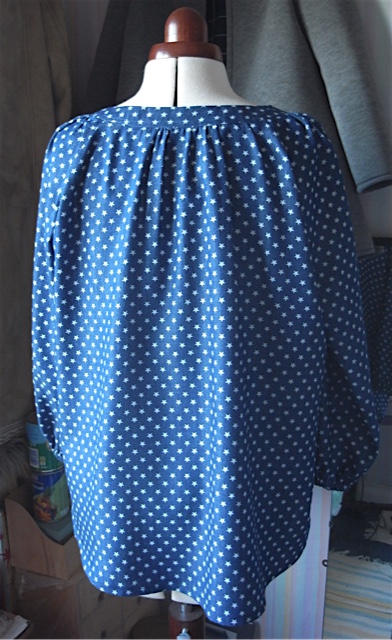
I do love that curved hem too.
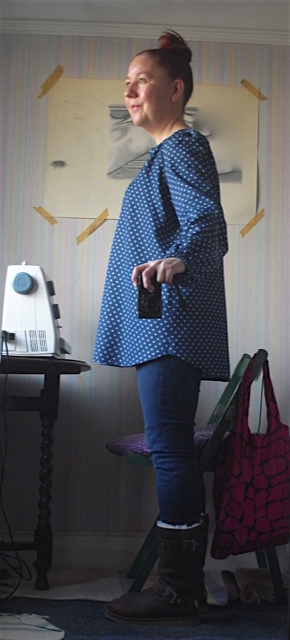
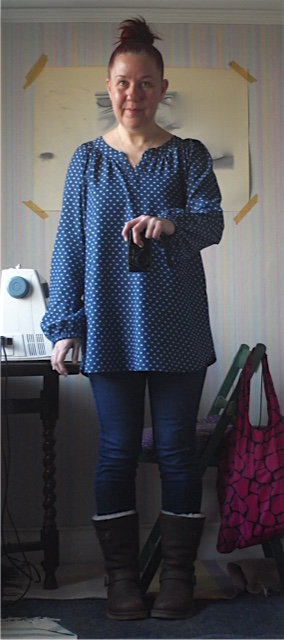
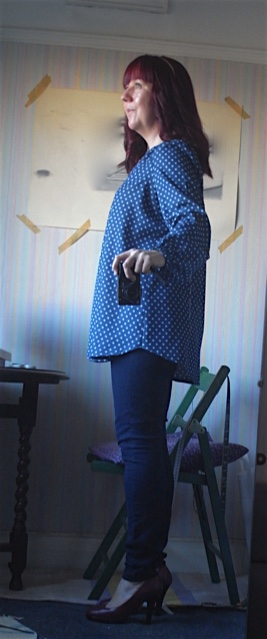
Imogen top. But this time I’ve lengthened the bodice by 8cm and the sleeves by 11cm, and it now it is perfect for me. PERFECT!
Yep I used the same fabric as I really love it. It washes well and doesn’t crease too much whilst wearing. And it just feels lovely to wear. I still had some problems with the front placket and the whole construction of it, unfortunately the instructions are just a little bit too vague and if I was a beginner (which this top is recommended for) well I would probably have given up! I got there in the end and just hope I manage to work it out when I make the next one, as I will be making at least another one…
I still enjoyed the making process though for this top. Maybe its about doing something different and challenging myself. Might have to give that more of a try next year, but I can see this pattern in so many various ways. Think it would make a fabulous dress , or long tunic over jeans. I already have a short sleeved black crepe dress version in my head, watch this space.
I wore it to my Dad’s 80th Birthday lunch and had a few compliments on it, and not one person asked if I made it. Which makes me think it looked that good it couldn’t possibly have been made by me!
Yep, thought it about time I had a go at something different. Think I’ve made enough Trapeze tops for now!
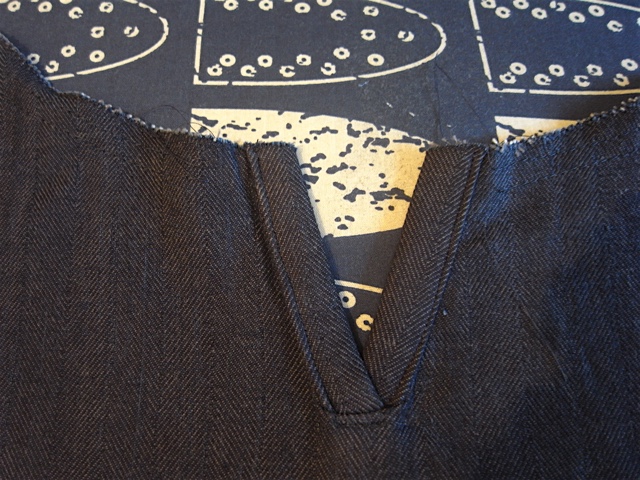
I fell in love with the Imogen top from sew me something, as it had a neckline I liked. However The neckline turned out to be a bit of a challenge.
The pattern says its suitable for beginners, however I beg to differ. I do have sewing experience now, but I feel if I’d tried this as a beginner I would have packed up my sewing machine and just stopped. I feel the instructions could do with being a little more detailed and more pictures wouldn’t go amiss either. So despite the experience I do have I still managed to bugger it up! I was able to rectify it though.
Totally forgot to take pictures of the buggered up version, as I was thinking it was a right off and was feeling very despondent, I really liked the fabric and was unhappy about the waste. And then I checked in my scrap pile and found I had enough scrap left over to give the buggered up bit another go.
Basically I put the collar on upside down, simple mistake to make, I was looking at it like a facing as thats what I’m used to. I unpicked the upside down collar and started again. Of course I had to compensate for some fabric that had already been cut off, but it worked out fine.
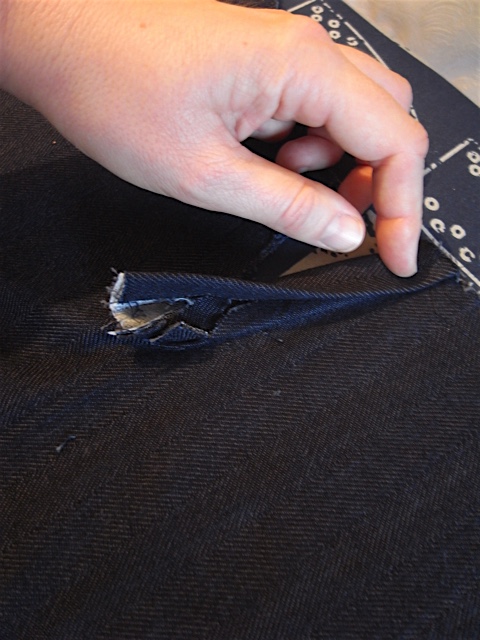
I also had a little problem right at the start with the placket not fitting right. There’s a little V like cut out in the neckline and I believe when I cut the fabric out I must’ve somehow made the bottom of the V a bit wider than it should have been (if that makes sense?) And once I’d attached both the plackets they didn’t overlap like they should. I was almost ready to give up at the first hurdle.
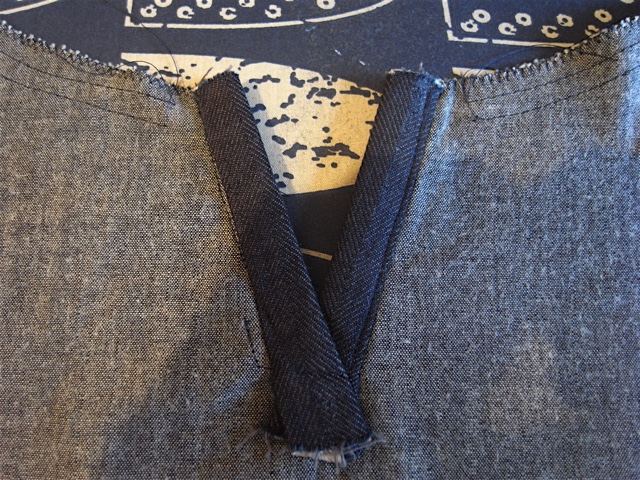
And then because I thought I’d ruined it already I thought why not cut it down the middle through the centre of the V and put back together with a small centre seam? Why not indeed! So thats what I did, and it worked. So I carried on. Which partly made me more determined to sort out the upside down collar situation.
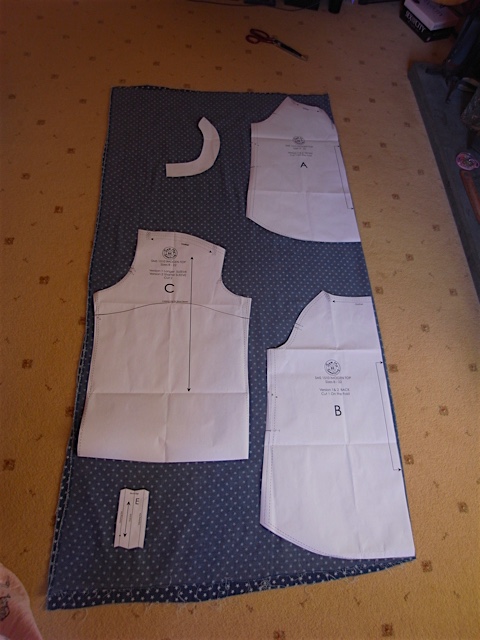
I was able to get a UK size 12 out of 1.5m of fabric.
Below is the placket situation before I sorted it out. As you can see the placket pieces do not in anyway shape or form meet or overlap.
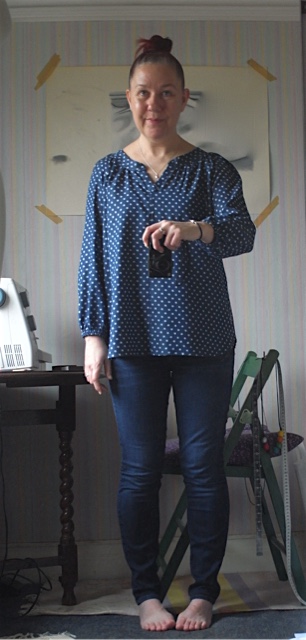
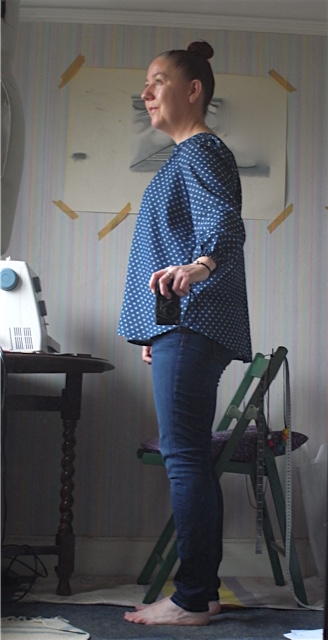
Ta daa! Here it is, and I love it.
Despite all my problems with it, I thoroughly enjoyed making this top. I learned several new things, not least how to insert elastic to make the sleeve cuff. It also had a different technique for sleeve insertion.
More pics
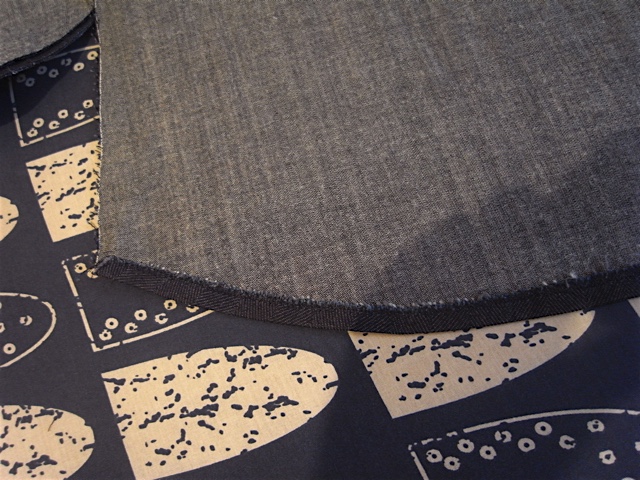
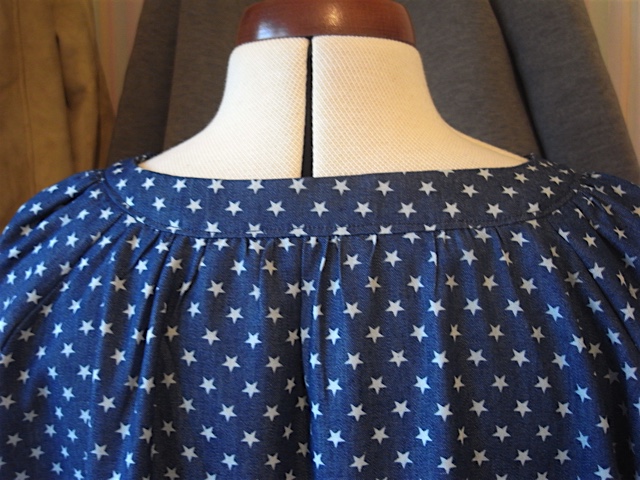
See what I mean about the lovely fabric. Its a cotton denim coloured chambray with little stars on it. It wasn’t expensive, I just really really liked it. And didn’t want it to have been a waste.
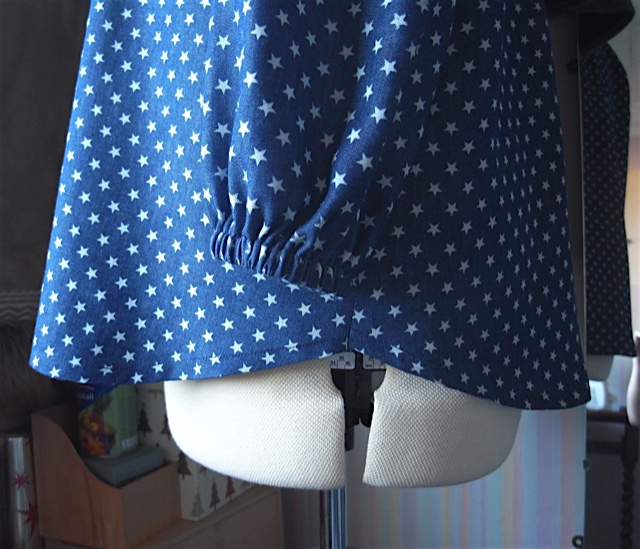
It has a lovely curved hem, and here you can see the elasticated cuffs too.
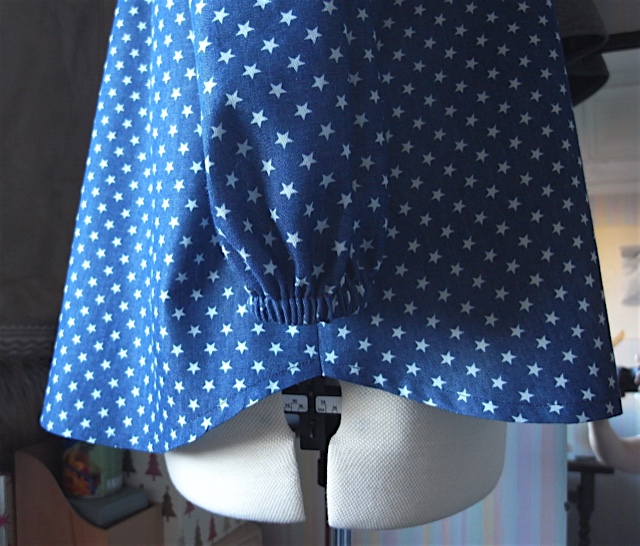
In the picture below you can see little more clearly the slight mess of the plackets and that the collar still isn’t quite perfect. I had to zigzag the seam at the base of the placket neck opening as the seam wasn’t quite big enough for me to finish it off properly on the edges, so that looks a bit messy, but I can live with it. Also the placket isn’t sitting quite right, but again I can live with it. I also made the row of stitching that anchors the bottom of the collar to the bodice a little too high from the neck seam. I think it looks Ok and again I can live with it.
The top is perfectly wearable and after giving it a good press the neck sits pretty nicely.

Anyone care to venture a guess on how many of these I will make? I can tell you now it will be more than one…
Its just been a while since I’ve blogged about it. I was busy making bags for my little Etsy shop
but now I’m back to the clothes.
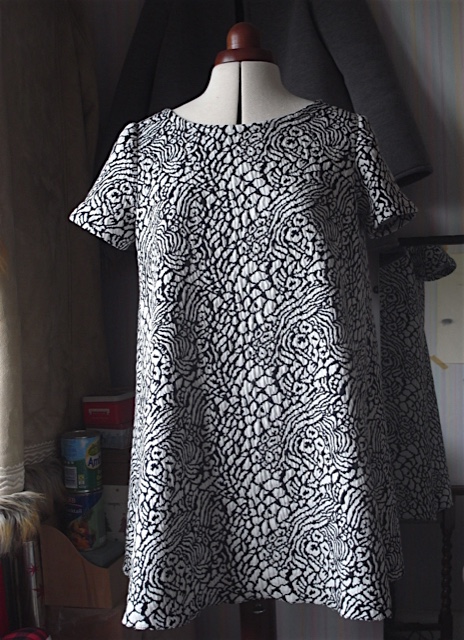
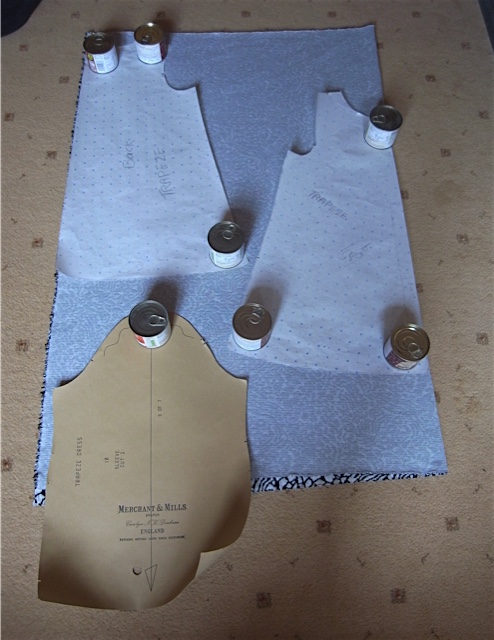
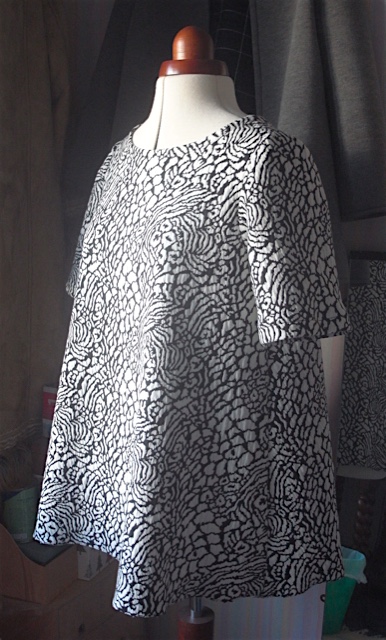
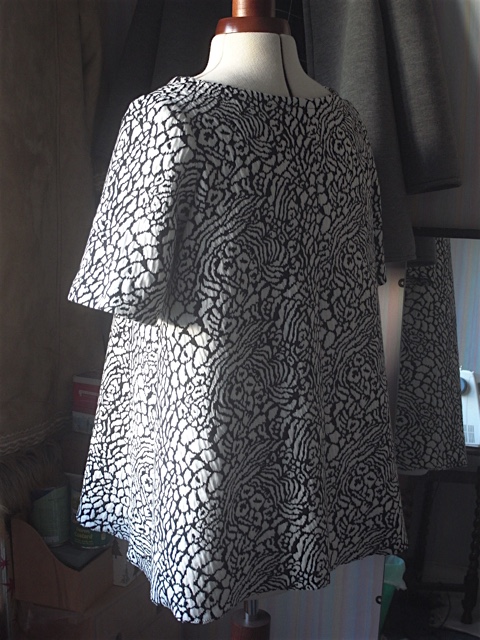
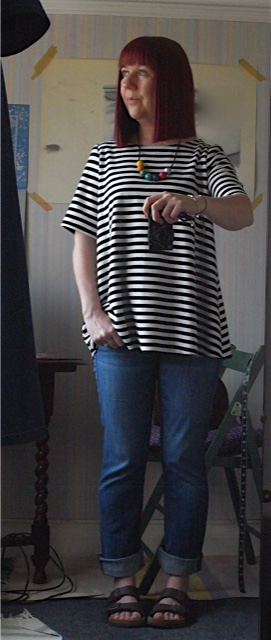
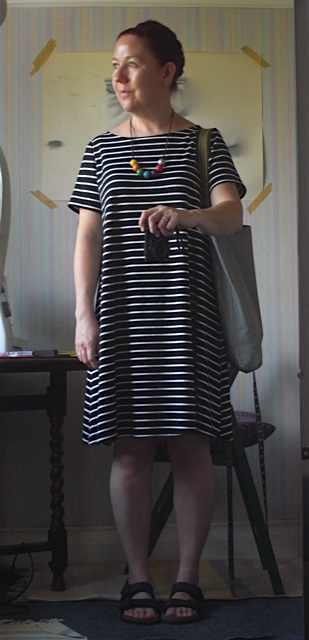
I’ve tweaked my Merchant and Mills Trapeze pattern once again, to make a mini dress/tunic length. And the first thing I made from this new pattern was a dress for my works Christmas party. I made it from the textured black and white ponte roma that I made a top from from in the summer. I had a hunch it would make a good dress for a party. And I think I was right. Very happy with it indeed.

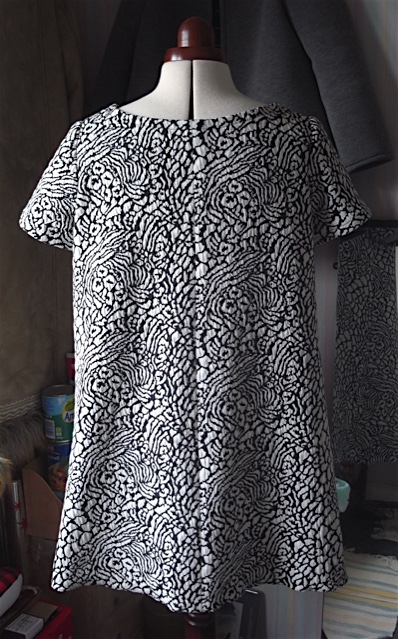
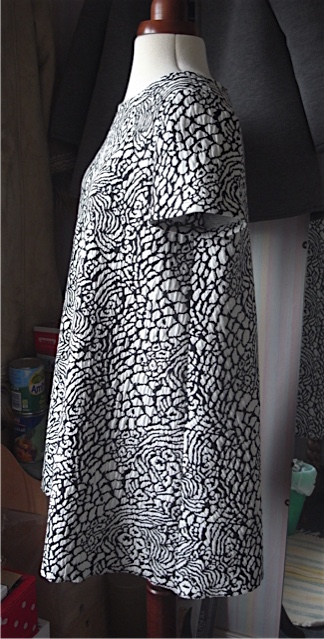
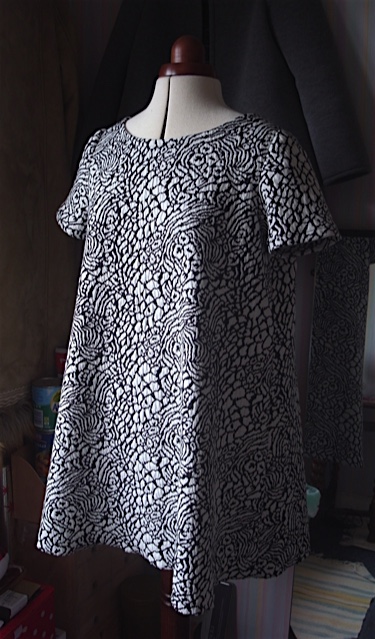
It was a nice easy make. The fabric is a joy to work with.
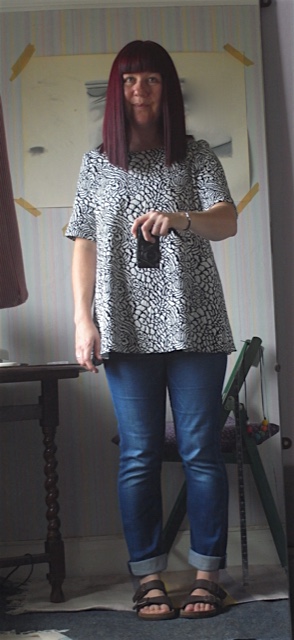
Here it is as party dress, I hope I’m not too old at the age of 45 to be wearing a mini dress like this. Don’t worry won’t wear it without tights, that was not a good look!

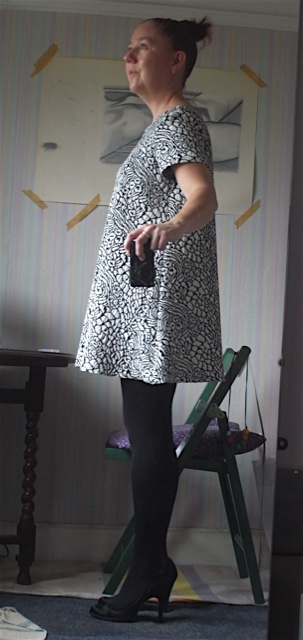
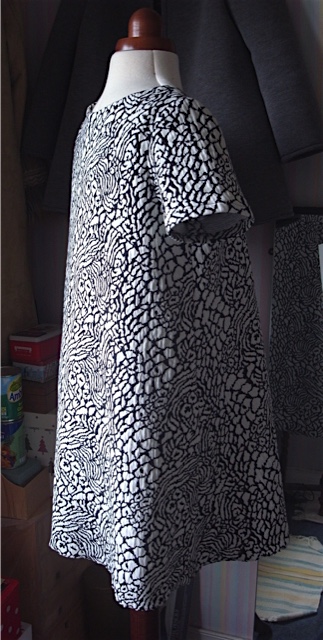
It also looks good as casual wear, worn with jeans and Uggs or Birkenstocks.

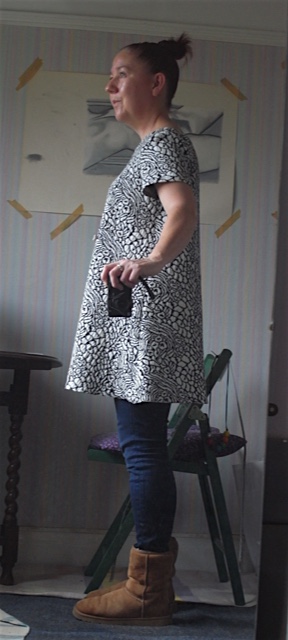
I probably prefer it worn casually but then again I prefer casual wear now a days anyway!
Hope you like it, I do.
Xx
For my bags! Yep I’ve been making lots of bags and am hoping to sell them to lovely people. I realised I’d made the ultimate tote bag and thought other people might love them too. I know thats a pretty big claim, but I know bags and I know I’ve hit on a great size and shape for a fabulous tote bag.
https://www.etsy.com/uk/shop/essjcreative?ref=l2-shopheader-name There’s the link.
Here’s some pics of the bags…
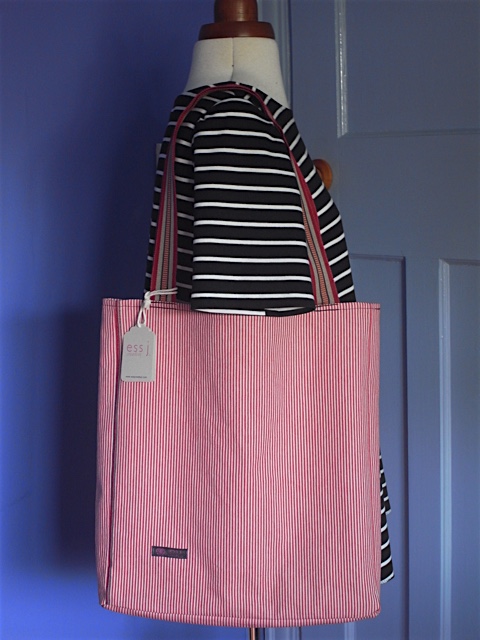
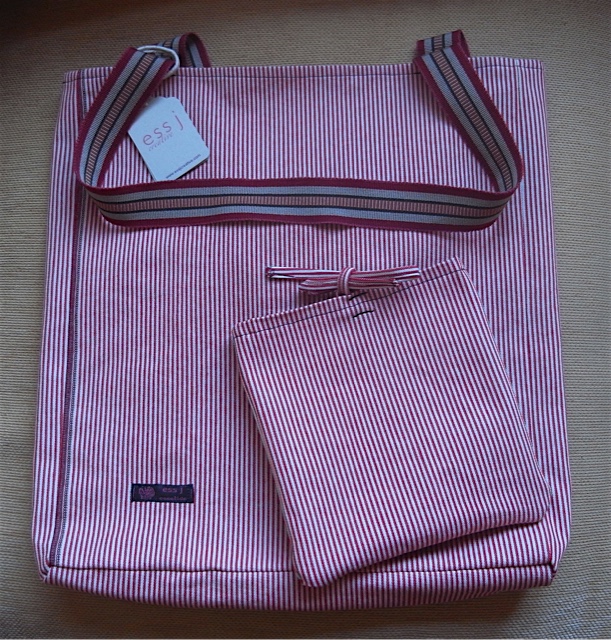
Red
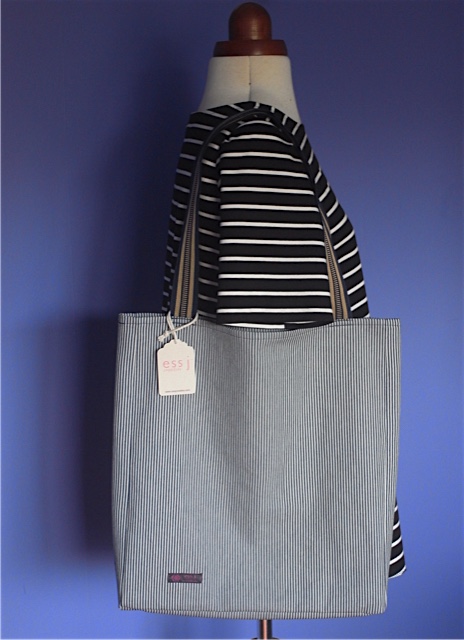
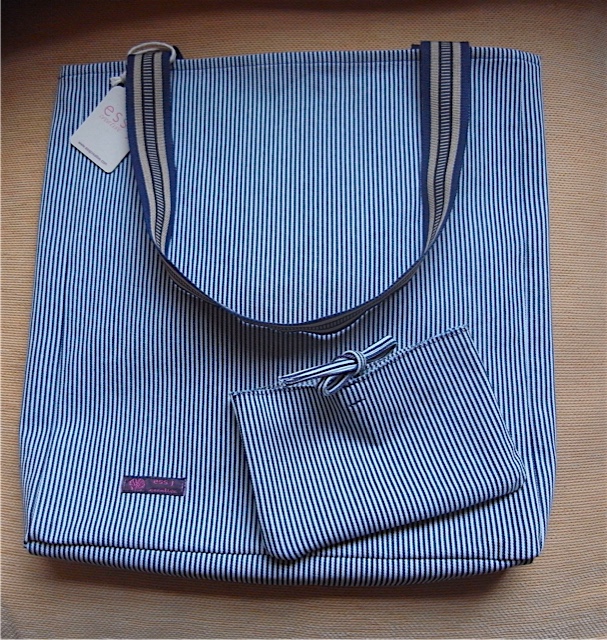
Blue
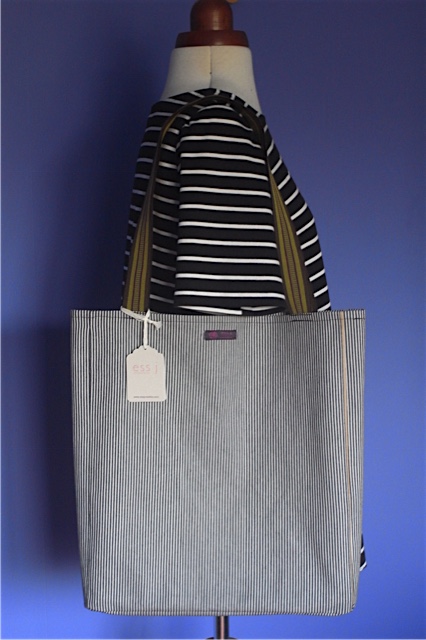
Black
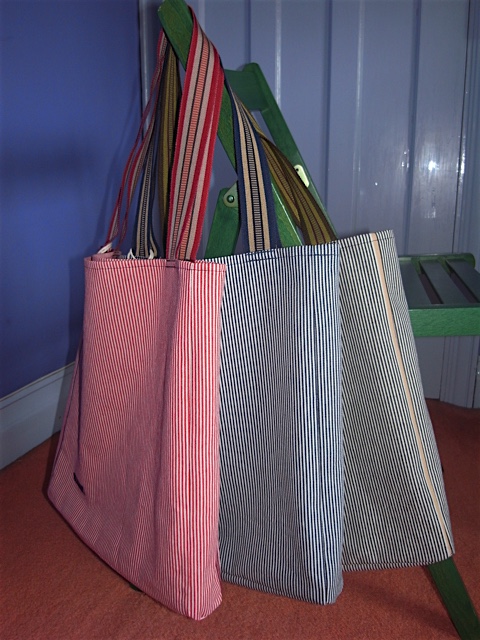
I’m calling them the Humbug striped bag, as i think they look like humbugs.
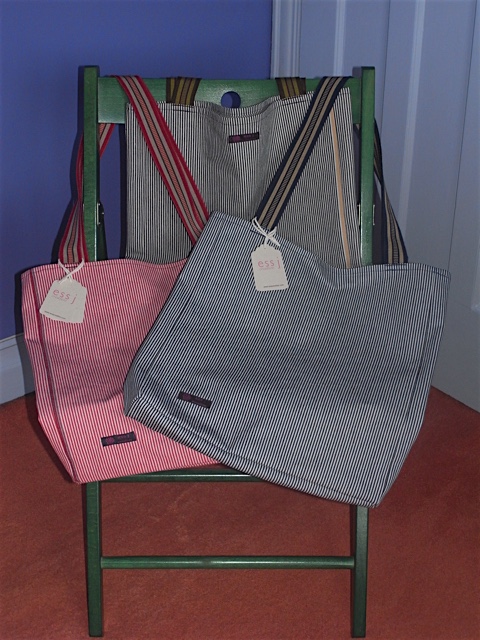
I really do love mine and my Niece loves hers too.
So its been a while, I’m sorry. I have neglected you my little blog. I’m here now to make amends.
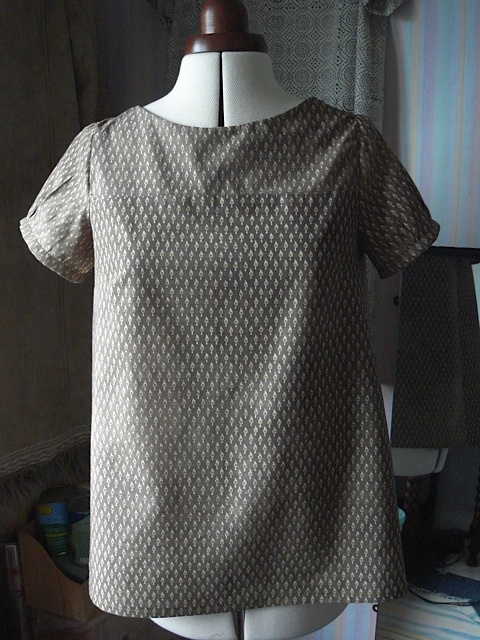
Whilst browsing Fabric godmother a little while ago I came upon this unusual looking fabric
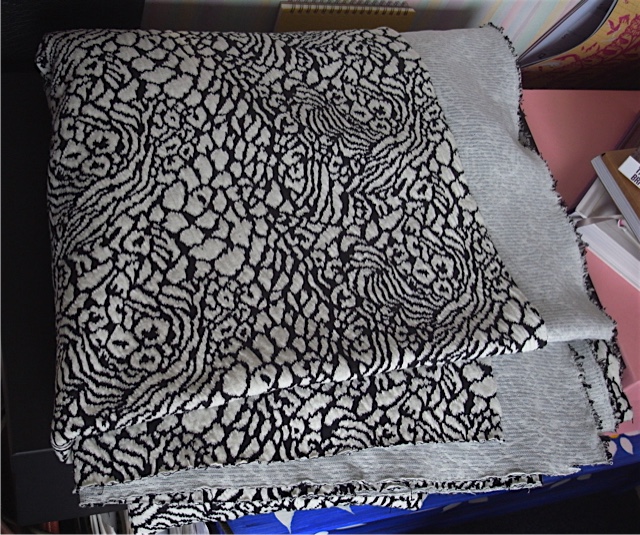
And promptly ordered 3metres of it. Its a roma jersey jacquard. Its quite textured and feels almost woolly, but its not. And unlike most jersey fabrics it does need to have the edges finished as it has a backing and I think the potential to fray. Besides that it was lovely to work with and I enjoyed making yet another trapeze top with it.
I used just over a metre for this top leaving me enough to hopefully make a dress out of it too. Would have had to use way more than a metre if I’d made a long sleeve version.
The above picture shows that the sleeve pattern piece is hanging off the end of the fabric.

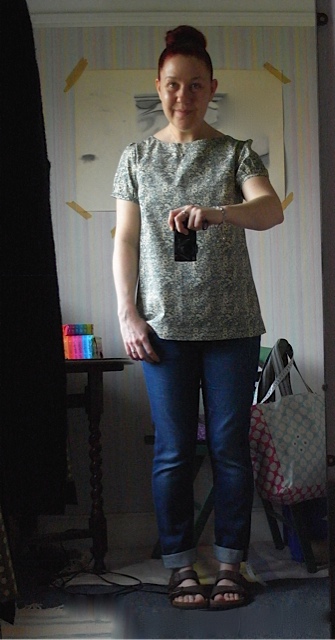
Didn’t take long to make and I’m very happy with it. The fabric feels lovely to wear and I think would look good in a sweatshirt type top. I must have a go at making one, one day.
My Husband seems to quite like it too which is nice.
Are my jersey makes.
I really really love the dress, I wear it with jeans and without and have worn it lots!
So I think I can conclude from this that I’m most comfortable in jersey. I try to look stylish but top of my agenda nowadays is comfort. Gone are the days of wearing clothes that I had to continually adjust and fidget with. Its comfort all the way now and I don’t care. Well I sort of do obviously as I still want to try and look nice.
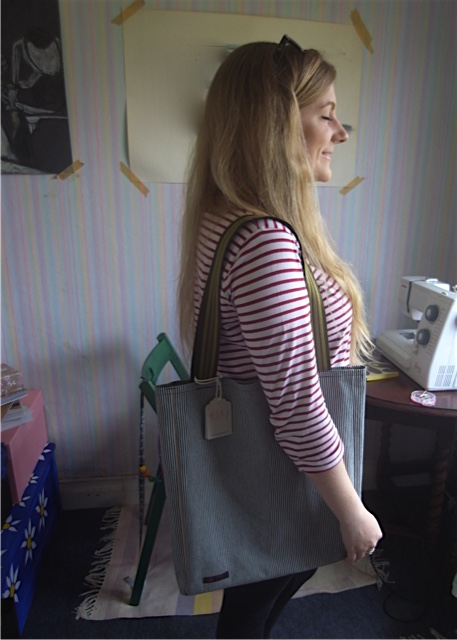
I’ve also used this bag a lot. I love it!
I have been looking in my wardrobe and am trying to sort it out and take out the stuff I haven’t worn much and being honest with myself and admitting they don’t really work, such as…
I should never have shortened the length or the sleeves, it was fine as it was, now I don’t like it anymore and feel uncomfortable in it.
The fit on this went a little wrong and isn’t as comfortable as it should be, so thats been taken out. As have most of the cotton Mathilde blouses. Gone right off them. I still love the dress versions though.
I love the fabric on the above top, but it has become tight across the bust I feel and once again is not comfortable. Shame as I really do love the fabric. There a re many more and I won’t bore you with them all.
So I’m learning what suits me and what fabrics I like best and will hopefully start to make better decisions regarding what I’m wearing, but don’t hold your breath.
Have you learned what suits you more since starting to make your own clothes?
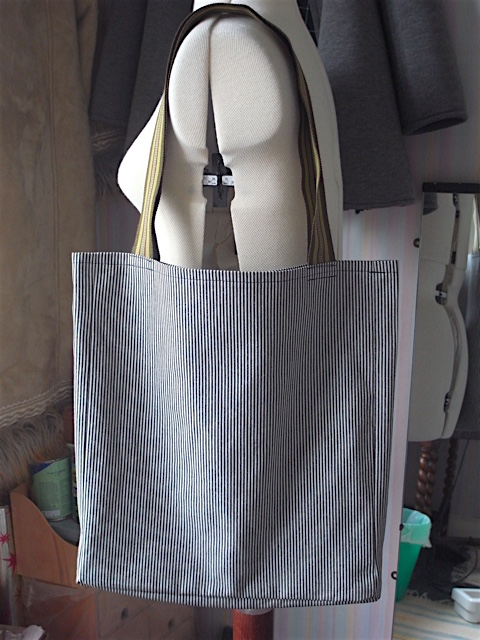
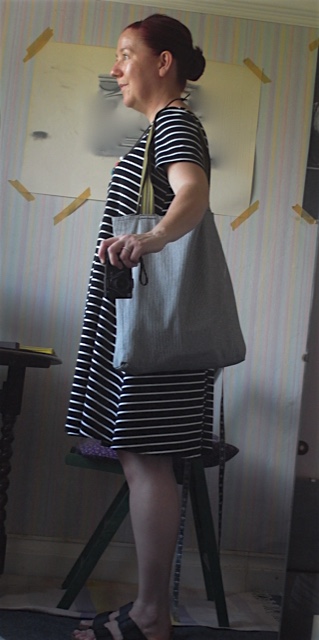
I’ve been wanting to make a new bag for a few months now. I had an idea of how big I wanted it to be and how long I wanted the handles. However I was procrastinating over this idea for the longest time because I knew I was going to have to draft the pieces myself and I’ve been spoilt with using patterns now (you might recall if you’ve been reading my blog from the beginning that I used to draft all my makes myself) and even though I was still going to be using a very simple shape I was feeling too lazy to do all the measuring out that I used to do when making a bag. also the bags I used to make all had several layers and this was very time consuming. Plus I hadn’t really come across any fabric that I really wanted to make a bag out of recently. Until the striped denim from Merchant and Mills, that I’d made a top out of. I had a feeling it would work really well as a bag.
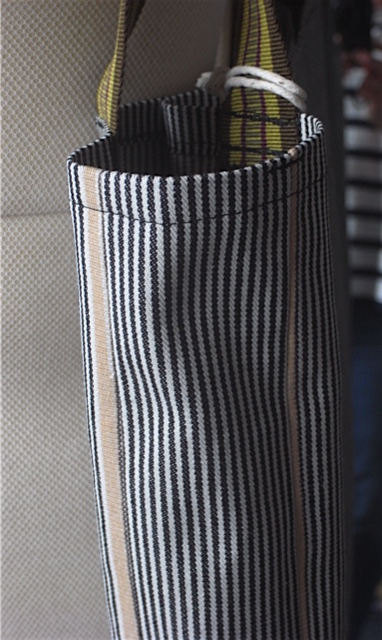
I cheated with the cutting out and took a bit of a gamble. I didn’t mark anything out at all. I just used my tape measure to guide me, and cut along it. I also folded the fabric so I’d only have to cut out a piece once. This seriously reduced the time it took. And for the most part the pieces were pretty even, so I was quite happy with that. I didn’t line this bag as the denim is fairly robust and sturdy and I also like how the fabric looks on the reverse.
I used some grosgrain strapping that I’d had in my stash for a while, also bought from Merchant and Mills. I like how the straps contrast nicely with the bag fabric.
I’m very happy with my lovely new bag and I was right, the fabric does work really as a bag.
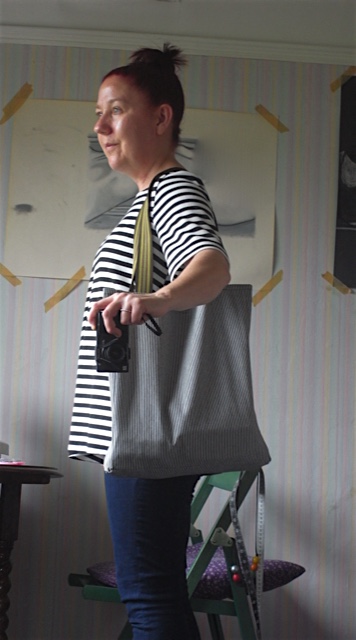
I think I’ve finally got the dimensions and strap length right for a very useful bag. Its comfortable on the shoulder and holds a lot of stuff.
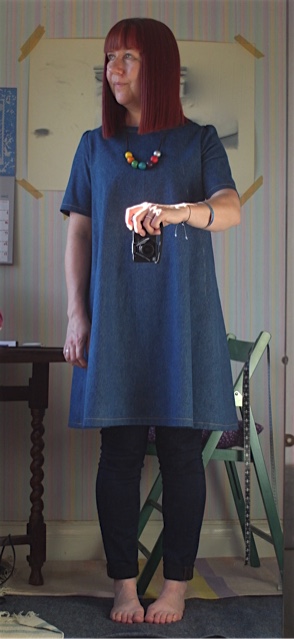
Here I am wearing it with dress and necklace also made by me. Walked into town on one of the hottest days of the year so far, back in July, and I was very comfortable (within reason ) in dress and carrying bag. Not too heavy, even when full of shopping.
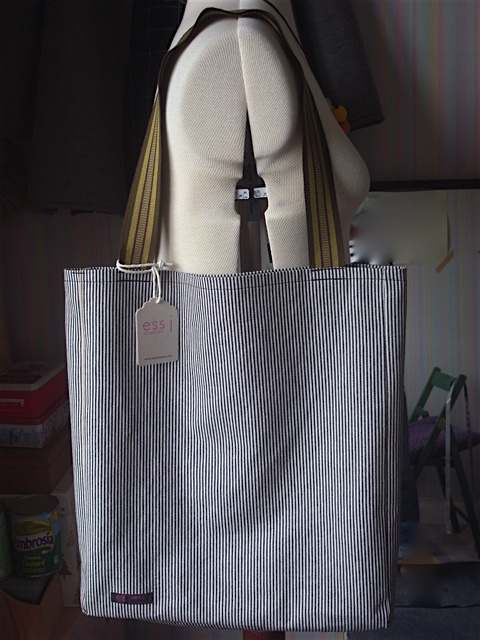
My Niece loved it too, and so I made her one. Hers is a little different and also a bit better made than mine. Although mine is not badly made, but it had been a while since I last made a bag. So making a second so soon after meant it was all fresh in my mind and therefore I feel I did a better job of it. I also managed to get some of the selvedge to show, which I had tried to do with mine but it didn’t work.
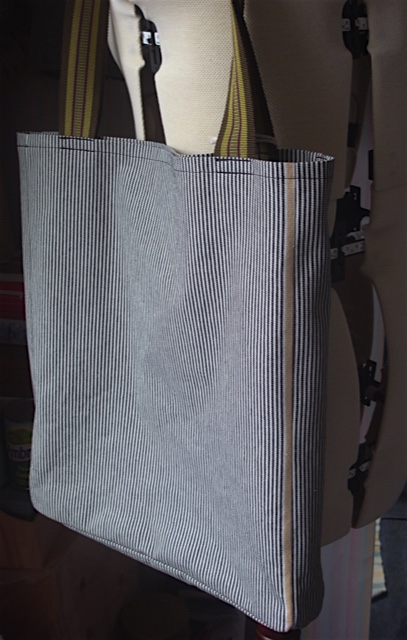
Loving that edge seam.
I added my label to hers too. I never think to add a label when its for me.
And here’s a modelling pic of my lovely Niece Zoe with her exclusive bag!
She’s very talented and has her own Etsy shop, Meemalz, where she sells miniature clay animals, and takes custom orders for your very own miniature pet. Follow the link and take a look.