November 16th, 2020
Puffy sleeves! I really wanted to make my empire line tops with puff sleeves, so I pattern hacked the sleeves from Tilly and the Buttons “Mathilde” top, to fit the Merchant and Mills “Trapeze” pattern. And I couldn’t be happier with the outcome. I hadn’t planned on having the puffy sleeve head, just thought I’d get fullness to the bottom part of the sleeve. So it was Serendipity that I got the puffy sleeve head.
This is my wearable toile.
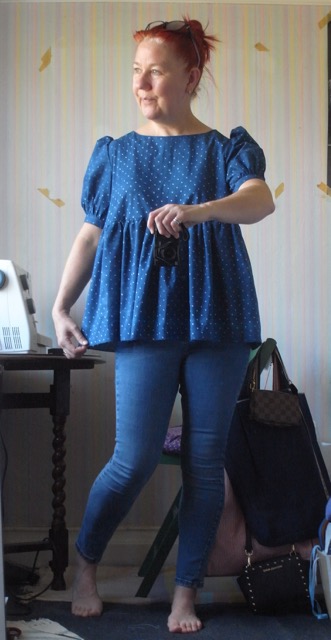
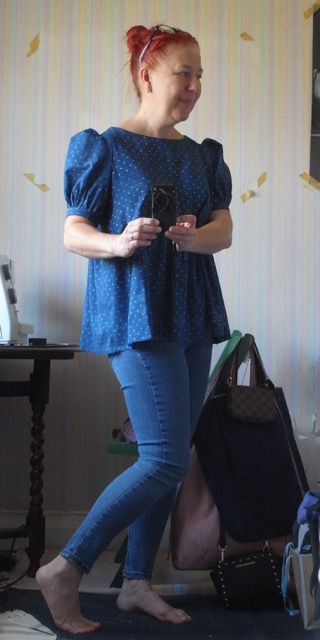
And then came this one. Made with the fabric I bought from Ditto fabrics in Brighton, back in February.
I am loving them.
March 14th, 2020
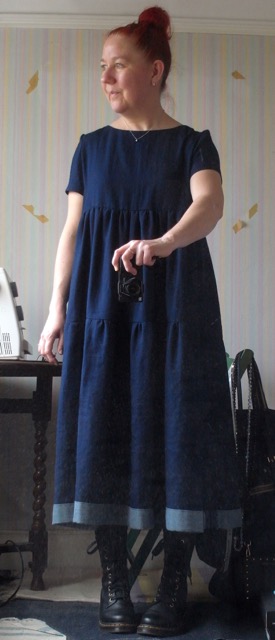
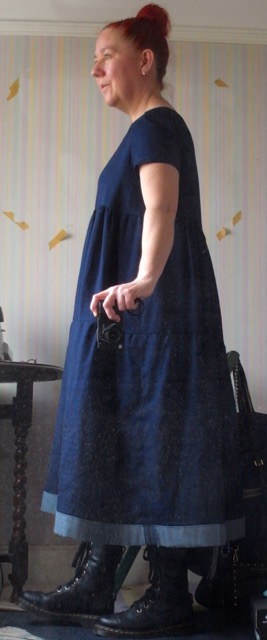
The top I made in my previous post was a practice run for this dress. I couldn’t be happier with the top, and was therefore very excited to get cracking with the dress version.
Its made from THE softest cotton double gauze I have ever felt. And comes from of course, Merchant and Mills. Not cheap, but then again it is quality stuff. I can’t remember if I bought 2.5m or 3m. I’m pretty sure it must’ve been 3m. This dress uses a lot of fabric!
I had intended for it to be a maxi dress, however when I tried it on at the length I thought I wanted it to be, I was not happy. Looked like a tent!
I thought about it for a day or two and then decided to turnout up. I think I turned it up about 10cm, I doubled the hem over so I had a 5cm or so turn up. And turned it up with the inside outside. Which gives it a lovely contrast border detail.
And now I’m very happy with it.

Please excuse the dusty mirror!
And this fabric is seriously so so so soft to wear, I feel like I’m wearing a cloud. Thinking I might have to get some more…
You can definitely expect to see more of these dresses.
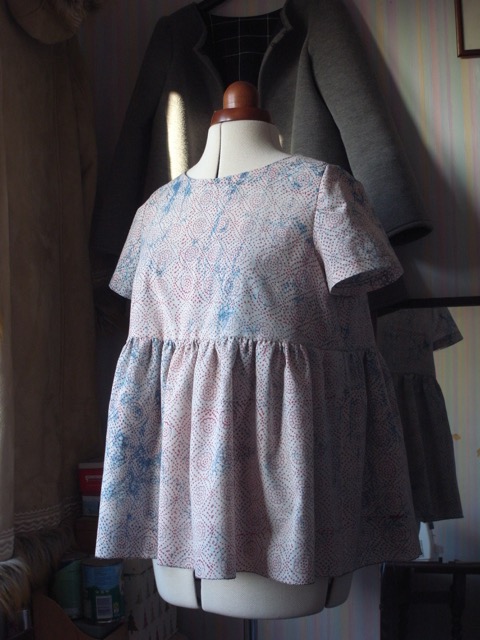
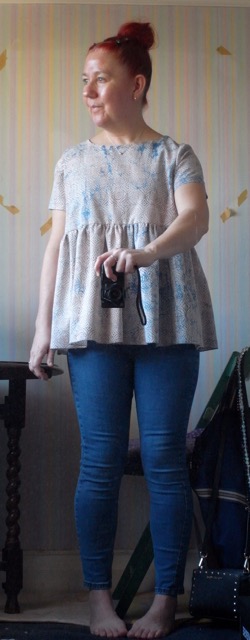
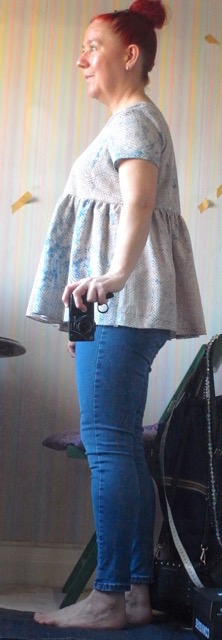
February 11th, 2020
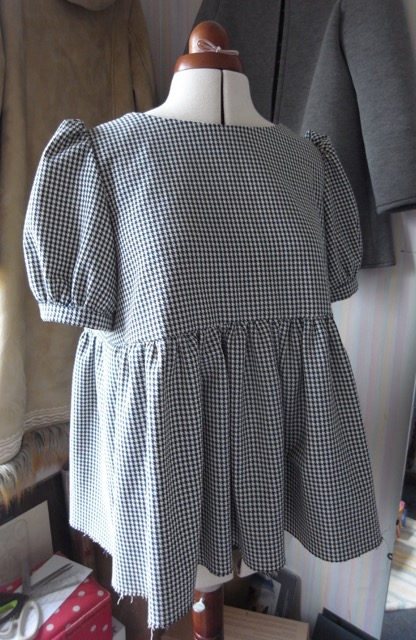
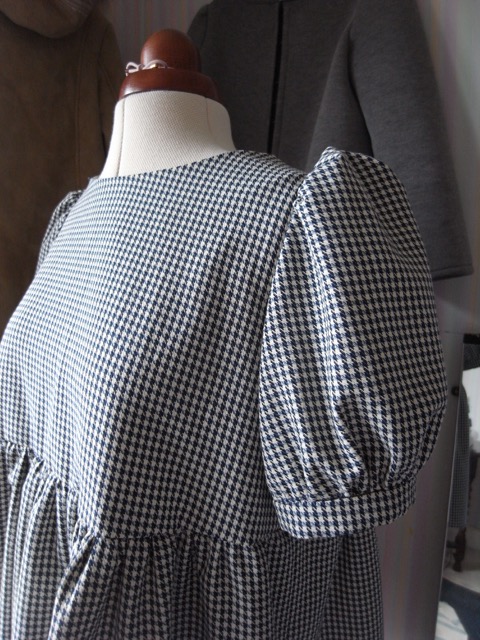
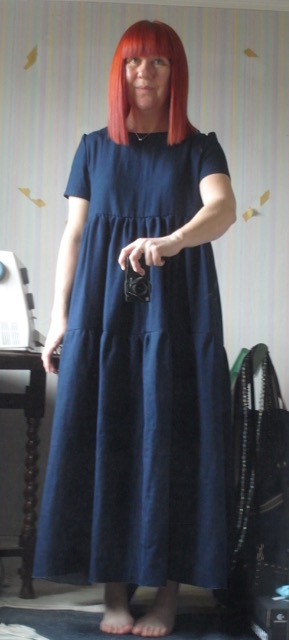
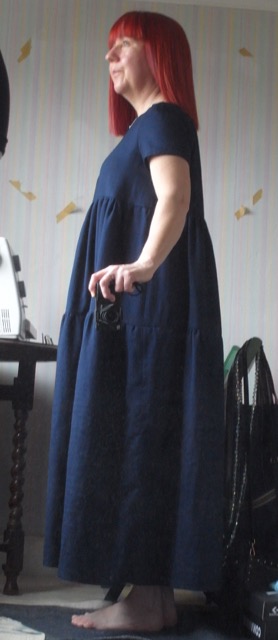
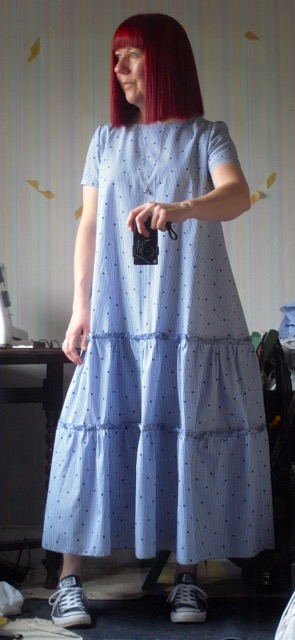
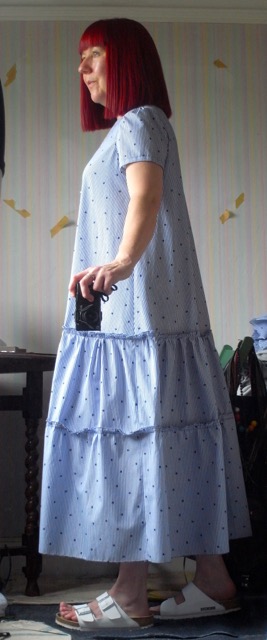
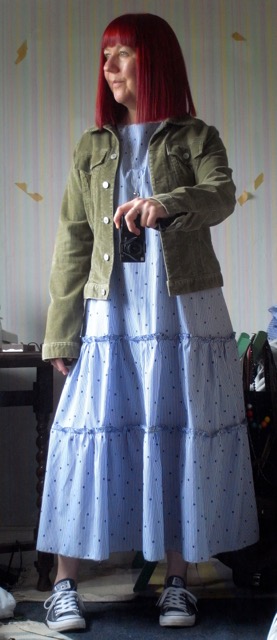
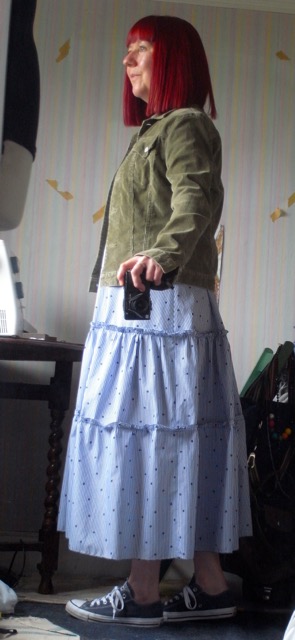
I’ve been wanting to make a high waisted/empire line dress, top for ages. I’ve seen several patterns I quite like, but you know, I do like to stick to what I know. So decided to once again hack the Merchant and Mills, Trapeze dress pattern. I love the neckline on the Trapeze. Takes a bit of working out to keep that lovely curve on the bottom edge though, but I got there.
I used some cotton fabric that I bought from M&M a few years back. I was a bit concerned as it isn’t a very wide fabric, only 110cm, I’m more used to at least a 140cm wide fabric nowadays. And the pattern piece for the tier bit was wider than the fabric, but I just had to go with it. I thought about making the tier shorter and adding in some extra fabric, but then decided against it.
I didn’t have enough fabric to make a dress, only a top. It worked out perfectly and I am beyond happy with it.
I’ve already started on the dress version.
October 3rd, 2019
Back in early March this year I did a sewing class at Merchant and Mills. I was already to blog about it straight after as I really enjoyed it, and found it very useful. However I wasn’t hundred percent happy with the the garment I made. The class was for the Camber dress. I have been wanting to make this pattern for a few years, but have been put off by seeing others comment about some of the fiddly bits. And I have first hand experience of M&M fiddly bits! SO when I saw they were running a class for this pattern, I jumped on it!
It wasn’t cheap, but it was worth it. You get a very experienced tutor , and I think the most they have in a class is 4 people, so you get some very individualised attention. the class I did we only had 3 pupils, which was nice. Also the workshop which is above the M&M shop, is gorgeous, and you get a lovely big cutting table to work with and all the bits and pieces you need to make your garment. Oh and they provide you with a very tasty lunch on both days. Yes it is a two day course.
I really enjoyed the experience and I picked up some great tips from Chrissie, our tutor. I also realised just how many gaps there are in my sewing knowledge, being self taught, I pretty much make it up as I go along. So when you come across a professional and a perfectionist, makes one realise just how sloppy ones sewing can be!
Now I have to say that my Camber dress is THE MOST PERFECTLY made garment I have in my wardrobe! It really is. I did have some help from Chrissie at times, she had to finish a couple of the steps for me, as I got a little frustrated at times with having to keep unpicking and redoing, and things were just getting worse, so I would look at her with eyes that said “help me” and she would have it done in a flash. If I’d been at home doing this, I would have stopped and started again another day. But I wasn’t and I really wanted to have a finished garment to take home.
I was the last to finish, but thats okay, it wasn’t a race.
As I said, the dress is the most perfectly made garment I have ever made, but once home and I tried it on, I really wasn’t sure I liked it on me! I decided it was too long as it was, it came to just below my knees. So I took off a couple of inches I believe, can’t really remember now it was a while ago. And I felt a little happier with it.
Here it is, worn with jeans after shortening.
I wore it once like that, but still wasn’t really happy with it. So I recently took it up a bit more. However I hadn’t worn it since that first time.
We went on holiday last month and I decided to take it with me, as I knew it was going to be hot and I wanted to take as many dresses with me as possible. I did wear it on one of the days, and I loved it. Felt really good to be wearing such a well made garment too. I was quite proud of it. And the Husband liked it too. Which is a nice, he doesn’t always like the style of the clothes I make.
Here I am wearing it on holiday

As I now feel happy with it, I thought it was time I blogged about it. I don’t have any pics of the details on the dress, as it was really tricky to take good photos of them. which is a shame, because this dress is deceptive. It looks like a simple shift type dress, which it is, but there are lots of exquisite little details that elevate it to a different level.
I will make another, not sure when. But I will.
June 9th, 2019
I love this dress, and have been planning it in my head for ages. I’ve just been too nervous to actually make it after my recent disappointments. The fabric I’ve had since August, its a beautiful cotton poplin from Fabric Godmother. And I’ve been looking at it and wondering what to make. And when this idea popped into my head I just knew that I had to make it. after the alteration to my Trapeze dress I made last week I decided I was ready for this.
I got 3metres of this fabric, now normally I try to get 2 garments out of this much fabric. Thinking it makes more economical sense, but this time I just thought F*^@k it! Use it all on one garment.
So this is a Trapeze/marshmallow combination. Trapeze on the top with a marshmallow bottom. Oh and an extra tier for length. Very happy with it, really really am.
Lots of pics to follow…
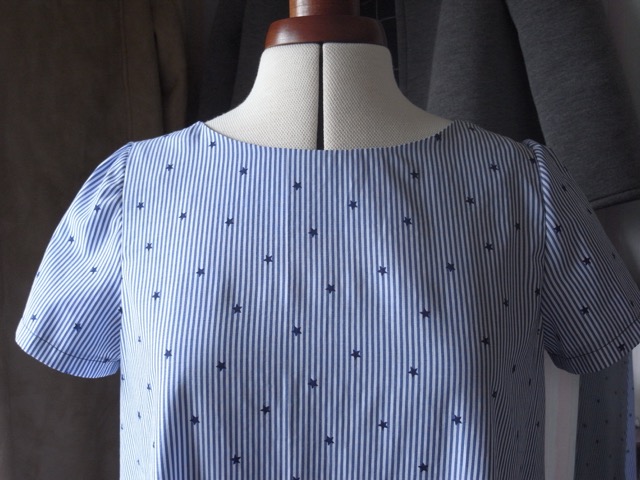
Lovely neck line.
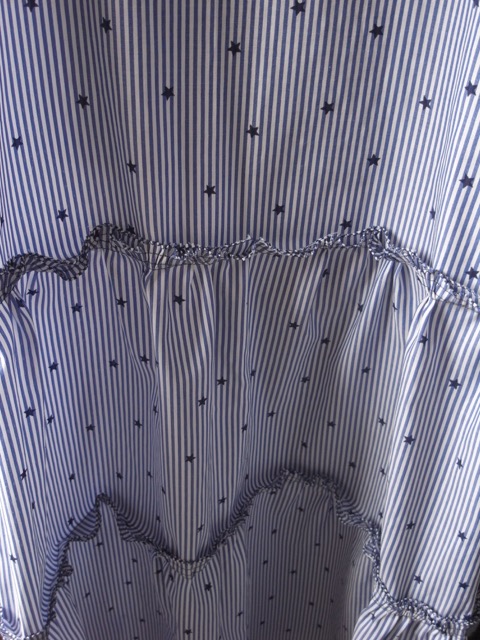
Sewed the tiers wrong sides together, to get the ruffle detail.

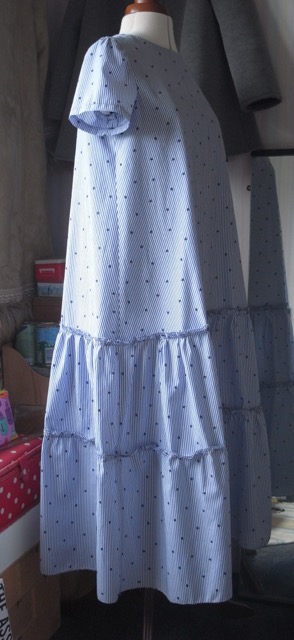
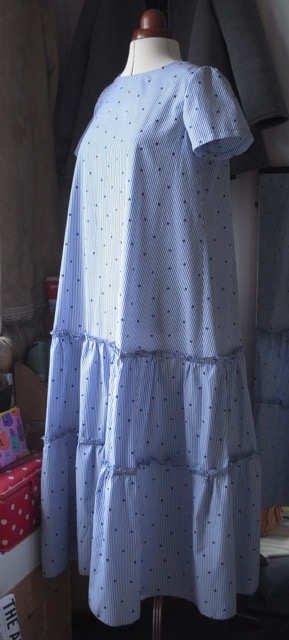

I can’t wait to wear this in the warmer weather! If we get any… Feels amazing on.
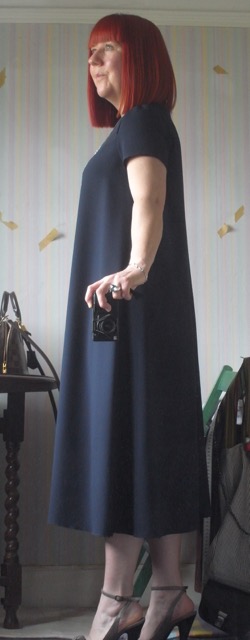
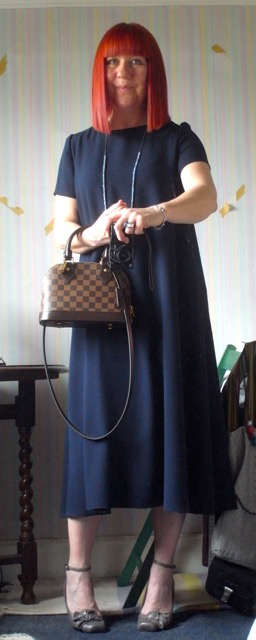
May 2nd, 2019
So my niece is getting married tomorrow, and here’s the dress I’ve made for it. A navy Crepe Trapeze dress. I added about 7inches to the length I believe, might have only been 6, can’t remember now. Its a mid length dress, and I love it. Feels amazing to wear and it moves beautifully, drapes really nicely.
Makes me feel elegant and sophisticated!

And with the bag I’ll be carrying.
December 23rd, 2018
Took a visit to the newly refurbished Merchant and Mills last month, and couldn’t resist buying some more of their delicious dry oilskin. Worst thing about the new shop is that everything is better displayed and so you can see all the fabrics and other goodies so much easier. Which means its so much more difficult to resist! Came out of there having spent a small fortune, oops!
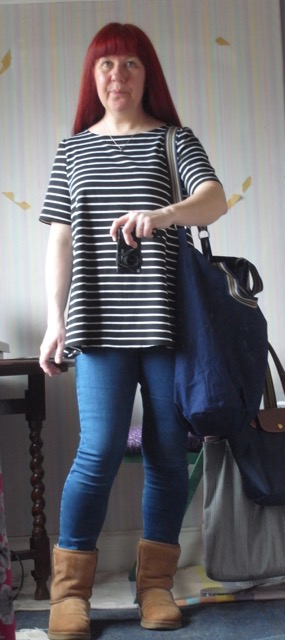
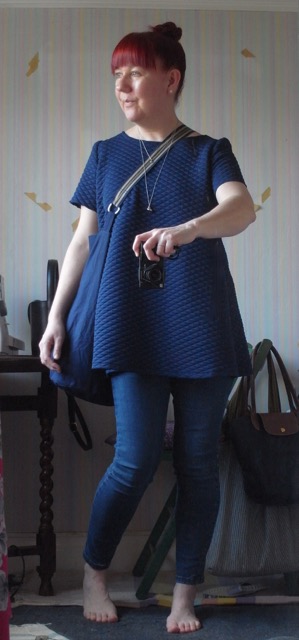
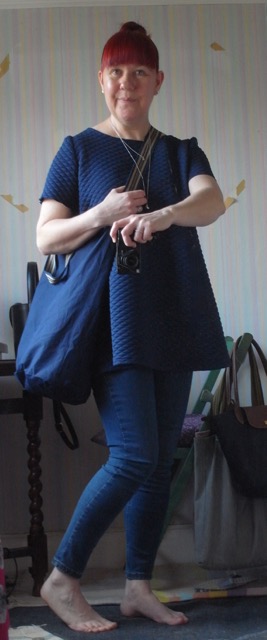
Happily though I made myself a lovely new bag, from said dry oilskin. I bought a metre each of three different colours, so I can mix and match. And as the fabric is 150cm wide I can get quite a few bags out of those. I love bags and love being able to make myself new ones. Or sometimes, I’ll make for friends.
I used a template I’ve used before for a sort of shopping/tote bag, but this time I added a longer strap too for cross body carrying. I like the versatility of having carry options.
As you can see I added some of the webbing to the bag for a little bit of decoration. Very pleased with how that turned out. I’ve the lined this bag in a contrasting green. Gives the bag a bit more sturdiness. The outside is a gorgeous colour, M&M call it Midnight, which suggests to me shades of blue, but I see a hint of green too!

Its a fab bag, even if I do say so myself. Can fit quite a lot of stuff in it, and its water resistant, which is very useful this time of year. Sorry there aren’t more pictures of the bag itself and the details, but this time of year there is such a small time frame when the light is right for taking pictures and I usually miss it! If I remember I’ll do some more pictures in the New Year, with more of the detail, but don’t hold your breath…
I wish you all a VERY MERRY CHRISTMAS and a HAPPY NEW YEAR! :0) xxxx
March 18th, 2018
For christmas my lovely hubby gave me a voucher for Merchant & Mills, and I’d been looking at the Jack Tar bag pattern for quite a while, but hadn’t gotten round to getting it. then they started doing a kit, which includes everything you need to make the bag. So armed with my voucher I trotted off to Merchant & Mills and bought it.
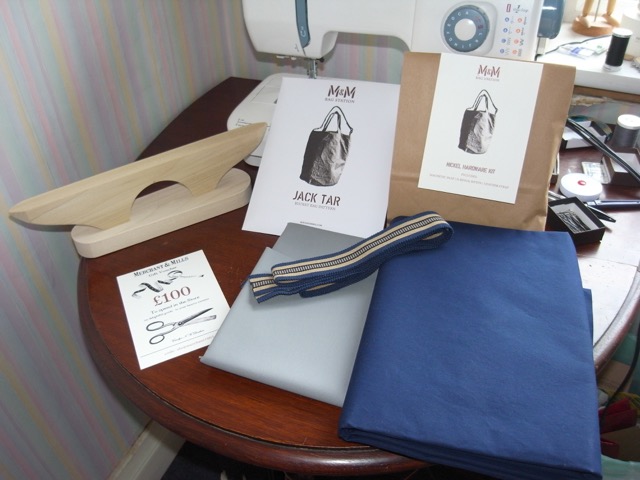
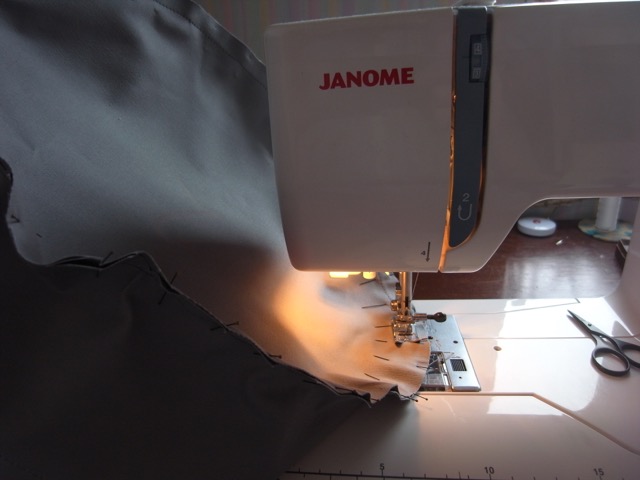
Its taken me a couple of months to get round to making this, but I’ve finally done it. I have to say it was a rather pleasant experience. I did things I’ve not done before, like snap closure, and used D rings. Also a facing on a bag, which I’ve not done before. And turning a bag right side out through a hole in the lining. That was an experience I can tell you.
This was also quite a painful make too! The outer fabric I believe is a dry oilskin and the lining is a sturdy canvas, both fabrics were quite tough to get my pins through at times, and I managed to stab myself on many occasions.
I also want to say, that whilst the pattern is supposed to be beginner level, Merchant & Mills can be quite frugal with their instructions, and If I hadn’t already known how to attach a base to the main body of a bag I would have been a bit stumped at that point.
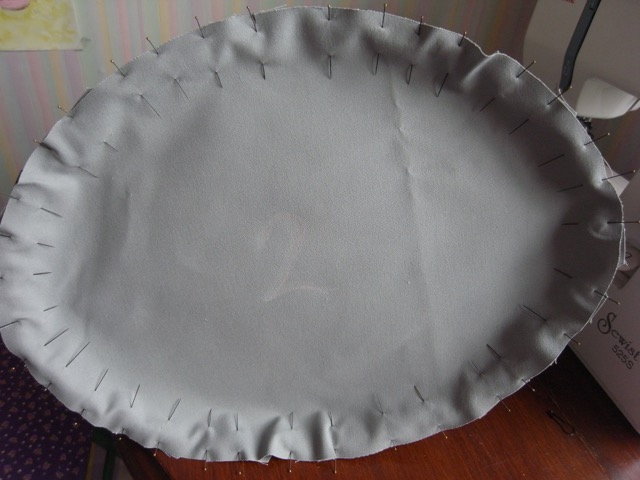
Base of the bag pinned to the top. Above ^ and below
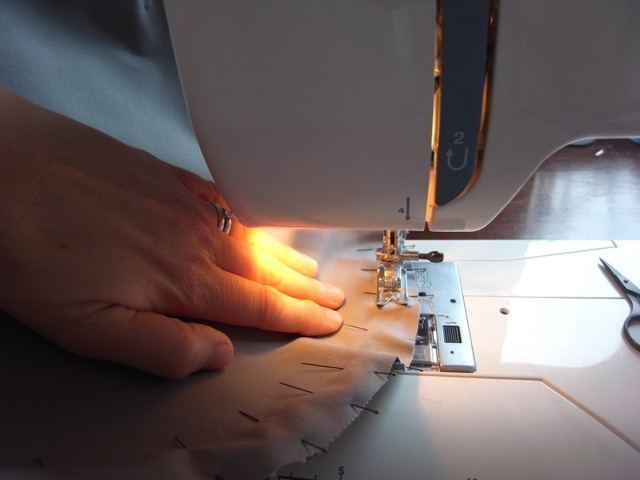
It was quite tricky getting it through the sewing machine, as the fabric was quite stiff. And this was one of the areas where I would get stabbed by my pins!
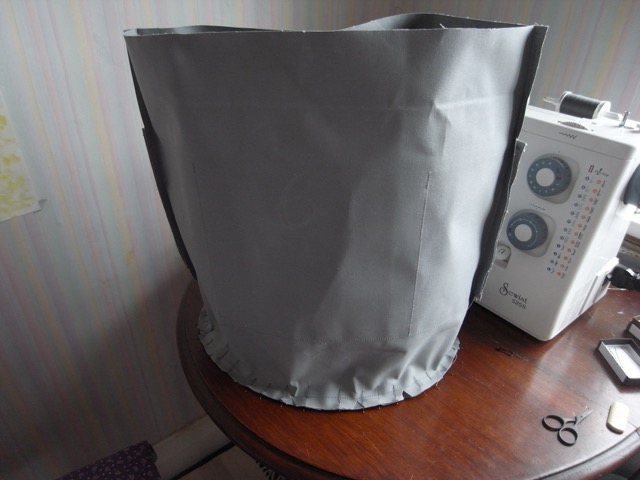
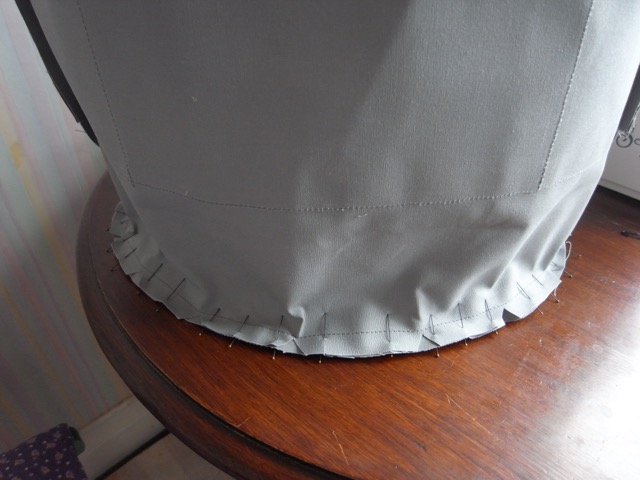
Picture of the lining, before I’d sewn the base.
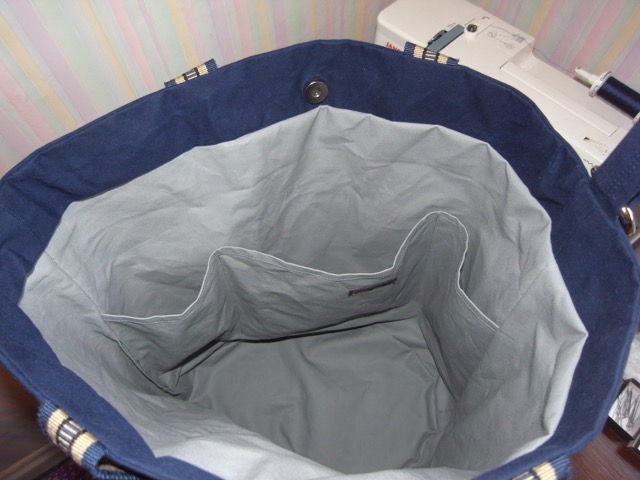
All finished. Inside view of the pockets.
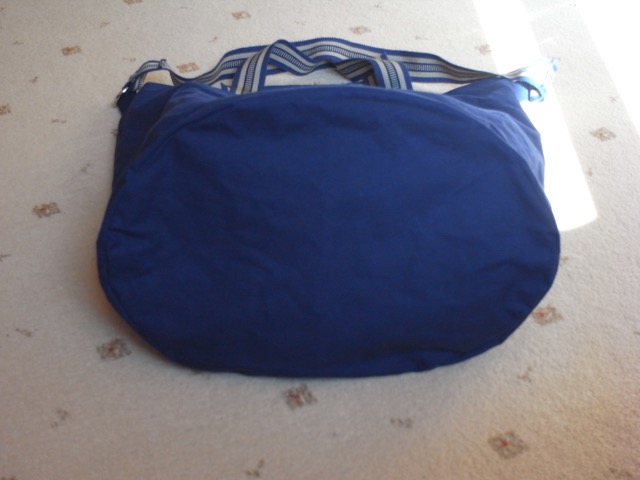
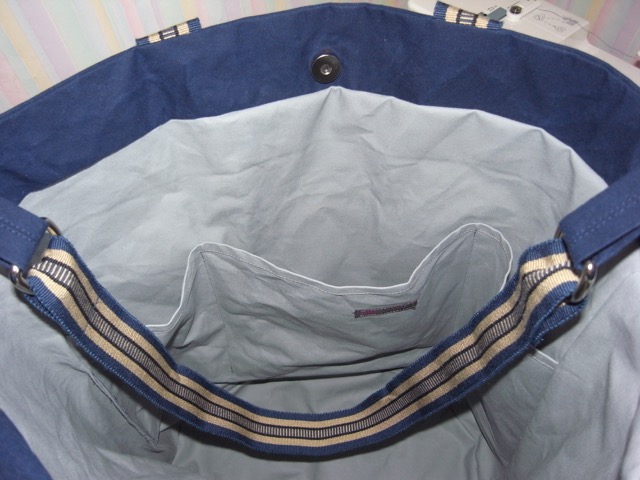
Another inside view, with the shoulder strap. The bag kit comes with a leather strap, but I decided not to use that, and opted for a webbing strap instead, same as I used for the handles. There is an option to make the handles yourself out of the same fabric as the bag. I like the contrast the webbing straps give though.
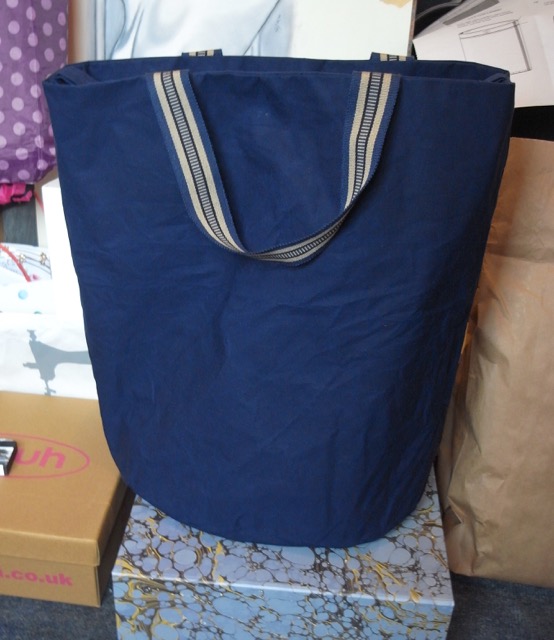
This is a pretty big bag, I think it will be really useful as weekend bag or carry on bag for flights, as well as being a great everyday bag for town and shopping. The 3 inside pockets are the perfect size for your purse, keys, sunglasses and phone. Plus any other small items you don’t want to lose inside the main compartment. the pockets are also ideally placed for good access whilst carrying the bag crossbody, but I reckon would be tricky for someone to try and pinch your purse.
Carrying options, are as follows.
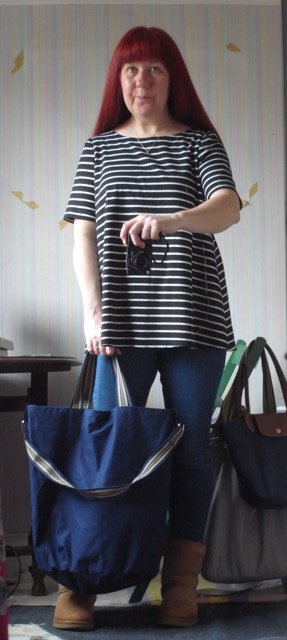
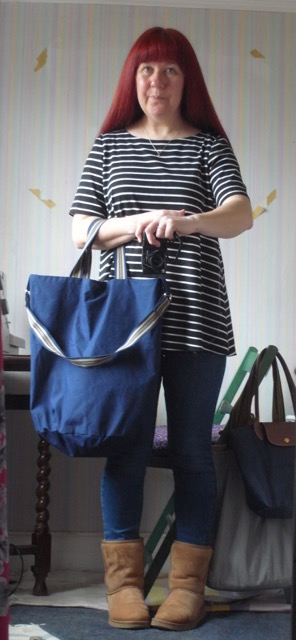
My favourite is crossbody, so comfortable. So there we have it. What do you think?
August 15th, 2017
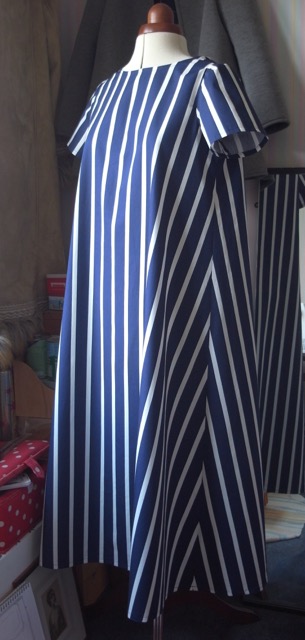
Here comes another Trapeze!
I’ve had this fabric for a couple of years now, when I bought it I made the mistake of thinking it was horizontal stripes (its a mistake I often make for some reason), so it threw me when I realised it was vertical stripes. So it languished in my stash box for the last 2 years. And on top of the stripe mistake I also went off this type of fabric (I think its a cotton poplin) and started making with knit fabrics more often than not.
Since I discovered the Trapeze dress pattern works well as a maxi length dress, I looked at this fabric again. Pondered on it for a week or two and decided to go for it. I bought 3 metres which is just as well as its only 107cm wide and the trapeze uses a lot of fabric at the bottom, and even more in the maxi version! I was just able to squeeze it out of the fabric, but it was really really tight!
I decided to not to do a facing which I usually leave off doing when using knit fabrics, haven’t done it with a woven fabric before though. I made sure I had enough fabric left if I ended up needing to do a facing. I only left it off as I was feeling lazy!
So without further ado here she is. Husband says its quite striking…

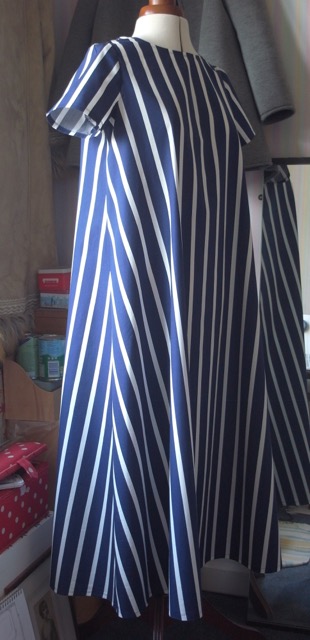
I like the way it looks like the stripes go in different directions due to the way it drapes.
Stripes almost match at the sides.
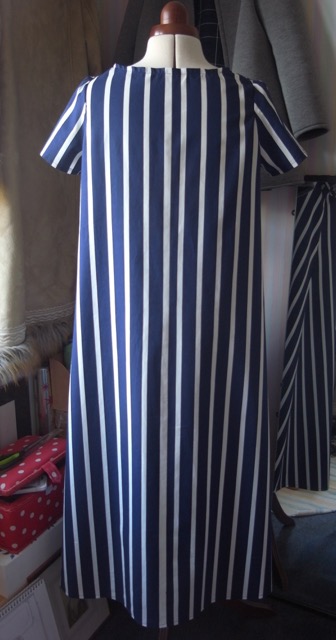
I have to look twice when trying it on as the centre back seam blends in so well I can barely see it. I managed to put it on Gertie (my mannequin) the wrong way round once and wondered why it didn’t look right!
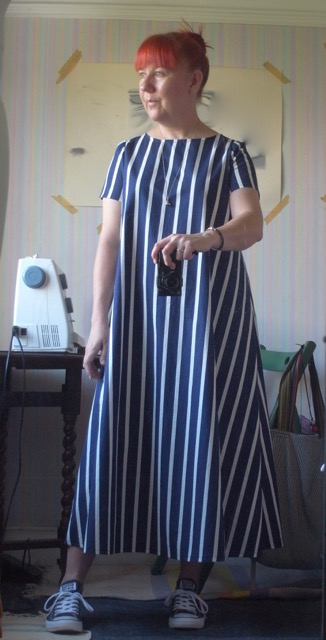
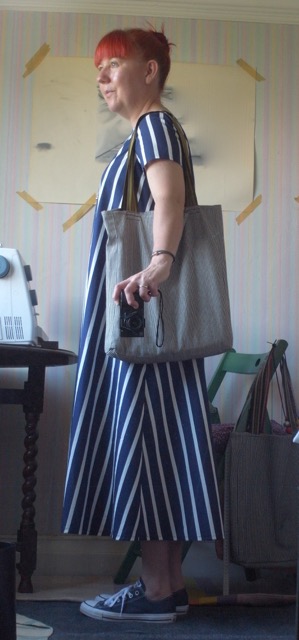
Works well with Converse and one of my bags
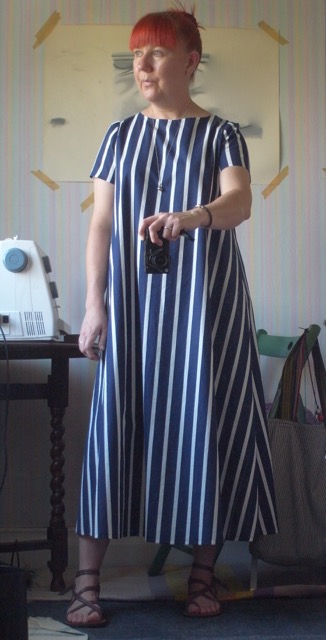
And also with sandals.
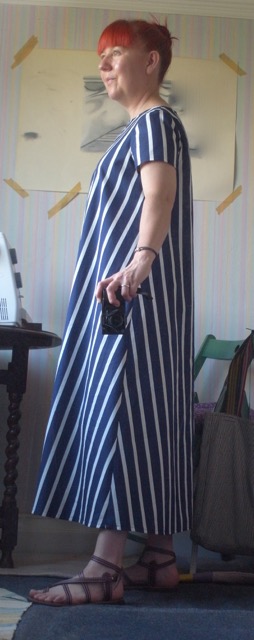
Side view looks better in the flesh.
Another successful Trapeze and happy to have finally used this fabric.
August 8th, 2017
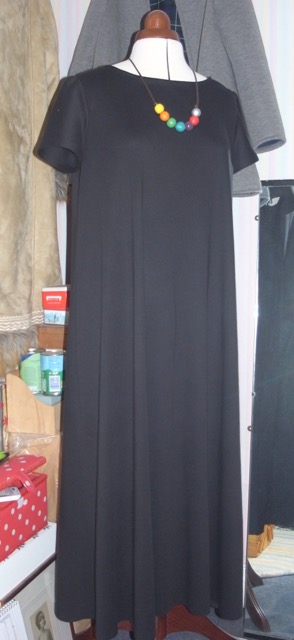
Well what can I say? I simply can not stop making Trapeze dresses! Here’s a maxi version in the softest of black jersey. I added 6inches to the original pattern length and I really like it.

It works well with different types of foot wear too.
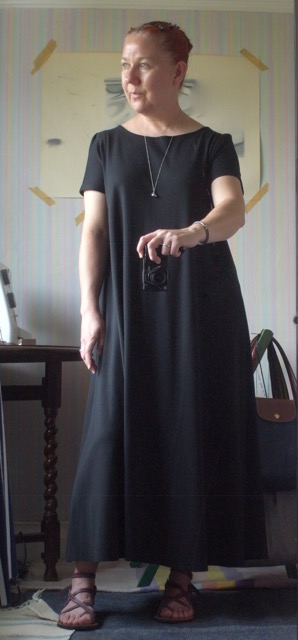
Once again very happy :0)